
You can install acrylic floating frames with this simple diy project. This tutorial helps you hang a modern floating acrylic frame on your wall. Gather your supplies to begin this diy photo frame project for your favorite photo.
What You’ll Need
- Tools: Drill, drill bits (for plastic & walls), level, measuring tape, pencil
- Materials: Your acrylic frame kit, standoffs, wall anchors, double-sided photo tape
Prepping Your DIY Floating Acrylic Frame
This part of the tutorial shows you how to prepare your artwork for its new home. Proper prep work ensures a clean, professional-looking display for your diy floating acrylic frame.
Peel the Protective Film
First, you need to prepare the acrylic sheets. Each sheet has a protective film on both sides. You should only peel the film from the inner sides of both acrylic panels for now. Leave the outer film on. This simple step protects the outer acrylic surfaces from scratches during the next steps.
Pro Tip: Stubborn Film? If the film is hard to remove, you can try a few tricks.
- Gently warm a corner with a hairdryer on a low setting.
- Apply a small amount of rubbing alcohol to an edge to loosen the adhesive.
- Peel a corner and then roll the film back on itself to pull it off.
Center and Secure Your Art
Now you will attach your photo. First, print your photo to the size you want. Place one acrylic sheet on your work surface with the peeled side facing up. Use a measuring tape to find the exact center of the panel. Place a tiny pencil mark to guide you. Use an archival-safe adhesive, like a double-sided photo mounting film, to attach your photo. This type of adhesive will not damage your photo over time. Carefully position your photo in the center and press it down firmly.
Align and Sandwich the Sheets
Take the second sheet of acrylic. Peel its inner protective film. Carefully place this sheet on top of the photo, aligning the edges and holes perfectly with the bottom sheet. You are creating a sandwich with your photo in the middle. To avoid trapping air bubbles, apply pressure starting from the center of the frame and moving outward toward the edges. This action pushes any air out. Your photo is now securely enclosed in its new acrylic photo frame, ready for the next stage of this diy project.
Acrylic Frame Tutorial: Drilling Holes
This part of the tutorial focuses on drilling the holes for your mounting hardware. With the right tools and a steady hand, you will create clean holes in the acrylic for a perfect fit. This is a critical step in the acrylic frame tutorial.
Clamp the Sheets Firmly
First, you need to secure your acrylic sandwich. Place the sheets on a flat, sturdy work surface that you do not mind scratching, like a piece of scrap wood. Use clamps to hold the two acrylic sheets together firmly. This prevents them from shifting while you drill.
Pro Tip: Choosing the Right Clamp To avoid cracking the acrylic, always use padding (like felt or rubber) with your clamps. Apply gentle, even pressure.
- Spring Clamps are great for a quick, temporary hold.
- Bar Clamps work well for larger frames, providing even pressure across a wider area.
Mark Your Drill Points
Now, you will mark where to drill. Your acrylic frame kit likely came with pre-drilled holes in the sheets. These are your guides. Use a fine-tip marker or a pencil to clearly mark the center of each hole. This ensures you drill in the exact spot needed for the standoff hardware. A clear mark helps you align the drill bit perfectly.
Drill Through the Acrylic
Drilling is the final step for preparing your frame. Using the correct drill bit is essential to prevent chipping or cracking the acrylic.
- Select the Right Bit: Use a drill bit specifically designed for plastic or acrylic. These bits have a sharp 90-degree point that cleanly shears the material instead of tearing it like standard bits.
- Set Your Drill Speed: Set your drill to a slow speed, around 400-600 RPM. A high speed will generate too much heat and can melt the acrylic, causing the drill bit to get stuck.
- Drill Slowly: Position the tip of the drill bit on your mark. Apply light, steady pressure and begin drilling. Let the bit do the work. Periodically back the drill out of the hole to clear away plastic shavings. Continue this process for all four holes.
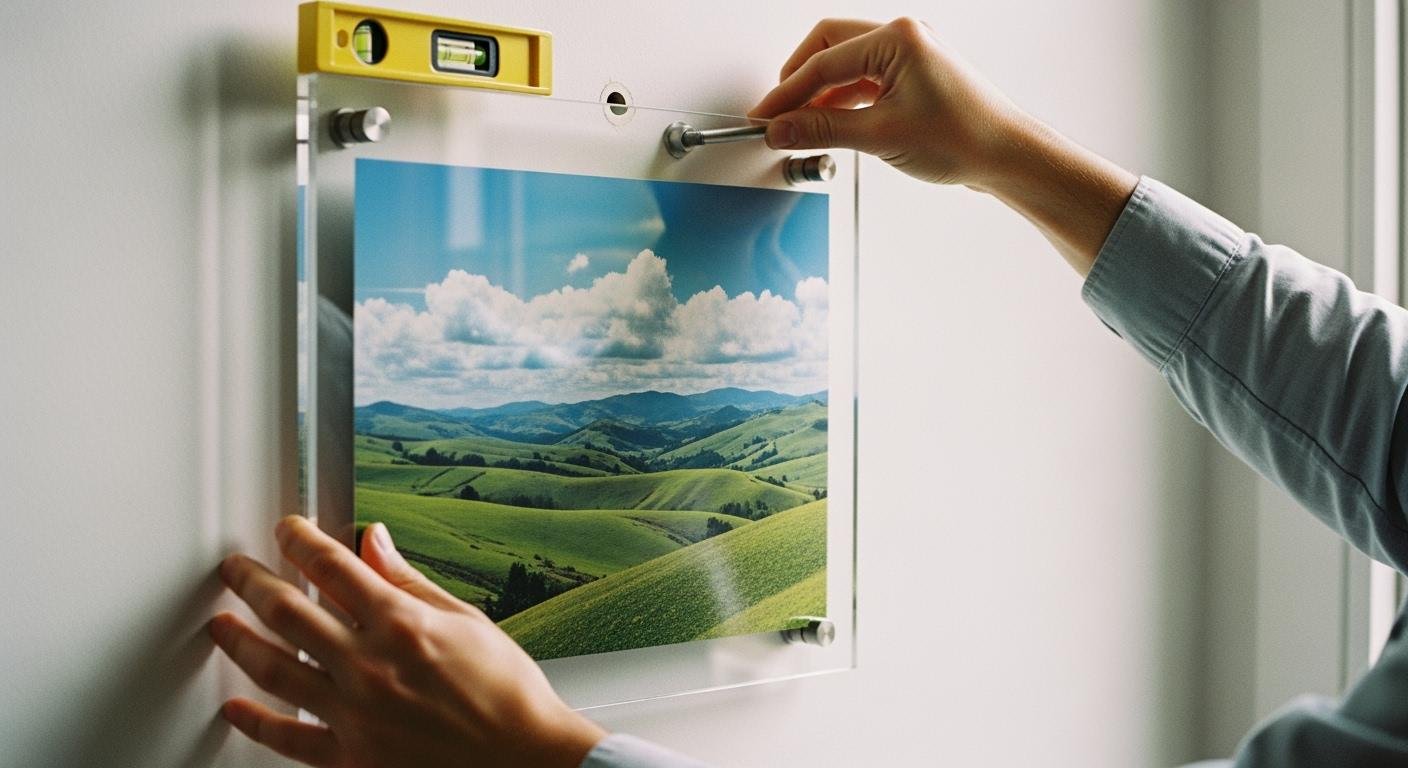
How to Install Acrylic Floating Frames
You are now at the final stage of this tutorial. This section guides you through the process to install acrylic floating frames on your wall. Careful measurement and the right hardware will give you a beautiful, secure display.
Mark Standoff Locations on the Wall
Proper alignment starts with precise marks. You will hold your acrylic frame against the wall where you want it to hang.
Pro Tip: Use a Level! 📏 A level is your most important tool for this step. Place it on top of the frame to make sure it is perfectly straight. An unlevel frame will be very noticeable once you install it on the wall. For ultimate precision, you can use a laser level to project a perfectly straight line on the wall.
Once the frame is level, use a pencil to lightly trace the inside of the four pre-drilled holes onto the wall. These marks show you exactly where to drill.
Drill Pilot Holes and Add Anchors
Now you will prepare the wall for the mounting hardware. This step is crucial for a strong hold, especially in drywall.
First, you must select the correct wall anchor. The type of anchor depends on your wall material.
Choosing the Right Anchor for Your Wall
- For Drywall: Use plastic drywall anchors for lightweight items. For heavier acrylic frames, metal toggle bolts (like a Snap Toggle) provide excellent support and can hold significant weight. One popular model, the Toggler SNAPTOGGLE, can support up to 180 lbs.
- For Plaster: Self-drilling metal anchors or Molly bolts are great choices. They are designed to expand behind the plaster for a secure grip.
- For Brick or Concrete: You will need steel anchor screws or plastic wall anchors designed for masonry. This requires a hammer drill and a masonry drill bit.
Next, you need to choose the correct drill bit size. The drill bit must match the diameter of the wall anchor, not the screw. You can usually find this information on the anchor’s packaging.
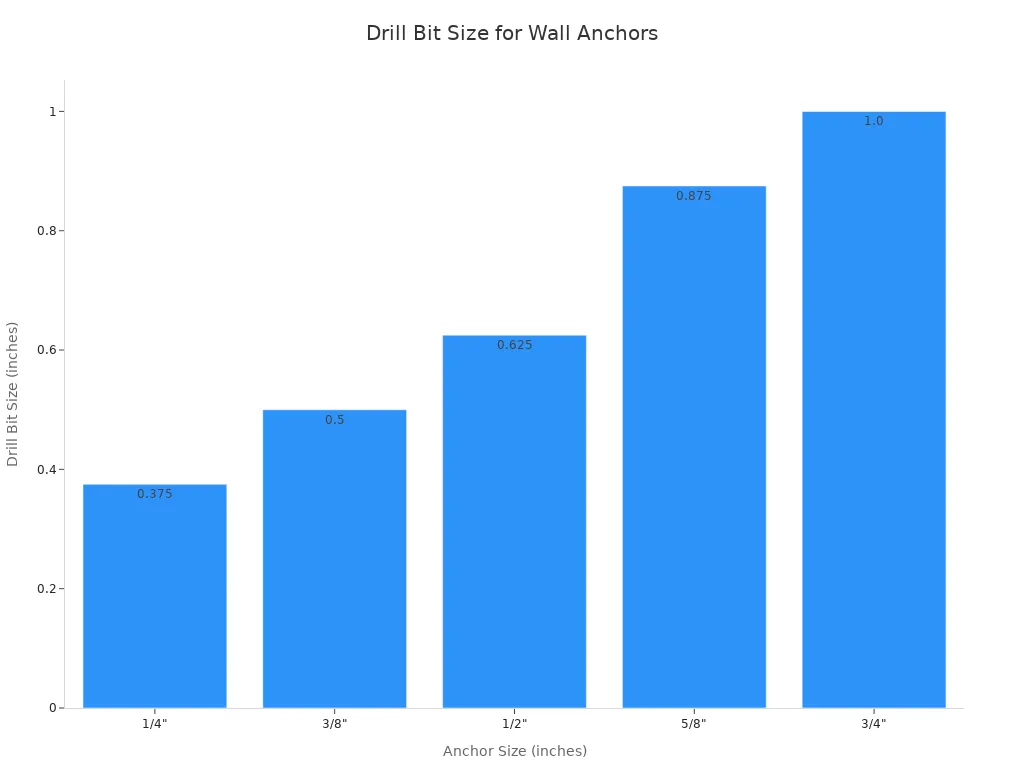
Here is a common reference for anchor thread sizes:
| Anchor Thread | Drill Bit Size |
|---|---|
| #6-32 / #8-32 | 5/16″ |
| #10-24 / #10-32 | 3/8″ |
| 1/4″ | 1/2″ |
With the correct bit, drill a pilot hole at each pencil mark on your wall. Then, gently tap an anchor into each hole until it is flush with the wall surface.
Screw Standoff Bases to the Wall
With the anchors in place, you are ready to install the standoff bases. The base is the part of the standoff that attaches directly to the wall. You will attach each of the standoff bases by driving a screw through the center of the base and into the wall anchor. Make sure each base is screwed in securely. This creates the foundation to install acrylic floating frames correctly.
Mount Your Floating Acrylic Frame
This is the final step to install it on the wall! First, carefully peel the remaining protective film from the outer surfaces of your acrylic sandwich.
Working Alone on a Large Frame? If you are mounting a large frame by yourself, start by securing the top two standoff caps first. Let the frame hang from the top two bases while you align and secure the bottom two caps. This makes the process much more manageable.
Follow these steps to complete the installation:
- Align the Frame: Carefully lift your acrylic frame and align its four holes with the standoff bases on the wall.
- Attach the Caps: Thread the standoff caps through the holes in the acrylic and screw them into the bases.
- Hand-Tighten: Tighten each cap by hand. They should be snug enough to hold the frame securely but not so tight that you risk cracking the acrylic.
- Final Check: Step back and check that your frame is level. You have successfully completed this tutorial and mounted your new floating frame!
You have successfully learned how to install acrylic floating frames. By following this guide, you prepared your photo, drilled the acrylic, and mounted it securely to the wall. Your new display looks clean and professional.
Keep It Clean! ✨ To maintain your beautiful acrylic frame, gently wipe it with a soft, microfiber cloth and soapy water. You should avoid ammonia-based cleaners, as they can permanently damage the acrylic surface.
Now you can step back and enjoy your stunning artwork on the wall!
FAQ
What size photo works best?
You should choose a photo size that leaves a clear border. A 2-3 inch border around your photo creates a classic floating effect. This makes your photo the center of attention. Measure your frame and subtract the border to find your ideal photo size.
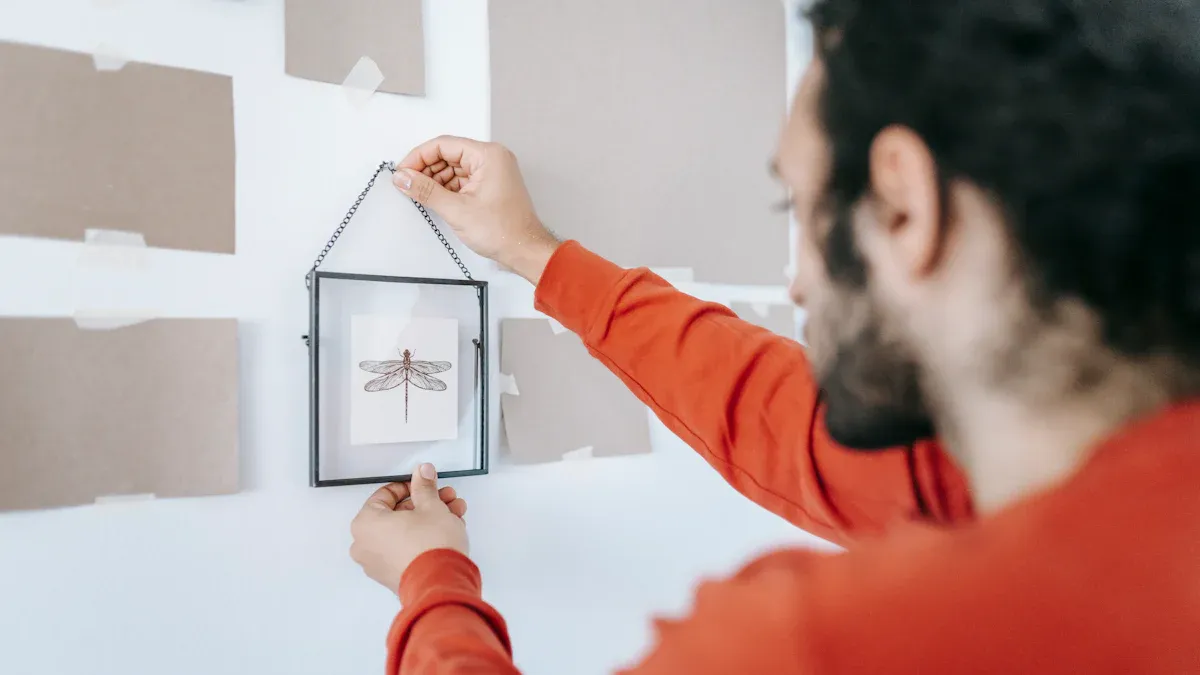
Can I hang the frame vertically?
Yes, you can hang your frame vertically. The installation process is the same. You simply need to turn the frame 90 degrees when you mark the hole locations on your wall. Make sure you use a level to keep the sides perfectly straight.
How do I choose the right photo paper?
The paper you choose affects the final look.
- Glossy paper offers vibrant colors and a sharp finish.
- Matte paper reduces glare and gives a more subtle, artistic feel.
Pro Tip 💡 For a professional look, consider using a high-quality archival photo paper. It helps preserve your image for years to come.
Can I change the photo later?
Yes, you can easily update your display. Simply unscrew the four standoff caps by hand. You can then separate the acrylic sheets and swap the old photo for a new one. This lets you refresh your decor anytime you want.
See Also
Acrylic Risers: Understanding Their Definition, Features, and Diverse Applications
Your Comprehensive Guide to Selecting the Perfect Acrylic Table Stands
Ten Stylish Methods to Elevate Your Space Using Acrylic Trays
Debunking Acrylic Tray Myths: Simple DIY Ideas for Creative Decor
Acrylic Trays: The Essential Choice for Modern Home Decor in 2025

