
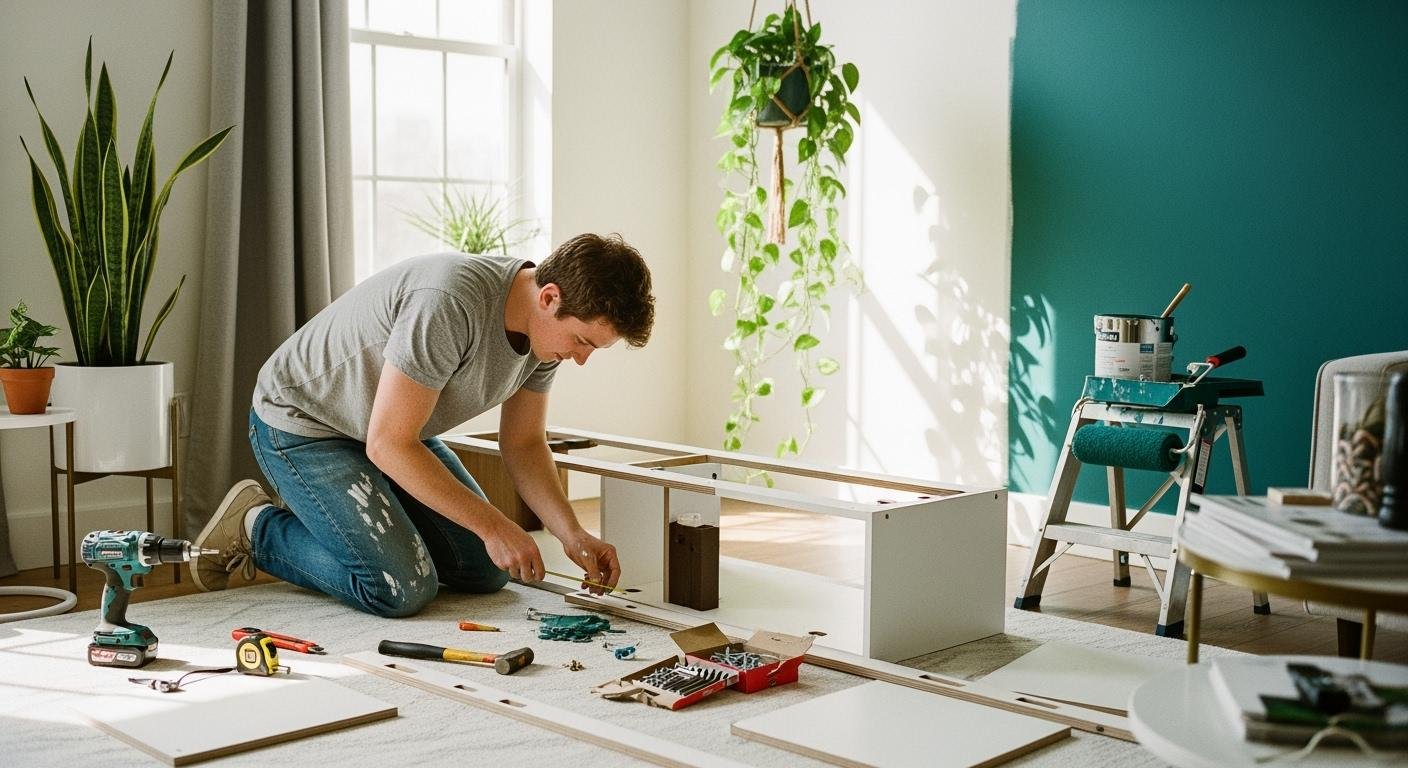
That simple dollar store picture frame on the shelf holds amazing potential. You can easily transform basic frames into stylish diy home decor that reflects 2026’s focus on craftsmanship and warm neutrals. This guide shows you how to tackle your next project. Create floating botanicals, a reusable planner, a chic tabletop sign, a glowing light box, or a mini terrarium. These fun diy projects are budget-friendly and perfect for any skill level.
Did you know? The DIY home improvement market is booming and projected to reach US$800 billion by 2025! 💡
Tips for Decorating with Picture Frames
Before you start your projects, let’s cover some basics of decorating with picture frames. A few simple rules can elevate your space from cluttered to curated. These tips will help you display your new creations like a professional.
Choosing Your Frame
The frame you choose sets the tone for your artwork. For these DIYs, we focus on acrylic frames. They are much lighter and more shatter-resistant than glass, which makes them safer and easier to handle. Even an inexpensive dollar store picture frame can look high-end with the right styling. Consider how the frame’s color impacts your decor. A white frame on a white wall makes the artwork pop. A shiny gold frame, on the other hand, adds a bold contrast against a navy wall. Your choice of frames can add texture and personality to your decorating plan.
Placement and Grouping
How you hang your art is just as important as the art itself. A great rule of thumb used by galleries is to hang artwork so its center is 57 inches from the floor. This places it at the average person’s eye level. When grouping multiple frames, you can create a stunning gallery wall.
Pro Tip: Lay your frames out on the floor first to find an arrangement you love before putting any nails in the wall!
Here are a few ideas for a balanced look:
- Find a Theme: Create a cohesive look by using a unifying element. You could use frames of the same color, stick to a consistent mat color, or group pieces with a similar subject, like travel photos.
- Use Odd Numbers: Grouping frames in odd numbers, like three or five, is often more visually appealing.
- Give It Space: Leave about 6-8 inches of space between the bottom of your frame and the top of furniture like a sofa. This helps the arrangement feel connected to the room without being crowded.
Floating Pressed Flower Art
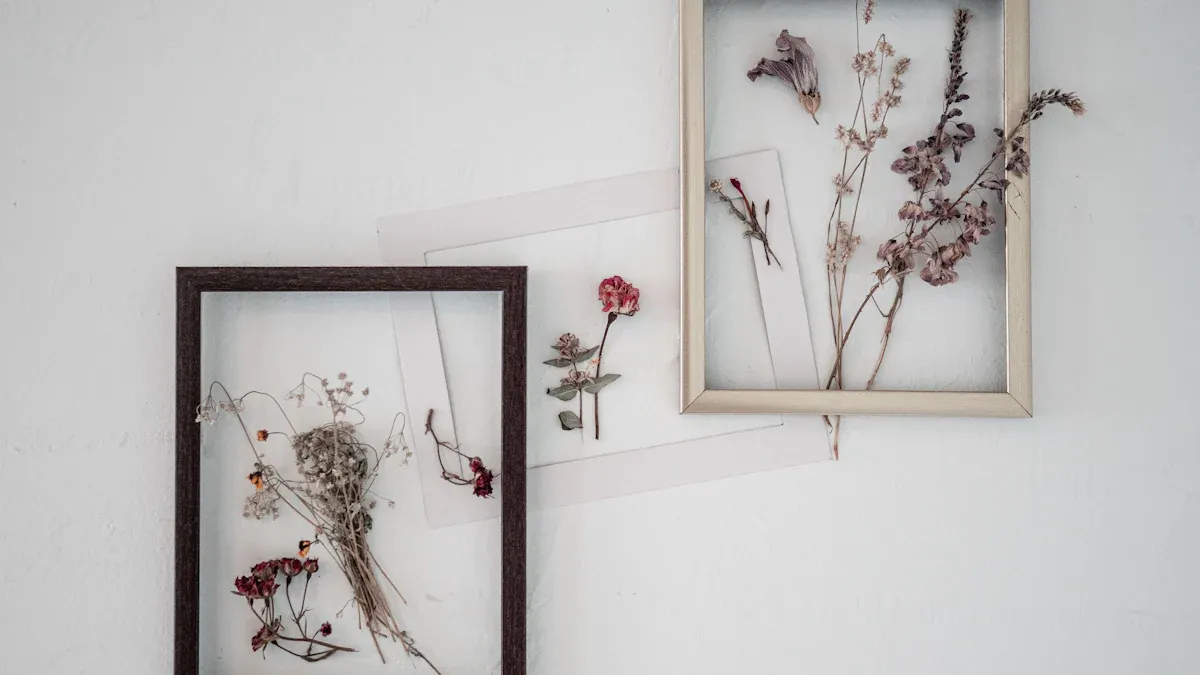
This is one of our favorite diy projects because it brings natural beauty indoors. You will create a stunning piece of see-through artwork that makes your flowers look like they are floating in mid-air. It’s a modern way to preserve the delicate charm of your favorite blooms.
Required Materials
You won’t need much to get started on this elegant project. Gather these simple supplies before you begin:
- Two 8×10 acrylic frames (or one double-paned floating frame)
- Pressed flowers and leaves
- A small paintbrush or toothpick
- Clear-drying glue (White PVA glue like Elmer’s works perfectly)
- Tweezers for delicate placement
Flower Power! 🌸 Some flowers press better than others. Dark red roses, fragrant lavender, and cheerful daisies all retain their color beautifully. For a delicate touch, try adding small blooms like baby’s breath or forget-me-nots.
Project Steps
Ready to create your botanical masterpiece? Follow these simple steps to assemble your artwork.
- Press Your Flowers: If you don’t have pre-pressed flowers, you can make your own. Place your flowers between two pieces of paper and put them inside a heavy book. For a quicker method, you can use a microwave press. Just create a ‘sandwich’ with your flowers between lining paper and wool pads, then microwave in 30-second bursts until they are dry and papery.
- Arrange Your Design: Open one of your frames and lay the acrylic sheet flat. Use tweezers to arrange your pressed flowers on the surface. Play with different layouts until you create a design you love.
- Secure the Flowers: Once you are happy with your arrangement, it’s time to glue. Use a toothpick to apply a tiny dot of clear glue to the back of each flower. Gently press it into place on the acrylic. Remember, less is more!
- Assemble the Frame: Let the glue dry completely. Place the second piece of acrylic on top, sandwiching your flowers. Carefully slide both sheets back into one of the frames. Your beautiful floating flower artwork is now ready to display!
Custom Dry-Erase Board
Tired of paper clutter? You can turn a simple picture frame into a stylish and reusable dry-erase board. This is one of those diy projects that is both practical and personal. It’s perfect for jotting down grocery lists, tracking weekly chores, or leaving a motivational quote to start your day. This budget-friendly project gives you a high-quality writing surface for way less than you would pay in a store.
Required Materials
You only need a few items to create your own custom planner. Most of these can be found at your local craft or dollar store.
- An 8×10 acrylic picture frame
- Dry-erase markers (Look for low-odor, non-toxic ink that erases easily from non-porous surfaces)
- A soft cloth or whiteboard eraser
- Your choice of decorative paper or a printed template (weekly planner, monthly calendar, to-do list, etc.)
Planner Power! 🗓️ You can find tons of free, customizable planner templates online. Search for a weekly or monthly layout that fits your style. Print it on 8×10 paper to fit perfectly inside your frame.
Project Steps
Creating your board is incredibly simple. You can complete this in just a few minutes!
- Choose Your Background: Select a piece of decorative scrapbook paper or print a planner template. This will be the background for your dry-erase board. Using a template helps you create organized lists and schedules.
- Assemble the Frame: Open the back of your picture frame. Place your paper or template inside, facing the acrylic front. Make sure it is smooth and centered.
- Secure the Backing: Close up the back of the frame. The acrylic surface now acts as your dry-erase board!
- Start Organizing: Use your dry-erase markers to write directly on the acrylic. You can use different colors to organize tasks or family members’ schedules. When you’re ready for a fresh start, just wipe it clean with a soft cloth. Your new board is ready for another week of planning!
Modern Tabletop Sign
You can create a sleek, professional-looking sign for any occasion with this simple project. Forget expensive custom printing. These signs are perfect for displaying your Wi-Fi password for guests, a menu for a dinner party, or an inspirational quote on your desk. This is one of those diy projects that adds a personal and modern touch to your home.
Required Materials
You will only need a few key items to get started. Most are available at your local craft store.
- An 8×10 acrylic picture frame
- A fine-tip paint pen
- A printed design template
Pro Tip: Pick the Perfect Pen! ✍️ Not all paint pens work well on acrylic. For a smooth, smudge-free finish, we recommend Posca paint markers. They are opaque, the paint flows easily, and they don’t require multiple coats. Other brands can be translucent or clog easily, so choosing the right pen makes a big difference.
Project Steps
This tracing method is foolproof and guarantees a perfect result every time. Just follow these four easy steps.
- Create Your Template: Design and print your message on a standard 8.5×11 inch piece of paper. For a modern look, use a clean sans-serif font like Helvetica or Futura. Their simple, geometric lines are highly readable and stylish.
- Position the Template: Open your frame and remove the backing and any paper inserts. Place your printed template inside, facing forward so you can see it through the acrylic. To keep it from moving, use a small piece of painter’s tape to hold it in place.
- Trace Your Design: Place the acrylic sheet over your template. Carefully trace the letters onto the acrylic surface with your paint pen. Take your time to create clean, steady lines. The template underneath makes it easy to get a flawless result.
- Assemble and Display: Once the paint is completely dry, remove the template from behind the acrylic. Reassemble your sign by placing the acrylic back into the frame. Your custom tabletop sign is now ready to impress!
Backlit Photo Light Box

You can make your favorite photos and artwork glow with this amazing project. A backlit light box adds a warm, dramatic effect to any room. It turns a simple picture into a captivating piece of decor. This is a great way to highlight a special memory or a unique piece of artwork. Best of all, you can build your own for around $30.
Required Materials
Gather these supplies to bring your idea to life. You can find most of them online or at a craft store.
- An 8×10 shadow box frame (one with a deep profile works best)
- A translucent photo or printed design (vellum paper works well)
- Battery-powered LED strip lights
- White paper or cardstock
- Tape or adhesive dots
Light It Up! 💡 For the best results, choose LED strips with 60 LEDs per meter. This density gives you bright, even light without dark spots. You can also look for 160° wide-angle LED strips. They spread light evenly and create a beautiful, dot-free glow behind your image.
Project Steps
Follow these simple steps to create your light box. You will have a stunning display in no time.
- Prepare Your Frame: Open your shadow box frame and remove the backing. Line the inside of the back panel with plain white paper. This white surface helps bounce the light around, making your display brighter and more even.
- Install the Lights: Carefully stick your LED strip lights around the inside edges of the frame. Start near the battery pack so you can easily hide it behind the frame later.
- Insert Your Artwork: Place your translucent photo or design into the frame, in front of the lights. Make sure it sits flat against the front acrylic panel.
- Assemble and Illuminate: Put the backing back onto the frame, securing your artwork in place. Turn on the lights and watch your creation come to life!
Safety First! ⚠️ Always be careful when working with LED lights. Here are a few tips to keep your project safe:
- Unplug the lights from any power source before you try to cut them.
- Only cut on the marked lines to avoid damaging the lights.
- Keep any small, leftover pieces away from children.
Your new light box will add a professional touch to your decor. These frames are perfect for showcasing your favorite images in a new and exciting way.
Create a Mini Picture Frame Terrarium
You can bring a miniature world of green into your home with this creative project. A picture frame terrarium turns a simple shadow box into a living piece of art. This tiny ecosystem is more than just decor. It helps purify your air and can even reduce stress, adding a sense of peace to your space.
Required Materials
For this project, an 8×10 shadow box frame with an acrylic front that opens easily is ideal. This type of frame simplifies adding your soil and plants.
- An 8×10 shadow box frame
- Small pebbles or gravel (for drainage)
- Activated charcoal (for filtration)
- Potting soil
- Small faux succulents or air plants
- Decorative elements like moss or small stones (optional)
Project Steps
Building your mini terrarium is like creating a tiny landscape. Follow these steps to assemble your beautiful display.
- Prepare Your Frame: Lay your shadow box flat and open the front. This gives you an open canvas to build your terrarium.
- Create a Drainage Layer: Add a half-inch layer of small pebbles at the bottom. This layer, called a false bottom, creates a space for excess water to go so your plant roots don’t rot.
- Add a Filtration Layer: Sprinkle a thin layer of activated charcoal over the pebbles. Charcoal is a fantastic filter that keeps the soil fresh and prevents odors.
- Add Soil and Plants: Place a layer of potting soil on top of the charcoal. Now for the fun part! Arrange your plants in the soil. Create a design you love before closing up the frames.
- Display Your Work: Close the shadow box. Your stunning picture frame terrarium is complete!
Real vs. Faux: What’s the Difference? 🤔 You can use real plants, but faux succulents or air plants make your terrarium incredibly low-maintenance. Here’s a quick comparison:
Feature Faux Plant Terrarium Real Plant Terrarium Maintenance Virtually zero—just occasional dusting. Requires watering, light, and pruning. Biology Static. Nothing grows or changes. A dynamic, tiny ecosystem. Lifespan Indefinite. Depends on the health of the plants.
You have seen how a simple frame can become a light box, a terrarium, or a modern sign. These diy projects show just how versatile basic supplies can be for creating beautiful diy home decor. Now it’s your turn to transform your space.
Which project will you tackle first? Share your finished work on social media! A unique hashtag like #GettyMuseumChallenge can inspire a fun, creative community. Let’s use #FrameYour2026 to show off your amazing creations. We can’t wait to see what you make! 🤩
FAQ
We’ve answered some common questions to help you get started on your next project.
Where can I find affordable acrylic frames?
You can find inexpensive 8×10 acrylic frames at many places. Check out your local dollar store, craft stores like Michaels, or big-box retailers like Target and Walmart. They offer great options that are perfect for these DIYs without breaking your budget.
How do I clean my new creations?
Keeping your projects looking great is easy. You can simply wipe the acrylic surfaces with a soft, dry microfiber cloth to remove dust and smudges.
Care Tip! 🧼 Avoid using harsh chemical cleaners. They can make the acrylic look cloudy over time.
Can I use different frame sizes for these projects?
Absolutely! You can adapt these ideas for any frame size. A larger frame makes a great statement piece for a gallery wall. A smaller 5×7 frame is perfect for a desk or a small shelf. Feel free to get creative with different sizes and colors!
Are battery-powered LED lights safe to leave on?
Most battery-powered LED lights are safe because they produce very little heat. However, you should always use high-quality lights and turn them off when you are not around. This helps save battery life and gives you peace of mind.
See Also
Modern Wood and Acrylic Coffee Tables: Perfect for 2025 Interiors
Elevate Your Home Decor with Stylish Acrylic Trays in 2025
Ten Ingenious Ideas for Styling Small Acrylic Trays Indoors
Transform Your Living Spaces: Ten Chic Acrylic Tray Decor Ideas
Top Round Acrylic Trays: Versatile Entertaining Solutions for 2025

