
You can attach things to acrylic in two primary ways. The first is chemical bonding using an adhesive. The second is physical joining with mechanical fasteners. Your choice for the best bond depends on project factors. Consider the object’s weight and if you need a permanent attachment. With the acrylic market growing, your project is part of a larger trend.
- The global acrylic sheets market is projected to reach over $8.3 billion by 2032.
- DIY and home improvement projects are a key driver of this growth.
This guide will walk you through the steps for a strong, clean bond.
How to Glue Acrylic Sheeting with Adhesives

You can achieve a professional, permanent bond when you glue acrylic sheeting. The secret is using the right adhesive and proper technique. This process creates a chemical bond that is incredibly strong. Let’s explore the best glues for your project.
Choosing the Right Adhesive for Your Project
Your choice of glue depends on what you are joining. Gluing acrylic to acrylic requires a different approach than attaching it to wood or metal.
Solvent Cement for Acrylic-to-Acrylic Bonds
For joining acrylic sheeting to itself, solvent cement is the best option. This type of adhesive works through a process called “solvent welding.” The glue melts the surfaces of the acrylic pieces. The melted plastics then fuse together. This creates a single, solid piece of acrylic. The resulting bond is exceptionally strong and clear. Popular brands include Acrifix and Weld-On (SciGrip).
Pro Tip: Solvent welding creates a permanent bond. You cannot separate the pieces after the glue cures. Always double-check your measurements and alignment before you apply the glue.
Other Adhesives for Mixed Materials
You may need to attach things made of other materials to your acrylic. In these cases, a different type of adhesive is necessary. Some glues require you to sand the acrylic surface first. This roughs up the plastic and helps the glue create a stronger bond.
Here are some excellent non-solvent adhesives:
- 3M™ Scotch-Weld™ Adhesives: These products offer a powerful bond for different materials. They work well on plastics, aluminum, and steel. Some formulas are low-odor and can handle extreme temperatures.
- 2-Part Epoxy: This glue sets quickly. It is a good choice when you need a fast bond. However, epoxy can leave bubbles, so it is not ideal for clear joints. The bond is not as strong as a solvent weld.
- 3M Adhesive Sheets (LSE): Professionals use these sheets for signs. The Low Surface Energy (LSE) version is perfect for slick surfaces like acrylic. You apply the sheet before cutting. This method leaves no messy glue spillover and creates a very clean bond.
The table below shows more options for your project.
| Adhesive | Compatible Materials (including acrylic) |
|---|---|
| Devcon’s Super Glue (Cyanoacrylate) | Plastic, rubber, metal, glass, and other non-porous surfaces |
| E-6000 | Ceramics, concrete, fiberglass, glass, metal, wood, vinyl, plastics |
| SCS2000 SilPruf (Silicone Sealant) | Glass, polycarbonate, plexiglass, vinyl |
Understanding Cure Times
Every adhesive needs time to cure and reach its full strength. You must plan for this waiting period. Rushing the process can weaken the bond.
| Adhesive | Working Time | Fixture Time | 80% Strength |
|---|---|---|---|
| Weld-On 40 | 20 min | 2 hrs | 72 hrs |
| 3M™ DP8410NS | 11 min | 36 min | 24 hrs |
Preparing Acrylic Surfaces for a Strong Bond
Proper preparation is the most important step for a successful bond. A clean, well-prepared surface allows the glue to work effectively. Skipping this step will result in a weak bond.
Sanding for a Better Grip
Some glues, like epoxies and super glues, need a textured surface to grab onto. You should sand the acrylic where you plan to apply the glue.
- Use a coarse sandpaper with a 150 to 220 grit.
- Sand the surface lightly. You want to create a rough texture, not a polished finish.
- A very smooth surface can prevent the adhesive from forming a strong bond.
Safety Note: Always wet sand acrylic. Keep the surface and the sandpaper wet. This prevents the acrylic from overheating and melting, which can make it look cloudy.
Cleaning the Surface
Dust, grease, and fingerprints can ruin your project. You must clean the acrylic surfaces thoroughly before gluing acrylic. Use a safe cleaning agent that will not damage the plastic.
- A simple mix of mild dish soap and warm water is very effective. Apply it with a soft microfiber cloth.
- You can also use a 30% solution of isopropyl alcohol.
- For grease or oil, you can use kerosene.
Wipe the surface clean and let it dry completely. A clean surface ensures the strongest possible bonding.
Applying Adhesives for a Flawless Finish
The application technique is key to a clean, bubble-free finish. For solvent cement, the best method is capillary action.
Using the Capillary Action Method
Capillary action uses the glue’s thin consistency to your advantage. The liquid glue flows into the tight space between two pieces of acrylic. This technique creates a perfect, nearly invisible bond.
- Fit Your Pieces: Place your acrylic pieces together exactly as you want them. Use clamps or tape to hold them securely in place.
- Use an Applicator: Use a squeeze bottle with a fine needle tip. This gives you precise control over the glue.
- Apply the Glue: Place the needle tip at the edge of the joint. Gently squeeze the bottle as you move the needle along the seam. The solvent glue will wick into the gap between the pieces.
- Let It Set: The initial bond forms in just a few seconds. Do not move the pieces. The bond will reach high strength in 24 to 48 hours. It will continue to get stronger for several weeks.
This method is the secret to professional-looking results when you glue acrylic. It ensures a strong, clean bond with no mess.
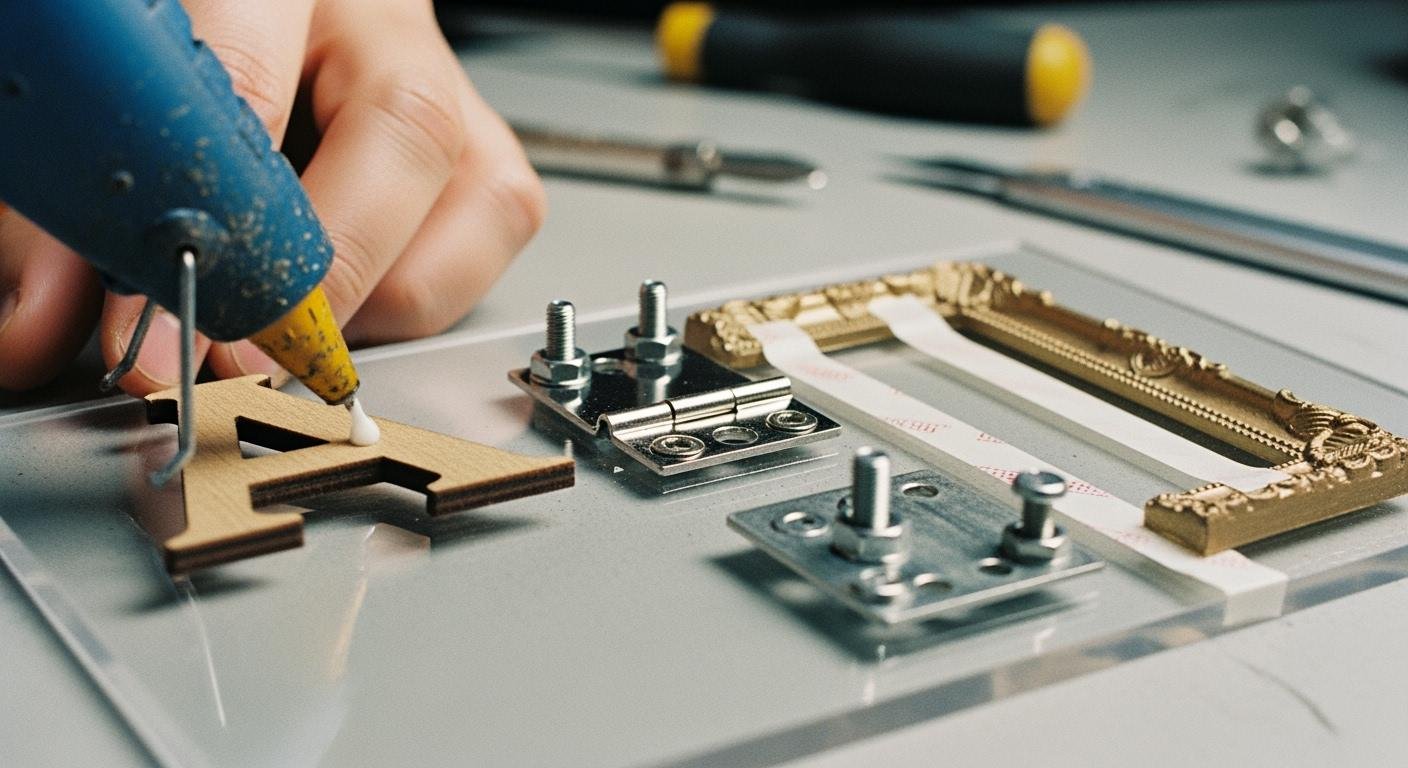
Using Mechanical Fasteners on Acrylic
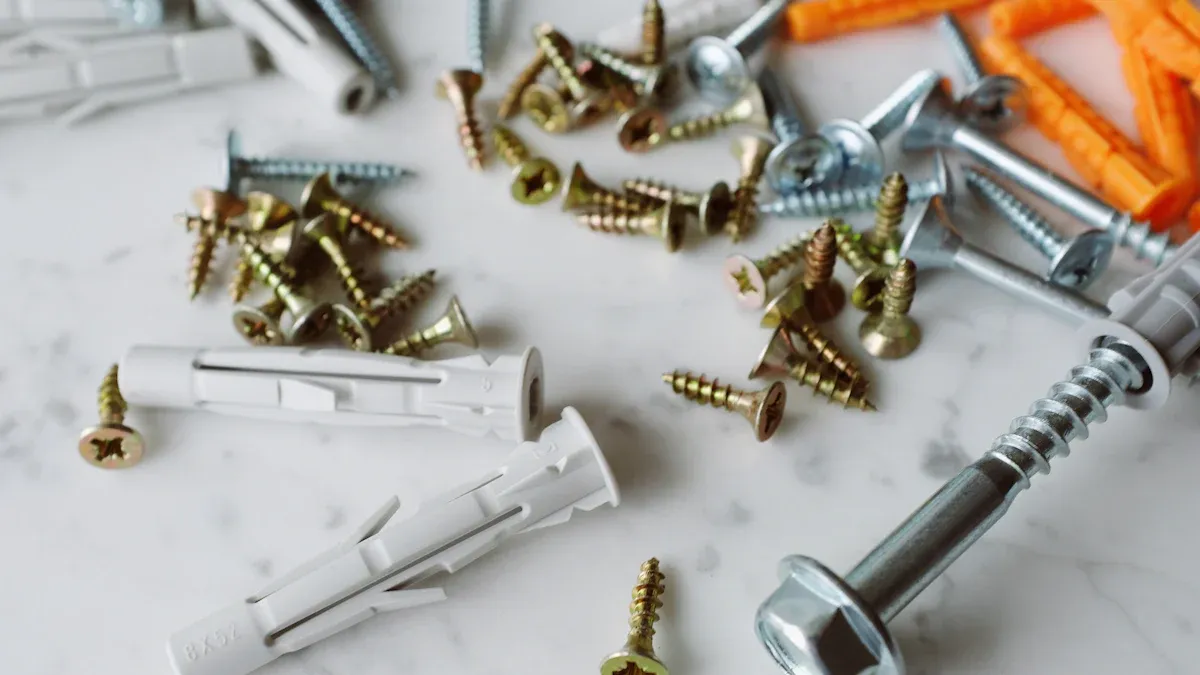
Sometimes, you need a connection that you can take apart. Other times, you need to support a heavy object. In these cases, mechanical fasteners like screws and bolts are your best choice. This method creates a physical joint. It is a reliable way to attach things to your acrylic sheet.
When to Use Screws, Bolts, or Rivets
Your project will determine the best fastener to use. Screws and bolts are great for different reasons.
Choose screws for projects where looks are important.
- Aesthetic Displays: You can use special acrylic frame screws to create floating frames. These are perfect for displaying photos or artwork between two sheets of acrylic.
- Layered Items: These screws are made to sandwich an item, like a sticker or print, between two acrylic pieces. They create a small space for the item.
Choose bolts or machine screws for projects that need more strength.
- Structural Assemblies: You can use machine screws and nuts to build interlocking structures. A clear acrylic box is a great example of this.
- Custom Components: These fasteners work well with custom-cut parts. You can use them in special slots to assemble complex designs.
Rivets are another option. They create a permanent mechanical bond. You cannot easily remove them once they are installed.
How to Drill into Acrylic Without Cracking It
Drilling is the most important step when using fasteners. You must do it correctly to avoid cracks and chips. The right tools and techniques will give you a clean, professional result.
Choosing the Right Drill Bit
You cannot use standard wood or metal drill bits on acrylic. These bits are too aggressive and will bite into the plastic, causing it to crack. You need a drill bit made specifically for plastics. These bits scrape the acrylic away gently instead of cutting it. This action prevents damage and leaves a smooth hole.
Here are some excellent choices for drilling into your acrylic project:
| Drill Bit Type | Key Features |
|---|---|
| Spur-point Bits | These have a sharp center point and two spurs. They drill straight and create clean-sided holes. |
| Twist HSS Bits | A general-purpose bit that works for plastic. Use one that is slightly used to prevent it from biting into the material. |
| Step Bits | This cone-shaped bit drills holes of many sizes. It creates very clean, smooth holes without any burrs. |
Pro Tip: For the best results, look for a bit with a zero rake angle and an 85° point angle. This design is engineered to reduce grabbing and melting.
Setting the Correct Drill Speed
Drilling too fast generates heat, which can melt the acrylic. You must use the correct drill speed for the size of the hole you are making. As the hole size increases, you should reduce the drill speed.
- For a small 1/8” hole, you can use a speed up to 3,500 RPM.
- For a medium 1/4” hole, you should lower the speed to 1,800 RPM.
- For a large 1” hole, do not drill faster than 450 RPM.
Always use a slow, steady feed rate. Let the drill bit do the work. A light mist of water can also help cool the material and give you a smoother finish.
Making a Pilot Hole
A pilot hole is a small starter hole. It guides your final drill bit and prevents it from wandering. You can slightly dull the tip of your drill bit on a hard stone. This helps the bit scrape the plastic instead of digging in, making it easier to start the hole accurately.
The size of the pilot hole is very important. Acrylic is a brittle material, so you need the right size to prevent cracking when you insert the screw.

Securely Installing Mechanical Fasteners
After you drill your holes, you are ready to install the fasteners. Proper installation is the final step to ensure a strong, crack-free connection.
First, consider the thickness of your material. For a strong connection, the acrylic thickness should be at least three times the diameter of your fastener. For example, if you use a standard #8 screw, your acrylic sheet should be at least 6mm thick.
Next, be very careful not to over-tighten your screws or bolts. Too much pressure will create stress points in the acrylic. This stress can easily lead to cracks around the hole. Tighten the fastener until it is snug, and then stop.
Use Washers to Distribute Pressure 💡 Always place a flat washer between the bolt head and the acrylic surface. The washer spreads the load over a wider area. This simple step prevents pressure from concentrating in one spot and cracking the material. Nylon washers are an excellent choice because they are lightweight and will not scratch the surface.
Essential Safety Precautions
Working with acrylic and strong adhesives requires you to be careful. Your safety is the most important part of any project. Following these precautions will protect you and ensure your project turns out great.
Proper Ventilation and Personal Protective Gear
You must work in a space with good airflow. Many solvent glues release fumes that can be harmful to breathe. Open windows and use a fan to move fresh air through your workspace. When using a strong solvent glue, you may need more than just a fan.
Air-purifying respirators are not a good choice for protection against methylene chloride exposure. This chemical can pass through the filter cartridges. You would not be able to smell it until after you have already been overexposed.
Always wear the right personal protective equipment (PPE). This includes:
- Safety Glasses: Protect your eyes from splashes of glue or adhesive.
- Gloves: Use chemical-resistant gloves to keep the glue off your skin.
- Closed-toe Shoes: Protect your feet from spills or dropped items.
Safe Handling of Solvents and Glues
Properly handling your glue and solvents prevents accidents. You should always store your adhesive products safely.
- Label all containers clearly with the chemical name and any hazards.
- Store flammable solvents in a fire-resistant metal cabinet away from heat.
- Keep different types of glue and chemicals separate to avoid dangerous reactions.
- Seal containers tightly to stop spills and prevent fumes from escaping.
Accidents can happen. If you get an adhesive on your skin or in your eyes, you need to act quickly.
- For Skin Contact: Soak the area in warm, soapy water. Gently peel or roll the skin apart. Do not pull.
- For Eye Contact: Wash your eyes with large amounts of warm water. Apply a gauze patch and see a doctor. The adhesive will naturally separate from the eye protein over time.
Preventing Scratches During Assembly
You want your finished acrylic project to look perfect. Preventing scratches while you work is key. Handling the material correctly is crucial when assembling acrylic sheets.
- Handle with Clean Hands: Wear clean cotton gloves. This stops oils and dirt from getting on the acrylic surface.
- Use a Soft Surface: Place your acrylic sheets on a soft, clean cloth. This prevents scratches from your work table.
- Never Wipe Dry: Always use a damp, soft microfiber cloth to clean dust or smudges. Wiping a dry surface can drag dirt particles and cause fine scratches.
Pro Tips for a Professional Finish
You can achieve a flawless look on your acrylic project. The final details make a big difference. These tips will help you create a professional-quality piece.
How to Avoid Bubbles, Smudges, and Glue Marks
Bubbles can ruin a clear bond. Your work environment plays a big role. The temperature and humidity in your room directly affect the bonding of your acrylic. These factors can cause bubbles to form in the solvent glue. Work in a controlled space for the best results. Use just enough glue for the job. Too much glue will squeeze out and create messy smudges. A precise applicator helps you control the glue flow. This prevents excess glue from spoiling your perfect bond. A clean application of glue is key to a strong bond.
Edge Bonding vs. Surface Mounting Techniques
You can join acrylic in different ways. Edge bonding connects the sides of two pieces. Surface mounting is how you attach things to the face of the acrylic. For a perfect edge bond, you can flame polish the acrylic.
- First, sand the cut edges to make them smooth.
- Next, use a sharp blade as a scraper to plane the edge.
- Finally, pass a torch flame quickly and steadily along the edge.
Keep it Moving! 🏃 Never hold the torch still on the acrylic. You must keep the flame moving. This prevents the material from melting or burning. A quick pass with the right glue gives you a crystal-clear bond. This technique makes your glue bond almost invisible.
Cleaning and Polishing Your Final Project
The final step is to clean and polish your project. This removes any fine scratches and leftover glue marks. A high-quality polish can make your acrylic shine.
- NOVUS Plastic Polish #2 is an excellent choice. It is made to remove fine scratches and haziness.
- This polish removes the damage instead of just filling it in.
- It helps restore the acrylic and leaves a smooth, sealed surface after you buff it out.
Always use a soft microfiber cloth for cleaning and polishing. This protects the surface from new scratches. A final polish ensures your project looks its best and that the glue bond is the only thing holding it together, not messy glue marks.
You now know how to attach things to acrylic using two main methods. You can create a chemical bond with adhesives or a physical attachment with fasteners. Remember that proper bonding is the key to success. A clean surface ensures a strong bond for your acrylic project. You can now confidently create a secure attachment and a lasting bond. Your new skills will help you build amazing things with acrylic and achieve a professional bond.
PREGUNTAS FRECUENTES
Can I use super glue on acrylic?
Yes, you can use super glue like cyanoacrylate. You must sand the acrylic surface first to create a better grip. This bond is good for small items but is not as strong as a solvent weld.
What is the strongest way to join two acrylic sheets?
Solvent welding creates the strongest bond. This method melts and fuses the acrylic pieces together. The result is a single, solid piece of plastic. This permanent bond is the choice for professional results.
Why did my acrylic crack when I drilled it?
Your acrylic may have cracked for two main reasons.
- You used the wrong drill bit. Standard bits are too aggressive.
- You drilled too fast. This creates heat and stress.
Solution 💡 Always use a drill bit made for plastic. You should also drill at a slow, steady speed to prevent cracking.
How do I attach acrylic to wood?
You cannot use solvent cement to join acrylic and wood. Instead, you should use a strong adhesive like a 2-part epoxy or E-6000. Sanding the acrylic surface where you apply the glue will create a stronger bond.
See Also
Your Comprehensive Guide to Choosing and Using Acrylic Table Stands
Exploring Diverse Designs and Practical Applications of Round Acrylic Trays
A Complete Guide to Selecting and Maintaining White Acrylic Trays
Ten Ingenious Ideas for Styling Small Acrylic Trays in Your Home
Discover Ten Chic Methods to Elevate Your Spaces Using Acrylic Trays

