
You can create your own high-end looking acrylic picture frames for under $40. I wanted stylish floating acrylic frames for my home. Store-bought options often cost over $80. This project is a great way to make your own picture frames. You can join the trend of DIY home decor. This guide provides simple steps for affordable diy acrylic frames.
Note: This project helps you create beautiful budget floating frames. You can achieve a professional look without the high price tag. My diy budget floating acrylic frames are a perfect weekend activity. Get ready to build your own floating acrylic picture frames.
Gathering Your Materials and Tools

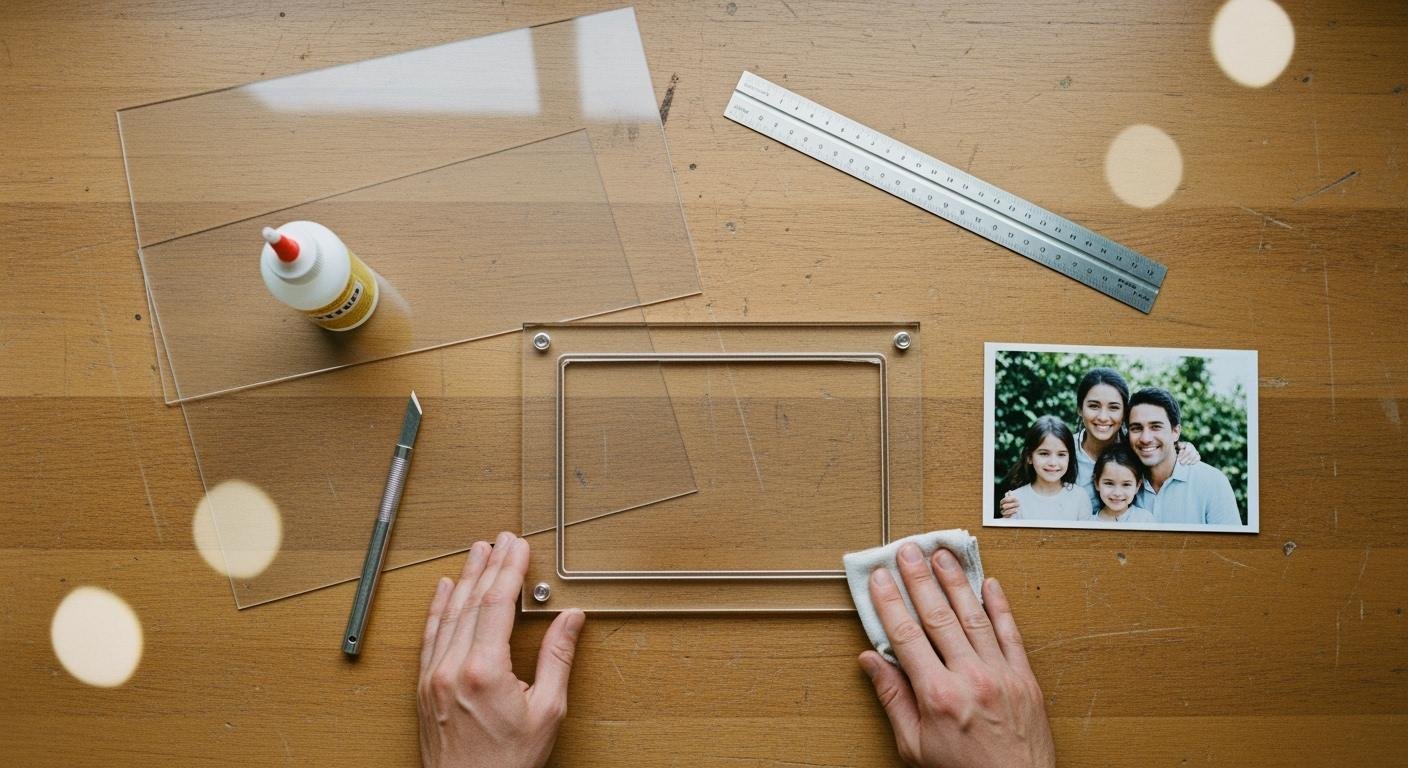
You need the right supplies before you start your project. A good setup makes the process smooth and fun. This list covers all the materials for floating frame creation. Let’s get everything ready.
Essential Project Materials
First, you will gather the main components for your frames. These items form the foundation of your project.
- Acrylic Sheets: You need two pieces of a clear acrylic sheet for each frame. Popular sizes include 8×10 or 11×17 inches. Remember to allow a small amount of clearance for your artwork.
- Standoff Bolts: These create the floating effect. Stainless steel standoffs are a great choice. They are durable and resist rust. Aluminum standoffs also work well for a modern look. You can find them in sizes like 1/2 inch or 3/4 inch.
- Artwork or Photo: Choose the piece you want to display in your new floating acrylic frames.
Necessary Tools for the Job
Next, you will collect the tools for assembly. Safety is very important when working with acrylic.
- Power Drill: You will use this to make holes in the acrylic and the wall.
- Drill Bits: Standard bits can crack acrylic. Use special acrylic drill bits or a step bit for clean holes.
- Safety Goggles: Always protect your eyes from dust and small plastic pieces.
- Clamps: These hold the acrylic sheet steady while you drill. This prevents slipping and cracking.
- Painter’s Tape: Place tape where you plan to drill. It gives the drill bit grip and protects the surface.
- Measuring Tape & Pencil: You need these for accurate measurements.
Safety Tip: Always wear your safety goggles when drilling. Securing the acrylic with clamps is a key step to prevent accidents and ensure a perfect finish.
Supplies for a Custom Look
You can easily add personal touches to your frames. A few extra supplies can make your project unique.
- Metallic Spray Paint: You can change the color of your standoff bolts. Many people love Rust-oleum’s Metallic Warm Gold or Champagne Bronze for a high-end brass finish.
- Decorative Washers: You can add small washers between the bolt and the acrylic. They come in finishes like brass, nickel, or black for an extra decorative detail.
How to Make Your Own Picture Frames
Now you have all your supplies. It is time to make your own picture frames. This section guides you through each step of the process. Follow these instructions carefully for a beautiful result.
Step 1: Prepare and Drill the Acrylic
Drilling acrylic can seem tricky, but you can do it without any cracks. The key is patience and the right technique. This is the most important step for creating professional-looking floating acrylic frames.
- Prepare Your Workspace: Place a piece of scrap wood on your work surface. This supports the acrylic and prevents chipping when the drill bit exits the other side.
- Stack and Clamp: Keep the protective film on both acrylic sheets. Stack them perfectly on top of each other. Clamp them securely to the scrap wood so they cannot move.
- Mark Your Holes: Use a measuring tape and pencil to mark where you will drill. A good rule is to place holes at least 1.5 times the hole’s diameter away from any edge. This prevents the edges from cracking.
- Add Painter’s Tape: Place a small piece of painter’s tape over each mark. The tape gives your drill bit extra grip and stops it from skidding across the slippery surface.
- Drill a Pilot Hole: Start with a small drill bit (about 3mm) to create a pilot hole at each mark. This small hole guides the larger bit and reduces stress on the acrylic.
- Drill the Final Hole: Switch to the drill bit that matches your standoff bolt size. Set your drill to a low speed, around 300-600 RPM. Apply steady, gentle pressure and let the drill do the work. You should see continuous shavings coming out of the hole. If the acrylic starts to melt, you are drilling too fast or pushing too hard.
- Deburr the Edges: After drilling, the edges of the holes might be a little rough. You can smooth them with a countersink bit or a piece of fine-grit sandpaper. This small detail gives your floating acrylic frame a clean, finished look.
No-Drill Alternative for Renters! renters!
Do you want to avoid making holes? You can still create this look. Instead of drilling, use small dots of removable mounting putty in the corners of your artwork to attach it to the back acrylic sheet. Then, use more putty or strong double-sided mounting strips to attach the entire frame to the wall. This is a super-easy option that won’t damage your walls.
Step 2: Customize Your Hardware
This step lets you add a personal touch. Painting your standoff bolts is an easy way to match your home’s decor.
- Prepare the Bolts: Clean the standoff bolts with a cloth to remove any dust or oils.
- Apply Spray Paint: In a well-ventilated area, apply a light, even coat of metallic spray paint. Products like Rust-Oleum Universal Premium Metallic are excellent because they are durable and scratch-resistant.
- Let It Dry: Let the paint dry to the touch, which usually takes 2 to 4 hours. For the best results, you should let the hardware cure for a full 24 hours before you handle it. This ensures the paint is hard and won’t chip during installation.
Step 3: Mount Hardware to the Wall
Accurate measurements are crucial for hanging your frame perfectly straight. Take your time during this step.
- Mark the First Hole: Decide where you want to hang your frame. Use a measuring tape and pencil to mark the location for the top-left standoff bolt.
- Use a Level: Place a level on the wall extending from your first mark. Use it to mark the spot for the top-right bolt. This guarantees your frame will be perfectly horizontal. A laser level can make this step even easier by projecting a straight line on the wall.
- Mark the Bottom Holes: Measure down from each top mark to position your bottom holes. Double-check that all four marks form a perfect rectangle.
- Drill and Add Anchors: Drill holes at your four marks. If you are drilling into drywall, gently tap in a plastic wall anchor at each hole. These anchors help support the weight of the acrylic picture frames. Plastic expansion anchors work great for frames under 15 pounds.
- Install the Standoffs: Screw the base of each standoff bolt into the wall anchors.
Step 4: Position Your Artwork
Now you will create the “floating” sandwich for your art.
- Take one of your drilled acrylic sheets and remove the protective film from both sides. This will be your back panel.
- Place your artwork or photo in the center of the sheet. You can use a tiny piece of double-sided tape on the back of the art to hold it in place.
- Take your second acrylic sheet and remove the protective film from both sides. Carefully place it on top of the artwork, creating a sandwich.
Step 5: Assembling Your Acrylic Picture Frames
You are at the final step! It is time to put everything together.
- Align the Frame: Hold your acrylic sandwich up to the wall. Align the four drilled holes in the acrylic with the four standoff bases you installed.
- Secure the Caps: Screw the standoff caps through the acrylic holes and into the standoff bases.
- Hand-Tighten Only: Tighten the caps until they are snug. Do not over-tighten them with tools. Too much pressure can crack the acrylic. A firm, hand-tightened twist is all you need to hold the floating acrylic frames securely.
Stand back and admire your work. You just created a beautiful, custom piece of decor for your home!
The Final Reveal and Cost

You did it! Your project is complete. Now you can enjoy the sleek, modern look of your custom frames. This final section shows off the result and breaks down the total cost. You will see just how much money you saved.
The Finished Frames
Take a moment to admire your new floating acrylic frames. You transformed simple materials into a stunning piece of home decor. The artwork appears to float off the wall, creating a professional, gallery-quality display. These frames work well as a single statement piece or grouped together for a beautiful gallery wall. You have many great photo display ideas to explore with this versatile design.
A Quick Guide to Care and Cleaning
You want your new frames to look great for years. Proper care is simple. You should handle your acrylic picture frames by the edges to prevent fingerprints. Follow these tips to keep the acrylic crystal clear.
- Use the Right Cloth: Always use a soft, clean microfiber cloth. Paper towels are too rough and can leave tiny scratches on the acrylic surface.
- Choose a Safe Cleaner: Never use cleaners with ammonia or alcohol, like many common glass cleaners. These chemicals can make the acrylic look cloudy over time.
- Clean Gently: For regular dusting, a dry microfiber cloth works best. For smudges, you can use a cleaner made for acrylic, like Novus No. 1. You can also use a simple mix of mild dish soap and water.
- Apply Cleaner Correctly: Spray your cleaner onto the cloth, not directly onto the frame. This prevents liquid from getting between the acrylic layers and damaging your art.
Project Cost Breakdown
You wanted a high-end look without the high-end price. This project delivers exactly that. Store-bought versions can easily cost over $80 per frame. Your affordable diy acrylic frames achieve the same style for a fraction of the cost.
Here is a simple breakdown of my expenses for one 11×17 inch frame. Prices may vary based on your location and where you shop.
| Artículo | My Cost |
|---|---|
| Two 11×17″ Acrylic Sheets | $15.50 |
| Stainless Steel Standoffs (4-Pack) | $12.00 |
| Metallic Gold Spray Paint | $8.50 |
| Drywall Anchors & Screws | $3.00 |
| Total Project Cost | $39.00 |
As you can see, you can create a beautiful, custom frame for under $40. You get a huge impact on your decor with a very small impact on your wallet. Enjoy your amazing new artwork display!
You can create beautiful, affordable acrylic picture frames. This project gives you a high-end look for a fraction of the retail price. You also gain other great benefits from this DIY activity.
- You get to use your creative expression.
- You feel a great sense of accomplishment.
- You gain more control over your home’s design.
Now it is your turn. We hope you try making your own floating acrylic frames. Please share your results or ask any questions in the comments below! We would love to see what you create.
PREGUNTAS FRECUENTES
Here are answers to some common questions about this project.
What if I can’t find the right size acrylic sheet?
You can buy a larger acrylic sheet. Many hardware stores will cut it to your exact size for free or for a small fee. This gives you a perfect custom fit for your project. 🖼️
Can I use a different type of hardware?
Yes, you can use other hardware. Decorative screws with caps or even simple bolts can work. You just need to make sure the hardware can go through both acrylic sheets and hold them together securely on the wall.
How do I clean the acrylic without scratching it?
You should always use a soft microfiber cloth. Never use paper towels or glass cleaners with ammonia. For smudges, you can use a special acrylic cleaner or a simple mix of mild soap and water.
What kind of art works best in these frames?
These frames work best with flat items. Photos, art prints, and thin fabrics look great. You should avoid thick materials like canvas or items with a lot of texture. The acrylic sheets need to press together flat.
See Also
Debunking Acrylic Tray Myths: Simple DIY Projects for Your Home
Your Comprehensive Guide to Choosing and Using Acrylic Table Stands
Exploring Premium Acrylic Stand Tables: Design, Materials, and Craftsmanship
Transform Your Space: Ten Clever Styling Ideas for Small Acrylic Trays
Recycled Acrylic (r-PMMA): Understanding Its Definition, Process, and Uses

