
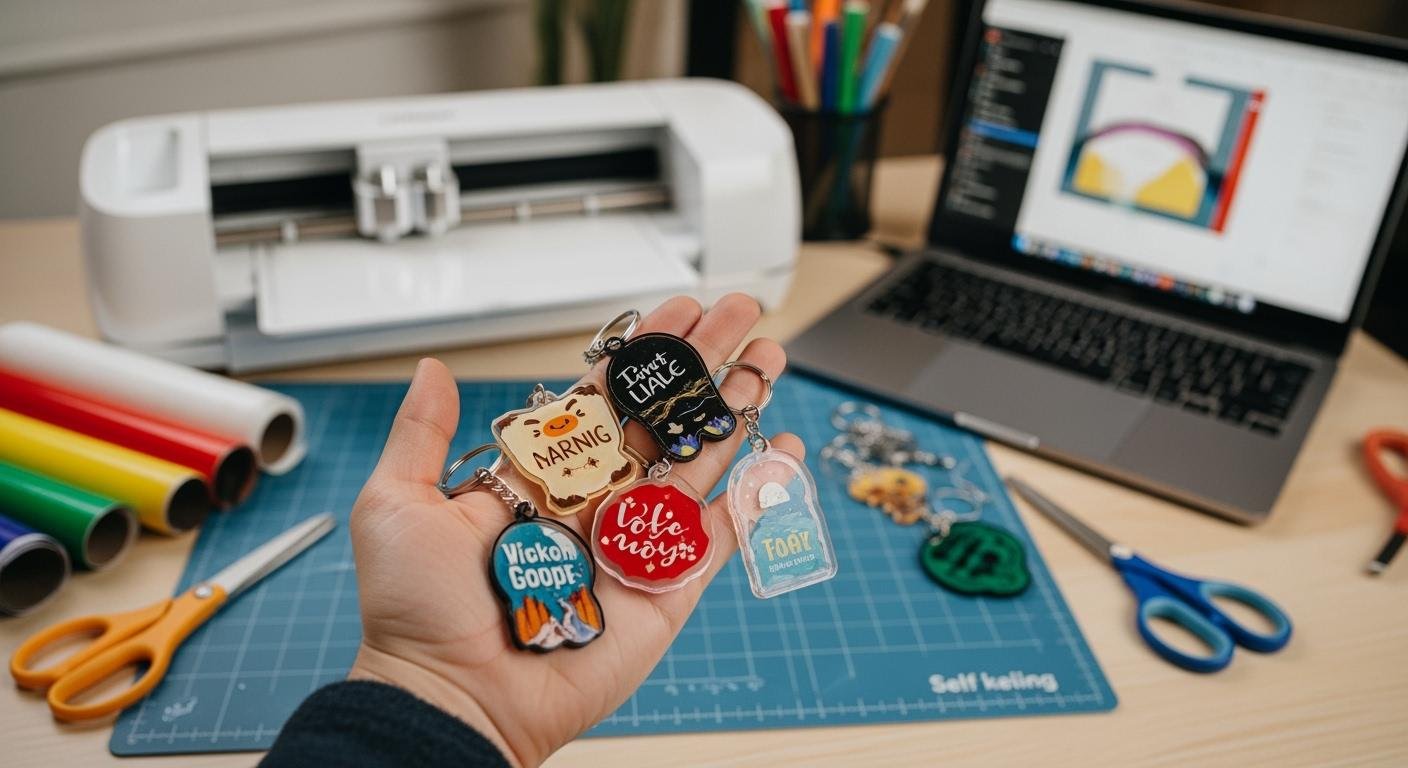
Yes, you can make acrylic keychains with a Cricut. You have so many ways to get creative. You might use vinyl, try engraving, or even add resin and glitter for extra shine. If you want simple or bold looks, check out these common methods:
| Method Type | Description |
|---|---|
| Single Layer Vinyl Keychain | A quick method using a single color vinyl cut out. |
| Brush Stroke Keychain | Customization using brush stroke images in two different ways. |
| Layered Vinyl Keychain | Involves layering multiple vinyl pieces for a more complex design. |
People love diy keychains for gifts, personal flair, or small businesses. You do not need to be an expert to start diy projects like these. If you wonder how to make acrylic keychains, you’re in the right place.
Materials Needed to Make Acrylic Keychains
Before you start making acrylic keychains, you need to gather the right materials. Having everything ready makes the process smoother and more fun. Here’s what you’ll need:
Acrylic Blanks and Keychain Hardware
Acrylic blanks are the base for your keychains. They come in many shapes like circles, hearts, or rectangles. You can pick clear, frosted, or colored blanks. These blanks give your project a sturdy and shiny look.
You also need keychain hardware. This usually means split rings, jump rings, and sometimes small chains. These parts help you attach your finished design to your keys or bag. Most starter kits include enough hardware for several keychains.
Vinyl Options for Cricut
You need vinyl to decorate your acrylic keychains. The Cricut machine works with different types of vinyl:
- Regular adhesive vinyl: Great for simple designs and easy to use.
- Smart vinyl: Works without a mat in newer Cricut models and saves time.
- Printable vinyl: Lets you print custom images before cutting them with your Cricut.
Pick the vinyl that matches your design idea. If you’re new to diy crafts, start with regular adhesive vinyl. It’s easy to weed and transfer.
Additional Supplies (Transfer Tape, Resin, Glitter)
Transfer tape helps you move your vinyl design from the backing to the acrylic blank. It keeps everything lined up and neat.
If you want to add sparkle, try glitter or resin. Resin gives a glossy, professional finish. Glitter adds color and shine. When you use resin or glitter, always stay safe:
- Wear gloves to keep resin off your skin.
- Use a respirator or a KN95 mask to avoid breathing in fumes.
- Work in a well-ventilated area and wear safety gear.
Tip: Lay out all your materials before you start. This helps you stay organized and makes the project go faster.
With these materials needed to make acrylic keychains, you’re ready to start creating unique keychains with your Cricut.
How to Make Acrylic Keychains: Design and Cut
Ready to jump into the creative part? This is where you get to design, cut, and bring your diy keychains to life with your cricut. You’ll see how easy it is to make something unique, whether you want a simple name tag or a glittery charm.
Design in Cricut Design Space
Start by opening Cricut Design Space. This is the place where you can play with fonts, patterns, and images. You can use shapes, upload your own artwork, or create a monogram in design space for a personal touch. If you want your keychains to look neat and fit well, pay attention to the size.
Here’s a quick guide for sizing your designs:
| Design Element | Width (W) | Height (H) |
|---|---|---|
| Keychain Size | 2.95 | 2.95 |
| Monogram Size | 2.466 | 1.88 |
Pick bold fonts for names or initials. Simple patterns work best for beginners. If you want to add a background, try a brush stroke or a layered look. Always check your measurements before you cut with your cricut machine. This helps you avoid wasted vinyl and keeps your project looking sharp.
Tip: Use the “Attach” feature in Design Space to keep your letters and shapes together when you cut.
Cutting Vinyl and Engraving Acrylic
Once your design is ready, it’s time to cut with your cricut machine. Place your vinyl on the mat, load it into the cricut, and let the machine do the work. If you use Smart Vinyl, you don’t need a mat, which makes things even easier.
If you want to engrave acrylic keychains, switch to the engraving tool. Make sure your acrylic blank is secure on the mat. Remove any protective film from both sides before you start. This helps the engraving come out clean.
Sometimes, intricate designs don’t cut cleanly. Here’s what you can do:
- Make sure your work area is clean and flat. This keeps the acrylic sheet stable.
- Use sharp tools like a laser cutter or rotary tool for detailed cuts.
- Always remove the protective film from both sides of the acrylic before cutting.
If you have trouble transferring your designs to your diy keychain, use a fresh piece of transfer tape and press firmly. Peel slowly to avoid tearing small pieces.
Using Printable Vinyl and Resin
Want to add photos or colorful artwork? Try printable vinyl. Print your image, then cut it out with your cricut. This is perfect for custom gifts or business logos.
If you want your keychains to last longer and look extra shiny, add a layer of resin. Resin makes your keychains more durable and impact-resistant. It gives a glossy, three-dimensional look that stands out. Resin keychains can last over three years with care, while acrylic keychains usually last one to two years. The hard surface of resin resists scratches, chips, and cracks. Epoxy resin keychains are less likely to break when dropped, thanks to their flexibility.
When you use resin, remember to let it cure. Most epoxy brands need between 24 and 72 hours to fully harden. The time depends on the brand, temperature, and humidity. Be patient—rushing this step can ruin the finish.
Note: Always wear gloves and work in a well-ventilated space when handling resin.
With these steps, you know how to make acrylic keychains that look professional and last. This easy cricut tutorial helps you design, cut, and finish your diy project with confidence.
Cricut DIY Keychains: Assembly and Customization
Applying Vinyl and Transfer Tape
You have your design ready. Now, let’s get that vinyl onto your acrylic keychains. Start by laying the acrylic flat. Spray a thin film of water on the surface. This trick gives you time to shift the tape and line up your design. Use a squeegee or a credit card to push the water out from the center to the edges. This helps you avoid bubbles.
Measure and mark both the acrylic and the vinyl graphic. Accurate alignment makes your diy keychains look professional. If you want the vinyl to stick better, use a hairdryer to warm it up. The heat makes the vinyl flexible and helps it hug the surface. Some crafters like heat transfer vinyl (HTV) for acrylic keychains. Remove the protective cover first, then press the HTV for five seconds at 300 degrees. Cover both sides with parchment paper. Let the acrylic cool under a flat, heavy object.
For transfer tape, you can try StyleTechCraft Opal or Crafty Glossy Vinyl. Regular transfer tape works well too. Always peel the tape slowly to keep your design in place.
Adding Glitter and Resin
Want your diy keychains to sparkle? Add glitter before you pour resin. Sprinkle glitter onto the acrylic blank. Pour a thin layer of UV resin over the top. Use a UV light to cure the resin. This step gives your keychains a glossy, durable finish.
If you use epoxy resin, let it cure for at least 24 hours. Resin protects your design and makes the colors pop. You can mix different glitters or even add small charms inside the resin for a custom look.
Tip: Wear gloves and work in a well-ventilated area when using resin. Safety first!
Attaching Keychain Hardware
Now, you need to finish your diy keychains by attaching hardware to your finished diy keychains. Grab a pair of pliers. Open the jump ring. Slide it through the hole in your acrylic blank and then through the keychain ring. Close the jump ring tightly. For extra security, add a drop of glue before you close it.
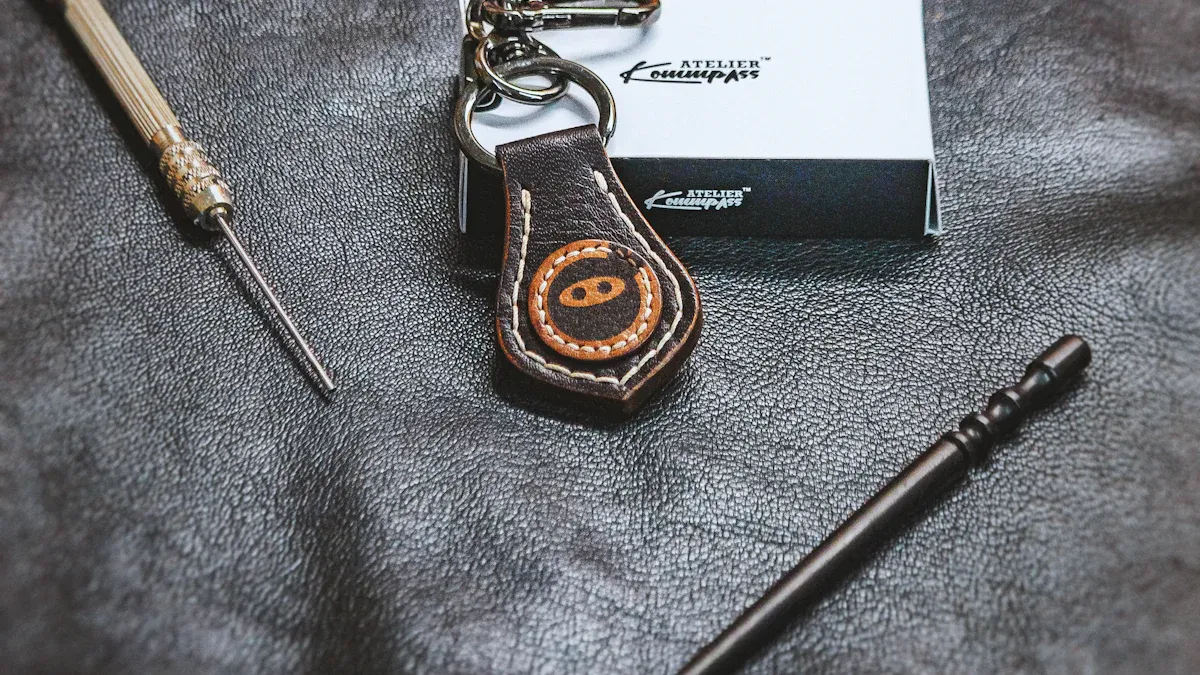
You can personalize your keychains with special names, family nicknames, or unique color combos. Try a simple monogram or go bold with phrases. Mix and match colors and words to make your keychains stand out.
Want a creative touch? Add a tassel, charm, or bead to your keychain ring. Your cricut lets you make endless combinations!
Tips and Troubleshooting for Acrylic Keychains
Common Mistakes to Avoid
You might run into a few bumps when making keychains. One common mistake is skipping the cleaning step. Dust and fingerprints can ruin the look of your acrylic keychains. Try using a lightly damp microfiber cloth with a bit of dish soap. This method removes oils and grime well, but don’t soak the blank. Here’s a quick guide:
| Cleaning Method | Description | Pros | Cons | Meilleur pour |
|---|---|---|---|---|
| Damp Wiping (Microfiber + Mild Solution) | Lightly moistened cloth with diluted dish soap. | Removes oils and light grime effectively. | Risk of water seepage into joints or seams if over-wet. | PVC keychains, acrylic charms, non-electronic plush. |
Another mistake is rushing the resin step. If you don’t mix resin well, it can stay sticky. Always mix slowly and let bubbles rise before pouring. If you see bubbles, use a little heat to pop them. If the resin still feels tacky, sand it lightly and add a thin layer to seal.
Tips for Clean Cuts and Transfers
Getting crisp cuts with your cricut makes your diy keychains look sharp. Use the right blade for the acrylic thickness. For thin sheets (.007), use a fine point blade and the acetate setting with two passes. For thicker sheets (.020), switch to a knife blade and the basswood setting with up to 14 passes. Place thin acrylic on a green or purple mat. For thick sheets, use a purple mat and secure the edges with masking tape.
Tip: The knife blade cuts through acrylic smoothly and gives a flawless finish.
When you transfer vinyl, spray a little water on the blank. This trick lets you move the design before it sticks. Use a squeegee to push out bubbles. Peel the tape slowly to keep your design in place.
Creative Ideas for DIY Keychains
Want your diy keychains to stand out? Try vintage-style keychains with gold touches or duct tape. Many crafters love using Glossy Accents medium for a faux resin domed look. You can add tassels, beads, or charms for extra flair. These ideas aren’t hard, but they do need patience. Mix up colors and materials to make your keychains unique. The diy community loves seeing new twists, so don’t be afraid to experiment!
You now know how to make acrylic keychains with your cricut. Try different materials and methods to create diy keychains that show your style. Share your finished keychains or questions in the comments. If you want to sell your keychains, use social media, join craft fairs, and create engaging content to reach more people. You can give keychains as gifts, keep them for yourself, or start a small business. The diy world is full of possibilities!
FAQ
How do you keep vinyl from peeling off acrylic keychains?
Clean the acrylic with rubbing alcohol before applying vinyl. Press the vinyl down firmly. Add a layer of clear sealant or resin for extra protection. This helps your design last longer.
Can you use heat transfer vinyl (HTV) on acrylic?
Yes, you can! Place the HTV on the acrylic, cover with parchment paper, and press for a few seconds with a heat press or iron. Let it cool under a heavy object for best results.
What Cricut blade works best for cutting acrylic?
Use the knife blade for thick acrylic sheets. For thin acrylic, the fine-point blade works well. Always check your Cricut’s recommended settings for the best cut.
How do you fix bubbles under vinyl on acrylic keychains?
Use a squeegee or credit card to push bubbles out toward the edges. If you see small bubbles, gently lift the vinyl and smooth it back down. Patience helps!
Can you make double-sided acrylic keychains?
Absolutely! Decorate both sides with vinyl or printable images. Seal each side with resin or a clear coat. Double-sided designs look great and make your keychains stand out. ✨
See Also
Debunking Acrylic Tray Myths with Simple DIY Solutions
10 Innovative Ideas for Decorating Small Acrylic Trays
Understanding Laser Cutting and Engraving in Acrylic Items
Defining Acrylic Trophies: Features and Their Uses Explained

