
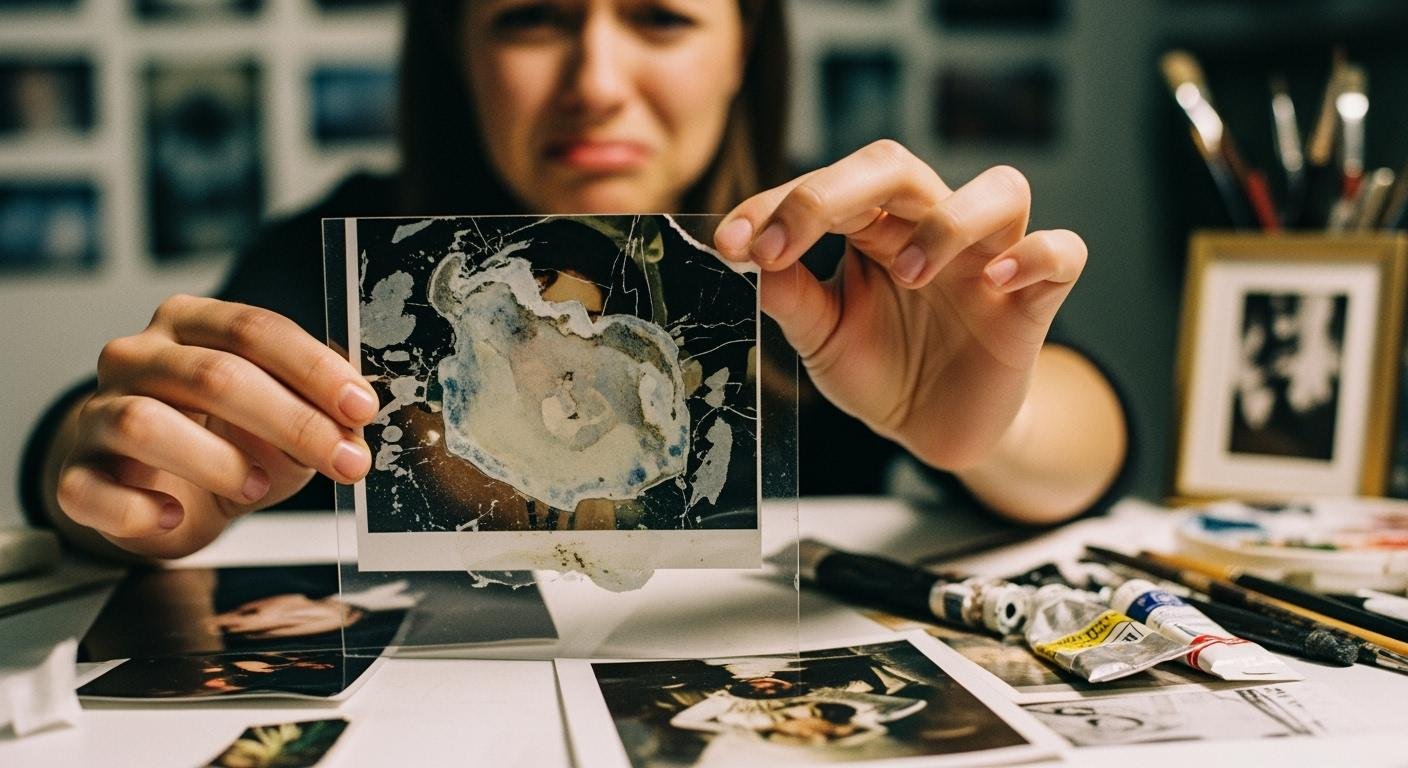
Do your photos stick to the acrylic in your frame? You are not alone. This common issue is different from a professional custom acrylic photo stick, where the image is permanently bonded. Humidity, ink types, and direct contact with the acrylic surface are the main culprits.
Note: You can learn to create removable photo prints for your display. This simple practice helps you avoid the problem of having acrylic photo sticks in the first place.
Why Do Photos Stick to Acrylic?
You might wonder how a simple photo frame can cause so much trouble. The answer involves a combination of your environment, your photo’s materials, and simple physics. Understanding these factors is the first step to protecting your memories.
The Humidity and Moisture Factor
Humidity is the primary enemy of framed photos. Your photo has layers, including a gelatin binder. Moisture in the air causes this gelatin layer to swell and become tacky. This process, known as ‘blocking’, essentially turns your photo’s surface into a weak adhesive.
Keep Humidity in Check! 📝 For best results, you should maintain a humidity level between 40-50% in your display area. Levels above 60% not only increase sticking risk but also encourage mold growth.
Heat and constant pressure against the acrylic can worsen this effect, creating a stronger bond over time.
Ink Emulsion and Paper Types
Not all photos are created equal. The type of paper and ink you use plays a significant role.
- Glossy and semi-gloss papers have smoother surfaces that make more complete contact with the acrylic.
- Inkjet prints, especially from home printers, often have inks that sit on top of the paper. This ink layer can become a soft, adhesive substance when exposed to humidity.
These materials are more likely to form a bond with the smooth acrylic surface when moisture is present.
Direct Contact vs. Face Mounting
Your photos stick because they are pressed directly against the acrylic. This constant contact, combined with humidity, creates the perfect conditions for sticking. This is very different from professional acrylic photo sticks. A professional face mount permanently bonds a print to acrylic on purpose. This process uses a specialized, optically clear adhesive backing to create a seamless, high-end display piece. The problem you face is an accidental, damaging version of this, which is why prevention is so important.
How to Prevent Photos from Sticking
Prevention is always better than a cure. You can take simple steps to protect your memories before they ever have a chance to get damaged. Following these practices will help you create beautiful, long-lasting displays.
Creating Removable Photo Prints
The best way to stop your photos from sticking is to create a small air gap between the photo and the acrylic. This simple separation is the key to creating removable photo prints. You can achieve this in two main ways:
- Use a Mat: A mat board provides a natural border and keeps the photo surface from touching the acrylic.
- Use Spacers: Products like EconoSpace are thin plastic strips with a self-adhesive backing. You can stick them to the edge of the acrylic to create a uniform gap.
Patience is Key! ⏳ Always let your prints cure for at least 24 hours before framing. Inks, especially on resin-coated papers, release gases as they dry. Trapping them too early can cause a hazy film to form on the acrylic and makes sticking more likely. For prints with heavy ink, wait up to a day and a half.
This curing time allows moisture and solvents in the ink to evaporate completely, reducing the risk of your print becoming an accidental adhesive.
Choose Archival Materials
The quality of your materials matters. To avoid a situation that looks like a bad custom acrylic photo stick, you should choose materials designed for preservation. Start with your print. Pigment-based inks are more stable than dye-based inks and resist fading and moisture damage.
For framing, use archival, acid-free mat boards. These boards are made from materials like 100% cotton rag or purified wood pulp. They are free of acids and lignin, which can cause yellowing and decay over time. These high-quality materials create a safe, stable environment for your photograph, unlike cheap paper products that can cause chemical reactions and lead to permanent acrylic photo sticks.
Control Your Display Environment
Your photo’s surroundings play a huge role. Direct sunlight is a major enemy because its UV rays can accelerate fading and heat up the frame, worsening the sticking problem. If you must place a frame in a bright room, choose UV-filtering acrylic for your display.
| Acrylic Type | UV Protection | Meilleur pour |
|---|---|---|
| Standard Acrylic | Minimal | Basic dust protection in low-light areas. |
| UV-Filter Acrylic | Up to 98% | Preserving valuable photos by blocking UV rays. |
Even with UV protection, you should avoid placing photos in direct sunlight. A controlled environment is the final step to ensure your removable photo prints stay safe and your photos stick to memories, not to the acrylic.
How to Fix a Stuck Photo
Warning: Proceed with Extreme Caution! ⚠️ The following methods carry a significant risk of damaging your photograph permanently. You should only attempt these steps on photos that are not valuable or can be reprinted. For any irreplaceable or precious photo, your safest option is to consult a professional photo restorer.
If you decide to proceed, work slowly and patiently. Stop immediately if you see any signs of damage.
Step 1: The Cold Treatment
Cold can sometimes help you separate a photo from acrylic. The cold temperature causes both the photo paper and the acrylic to contract slightly. They may shrink at different rates. This change can help weaken the bond between the two surfaces.
- Place the entire frame, with the photo still inside, into a waterproof plastic bag.
- Seal the bag tightly to protect it from moisture.
- Put the sealed frame in a freezer for about one hour. Do not leave it in for too long.
- Remove the frame from the freezer. Try to gently peel a corner of the photo while it is still cold. If it begins to lift, you can proceed to the next step. If it remains stuck, do not force it.
Step 2: The Gentle Separation
If the cold treatment loosened an edge, you can try to separate the rest of the photo. This step requires a steady hand and a lot of patience. Heat can help soften the accidental adhesive bond, but too much heat will destroy the print.
You can try using a hairdryer and waxed dental floss.
- Set a hairdryer to a low or warm setting. Never use high heat.
- Hold the hairdryer several inches away from the acrylic. Sweep it back and forth across the surface for 15-20 seconds to warm the area evenly.
- Gently lift a corner of the photo.
- Slide a piece of waxed dental floss under the lifted corner.
- Hold the floss taut and gently pull it across, underneath the photo. Keep the floss as flat as possible against the acrylic to avoid tearing the paper.
- If you feel resistance, stop. Reheat the area with the hairdryer for a few seconds before continuing.
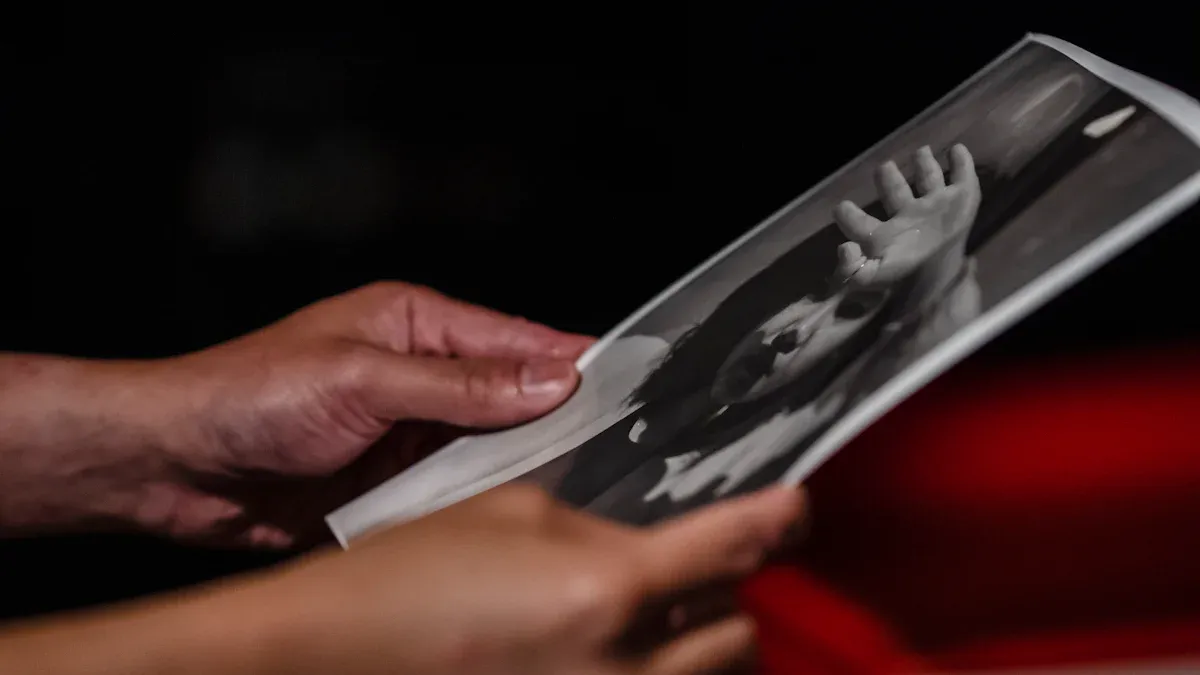
As you work, watch for signs of irreversible damage. You should stop immediately if you see:
- Peeling or Flaking: The top image layer starts to separate from the paper base.
- Bubbles or Blisters: Pockets of air form under the image surface.
- Color Lifting: The ink itself is peeling off and staying on the acrylic.
After you successfully remove the photo, it may be curled. You can place it between the pages of a heavy book to help it flatten.
Step 3: When to Call a Professional
Sometimes, a DIY fix is not the right answer. You should always contact a professional photo conservator or restorer if your photo meets certain criteria. These experts have specialized tools and solvents to dissolve the adhesive without destroying the image. This is especially true for older prints where the problem of photos stick is common.
Consider calling a professional when:
- The photograph has high sentimental, monetary, or historical value.
- The photograph is an original, and you do not have a negative or digital copy.
- The photo is very old or fragile.
- You see any signs of damage (like peeling or bubbling) during your own attempt.
A professional can safely handle these situations. They understand how to deal with delicate emulsions and avoid the damage that creates permanent acrylic photo sticks. Their expertise is your best insurance policy for protecting a memory you cannot replace.
You can easily prevent photos from sticking to acrylic. The most important step is using a mat or spacer. This simple addition creates removable photo prints by adding a vital air gap. You should also select archival materials and control humidity below 65% to avoid damage. These practices help you make safe, removable photo prints. Your cherished memories will stay beautiful and protected for years to come. 📸
FAQ
Why is my photo sticking to the frame glass?
Your photo sticks because of moisture. Humidity makes the photo’s surface tacky. Direct pressure from the acrylic then creates a bond. This problem is worse with glossy papers and in humid rooms.
What is the best way to stop photos from sticking?
You should create an air gap. Use a mat board or frame spacers. This simple separation keeps the photo’s surface from touching the acrylic. It is the most effective way to prevent sticking.
Is this the same as a professional acrylic print?
No, it is not. Professionals use a special, clear adhesive to permanently bond a photo to acrylic. This creates a high-end look. Your problem is an accidental, damaging bond you want to avoid.
Can I fix a very old or valuable stuck photo myself?
You should not try to fix a valuable photo. The risk of permanent damage is very high.
Expert Tip 🧑🔧 Always contact a professional photo restorer for any irreplaceable pictures. They have the right tools and skills for safe removal.
See Also
Acrylic Sign Holders: Understanding Their Definition, Features, and Practical Uses
Debunking Acrylic Tray Myths: Simple DIY Projects for Creative Solutions
Impact-Modified Acrylic: Exploring Its Definition, Key Features, and Applications
Edge Bonding in Acrylic: Definition, Manufacturing Process, and Diverse Applications
Acrylic Brochure Holders: Defining Their Structure, Purpose, and Various Uses

