

You want to create a beautiful piece of custom art. The idea of making personalized acrylic photo blocks might seem complex. However, you can easily turn a favorite photo into a stunning display. This step-by-step acrylic printing guide simplifies the entire process for you. You are joining a popular trend. The U.S. personalized gift market is projected to reach over $15 billion by 2032.
Your cherished memories deserve a modern, elegant showcase. Let’s create something beautiful together.
What Are Personalized Acrylic Photo Blocks?
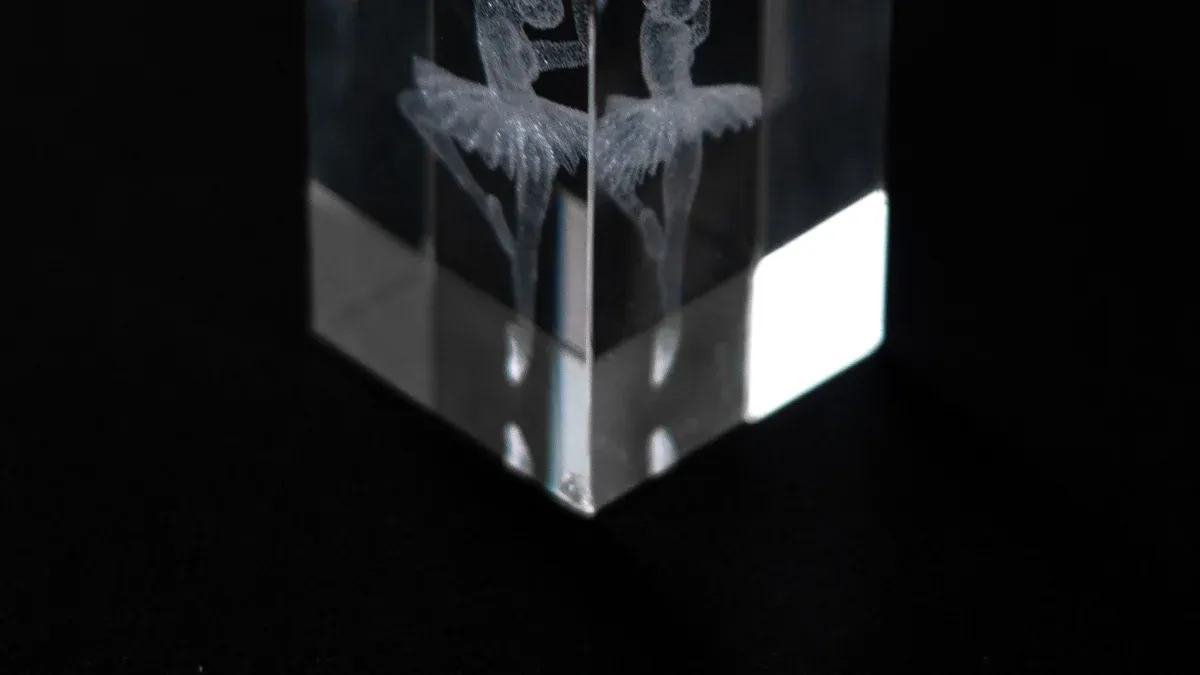
Personalized acrylic photo blocks are modern, self-standing displays for your favorite memories. Think of them as thick, substantial pieces of art. We print your photo directly onto a solid block of high-quality acrylic, also known as Plexiglass or Lucite. This process creates a stunning 3D effect that makes your image pop. These blocks are a precious way to celebrate milestones. You can choose sizes from a small 2×2 inch cube for your desk to a larger statement piece for a mantel.
Acrylic Blocks vs. Acrylic Prints
You might wonder about the difference between a block and a print. The main distinction is thickness and how you display them. An acrylic block is thick enough to stand on its own, making it perfect for shelves, desks, or nightstands. Custom acrylic prints, on the other hand, are thinner and function like acrylic wall art, designed to be mounted.
The material itself offers superior visual quality. The acrylic printing techniques used today ensure your image is vibrant and sharp. Unlike regular glass, which can have a green tint, clear acrylic allows for true-to-life color.
Tip: See how acrylic compares to the glass in a standard frame. This difference is why your photo looks so much better in a block.
| Feature | Clear Acrylic | Regular Glass |
|---|---|---|
| Color Tint | None | Green Tint |
| Light Absorption | Virtually none | ~2% or more |
Why They Make a Great Gift
An acrylic block is more than just a gift; it is a personal statement. This unique form of photo printing creates a lasting emotional connection. It shows you took the time to create something special, making the recipient feel truly valued and understood. Giving a personalized gift like this often becomes a cherished keepsake, a tangible reminder of a happy memory.
This makes them perfect for many occasions. People love giving and receiving them for:
- Weddings and Anniversaries 💍
- Birthdays
- Mother’s Day and Father’s Day
- Graduation 🎓
- Celebrating a new baby
The acrylic photo printing process turns a simple photo into a durable, modern piece of decor that strengthens your bond with the person receiving it.
Step 1: Choose the Perfect Photo
The foundation of a stunning acrylic block is the image you select. Your choice of photo directly impacts the final product’s beauty and clarity. This step guides you in picking an image that will transform into a masterpiece.
The Importance of High-Resolution
Resolution is the most critical factor for excellent print quality. A high-resolution image contains more detail. This detail ensures your final print is sharp and clear, not blurry or pixelated.
Image resolution is measured in pixels, while printing resolution uses DPI (dots per inch). For the best photo printing results, you should use an image with at least 300 DPI at your desired print size. For example, an 8×10 inch block requires a file that is at least 2400 x 3000 pixels. While some services can work with images at 150 DPI, a higher number is always better. Some professional photo printing services even recommend 720 DPI for the highest quality output.
Quick Tip: Check your photo’s properties on a computer to see its dimensions in pixels. A larger number means higher resolution and a better potential print.
Best Photo Styles for Blocks
Certain types of photographs truly shine in an acrylic block format. The thickness of the acrylic adds depth, making some images pop more than others. Consider these styles for the best effect:
- Vibrant and Colorful Images: Bold colors look incredible behind polished acrylic. Sunsets, floral shots, and travel photos with bright scenery are excellent choices.
- High-Contrast Portraits: Black and white portraits or images with strong light and shadow create a dramatic, artistic look.
- Close-Up Shots: Macro photos of flowers, insects, or textures gain a stunning 3D effect.
- Simple, Clean Backgrounds: A photo with a simple background puts all the focus on your subject. This creates a modern and elegant display.
Photos to Avoid for Best Results
Not every picture is a good fit for this medium. You should avoid certain types of images to prevent disappointment. Low-quality source files will result in a low-quality product.
Here are some images to steer clear of:
- Screenshots or Social Media Photos: These are usually compressed and have low resolution. They will likely look pixelated when enlarged.
- Blurry or Out-of-Focus Images: The photo printing process cannot fix a blurry original image. The blur will be even more noticeable on the final block.
- Very Dark or Hazy Photos: Images taken in low light can appear grainy. If your favorite photo is a bit dark, you should use a color correction service if the printing company offers one. This can significantly improve the final look of such images.
Choosing the right image is the most important part of the process. A great starting image ensures you will love your finished acrylic block.
Step 2: Select Your Block’s Specifications
After you pick the perfect image, your next step is to choose the physical details of your block. The size, thickness, and shape you select will define its presence in your space. These choices help you match the block to your home’s decor and the photo’s style.
Picking the Right Size and Shape
You should first think about where you will display your block. This decision helps you pick the right size. A small cube fits perfectly on a crowded desk, while a larger piece makes a statement on a mantel or bookshelf.
Many companies offer a wide range of standard sizes.
- A mini 2×2 inch block adds a personal touch to a small workspace.
- A larger 8×10 inch block is a popular choice that commands attention.
Other common sizes offer different display possibilities. You can choose one that best fits your space and your image.
| Common Size (inches) | Best For |
|---|---|
| 4×4 or 5×7 | Nightstands, side tables, and office desks. |
| 4×6 | A classic photo size, great for group displays. |
| 4×12 or 4×16 | Panoramic shots like landscapes or cityscapes. |
The shape of your photo also matters. A square block works well for Instagram photos, while a rectangular block is ideal for traditional portraits and landscapes.
Understanding Block Thickness
The thickness of an acrylic block is its most defining feature. It is what allows the block to stand on its own without a frame or support. Most high-quality, freestanding blocks are about 1 inch thick. Some may be slightly thinner, around 0.94 inches, but they still offer excellent stability.
This substantial thickness does more than just provide support. It creates a stunning 3D effect. The light refracts through the polished acrylic, making your image appear deep and vibrant. It looks as if your picture is floating inside a crystal-clear solid. Many premium blocks feature diamond-polished edges, which adds to the brilliant, gem-like quality.
Pro Tip: The one-inch thickness gives the block a feeling of substance and luxury. This is a key difference from thinner acrylic wall art, which is designed for hanging.
Standard vs. Custom Shapes
Most people choose a standard square or rectangle for their block. These classic shapes are versatile and fit well with any decor. They put all the focus on your image.
However, you can also choose a custom shape for a more unique display. Going beyond the standard rectangle can turn your photo into a truly creative piece of art. Many services now offer exciting custom shapes. These options can make your personalized acrylic photo blocks stand out.
Some popular custom shapes include:
- Circles
- Hearts ❤️
- Hexagons
- Diamonds
- Crescents 🌙
A custom shape can add another layer of meaning to your gift. For example, a heart-shaped block is a perfect choice for an anniversary or Valentine’s Day gift. Choosing a shape that complements your image can make your final product even more special.
Step 3: The Online Customization Process
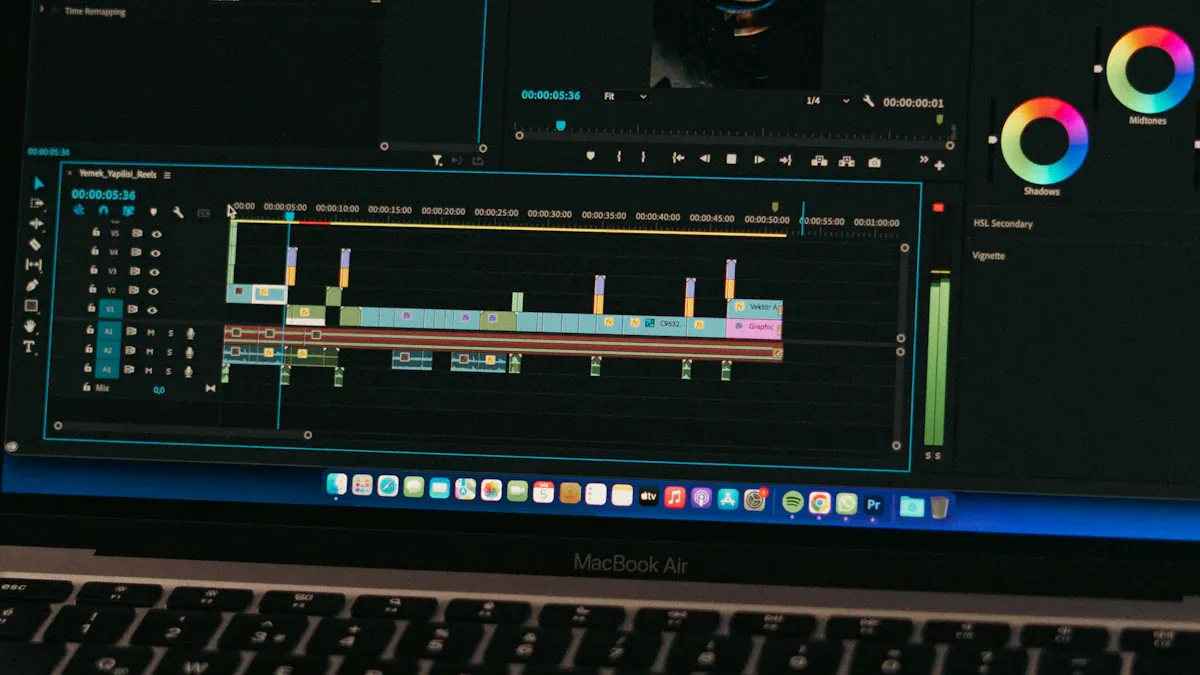
This is where your creative vision comes to life. Modern online ordering tools make this part of the step-by-step acrylic printing guide fun and easy, even for beginners. Systems used by the best acrylic printing services are designed to be user-friendly. You do not need any special software. You will do everything right in your web browser.
Uploading Your Image
You begin by uploading your chosen photo. Most services offer a simple drag-and-drop interface. You can also select files directly from your computer, Google Drive, or Dropbox. For the best print quality, you should always upload the original, high-resolution file.
Different companies accept various file formats. It is a good idea to check which ones your chosen service prefers.
| Service | Accepted File Formats |
|---|---|
| WHCC | JPEG |
| Contrado | TIFF (for detailed files), JPEG (for simple files) |
| Big Acrylic | PNG, JPEG, PDF, EPS, TIFF |
Using Preview and Adjustment Tools
Once your image is uploaded, you can use a suite of powerful tools. These features help you perfect your photographs before printing. You can easily crop your image to fit the block’s dimensions or adjust the brightness and contrast. Many services offer advanced acrylic printing techniques powered by AI, such as background removal or automatic photo enhancement. These tools help you achieve professional photo printing results with just a few clicks.
Preview is Key: Always use the instant preview tool. It shows you exactly how your image will look on the final block. This step helps you avoid any surprises.
Adding Optional Text or Graphics
Many people who buy acrylic prints online want to add a personal touch. You can make your custom acrylic prints even more special by adding text or simple graphics. This is a great way to commemorate an event or add a meaningful message. The online editor lets you choose from various fonts and colors to match your image.
Consider adding:
- A special date 📅
- Names or initials
- A short quote or message ❤️
- A simple graphic like a heart or star
This final step in the photo printing process turns your beautiful image into a unique and personal keepsake.
Step 4: Finalize Your Order and Care
You are now at the final stage of your creative journey. This last step ensures your order is perfect and helps you keep your block looking beautiful for years to come. This part of the photo printing process is simple and straightforward.
Reviewing Your Order Details
Before you complete your purchase, you must carefully review your order. Take a moment to double-check every detail in your shopping cart.
Important: This is your last chance to catch any mistakes. A quick review now prevents disappointment later.
Look over these key items:
- The Preview: Does the image crop look correct?
- The Specifications: Did you select the right size and shape?
- The Text: Are there any typos in your custom message?
- The Quantity: Did you order the correct number of blocks?
Production and Shipping Times
You should understand how long it will take for your block to arrive. The total time includes both production and shipping. Production is the time the company needs to create your custom item.
- Some services, like Printway.io, have an average production time of 1–3 working days.
- Other companies, such as WHCC, may take 4–6 days for acrylic blocks.
After production, your order ships. Most companies require an extra 1-2 business days for processing before shipping.
| Shipping Type | Destination | Estimated Timeframe |
|---|---|---|
| Standard | U.S. | 2–5 Business Days |
| Expedited | U.S. | 1–2 Business Days |
| International | Varies | 7–21 Business Days |
How to Clean Your Acrylic Block
Your new acrylic block is durable, but you need to clean it correctly to avoid scratches. Proper care will keep it looking crystal clear.
First, use compressed air or gently blow away any loose dust. Wiping a dusty surface can cause scratches. For cleaning, you should use a soft, lint-free microfiber cloth. Never use paper towels, as their fibers can scratch the acrylic.
For a safe cleaning solution, mix a few drops of mild dish soap with distilled water. Lightly dampen your microfiber cloth with the solution and gently wipe the block. Avoid using cleaners that contain ammonia, alcohol, or acetone, like many window sprays. These harsh chemicals can cause the acrylic to crack or become cloudy over time.
You now have the steps to create beautiful personalized acrylic photo blocks. You can easily turn a favorite photo into a modern, durable keepsake. The process is simple:
- Select your image.
- Upload and customize it online.
- Place your order.
Your cherished memory becomes a stunning piece of art that lasts a lifetime.
Ready to transform your memory into a brilliant display? Start creating your personalized acrylic photo blocks today!
FAQ
Can I use a photo from my phone?
Yes, you can use a phone photo. Modern smartphones take high-resolution pictures suitable for printing. You should always upload the original file, not a version from social media. This ensures your block has the best possible clarity and detail.
How long will my acrylic block last?
Your acrylic block is very durable. The material resists shattering and UV light. The image is printed directly onto the acrylic, so it will not fade or peel. With proper care, your block can last for many decades without losing its vibrant color.
What if I am not happy with my order?
Customer satisfaction is very important. The best acrylic printing services often have a satisfaction guarantee. You should contact customer service if you have an issue. They can help you with reprints or other solutions to ensure you love your final product.
Is the photo printing on the front or back?
Your photo is printed on the back of the clear acrylic block. This technique is called second-surface printing. It protects the image from scratches and damage. Viewing the photo through the thick acrylic creates the beautiful depth and vibrant 3D effect.
See Also
Exploring Acrylic Blocks: Definition, Key Features, and Practical Uses
Elevate Your Decor with Acrylic Trays and Customizable Inserts
Compact Acrylic Trays: Your Go-To for Versatile Storage Needs
Organize with Style: Large Acrylic Trays for Tabletop Elegance

