

You found the perfect artwork. Now you need the perfect frame. Your journey to choosing frame styles begins with your artwork itself. The first step is to get precise measurements. Note the artwork’s length, width, depth, and weight. These details guide every decision. An improper frame can damage your artwork. Acids from a cheap frame can make your artwork yellow and brittle.
A great frame protects your artwork. A poor frame choice can ruin it. Your goal is a frame that both displays and secures your artwork for years. This makes the right frame essential.
How to Choose the Best Frame Style

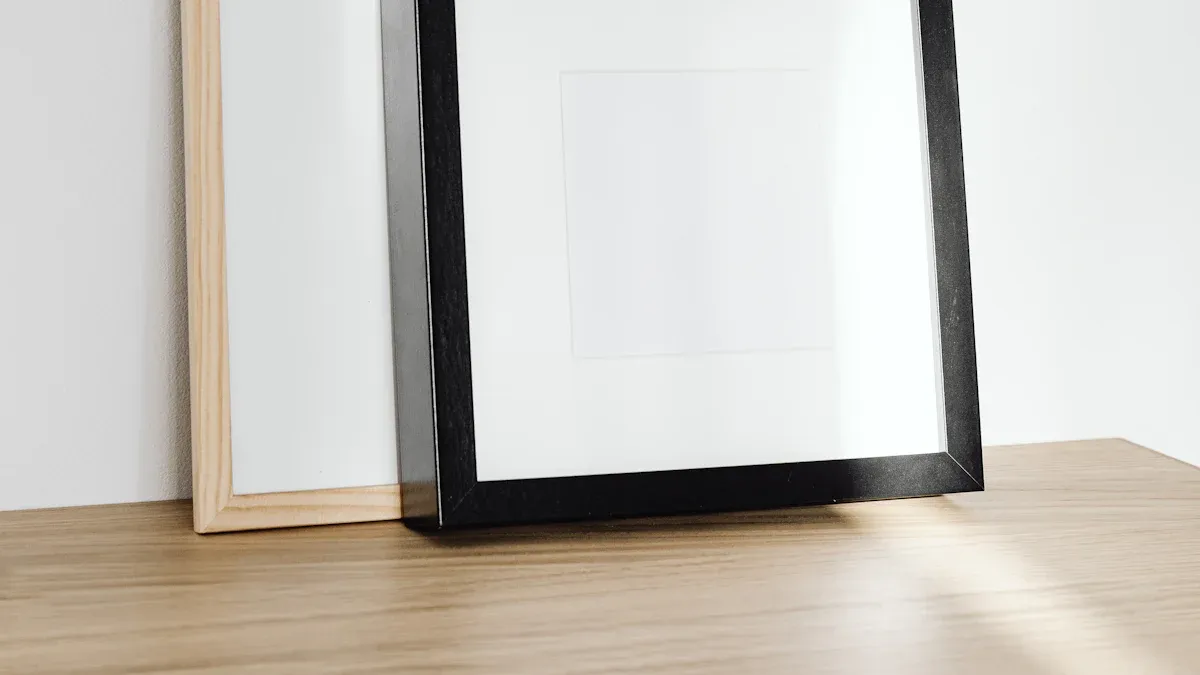
Choosing the right frame style is a creative process. You want a frame that elevates your artwork, not overpowers it. A great place to start is with floater frames. Floater frames are designed specifically for canvases. The artwork sits inside the frame, creating a gap that makes it appear to “float.” This modern style gives your artwork a professional, gallery-quality look. A float frame is an excellent choice for framing artwork on canvas.
Match the Frame to Your Art
You should match the frame to the mood of your artwork. A simple, thin frame works well for minimalist art. A bolder frame can turn your artwork into a major statement piece. The color palette of your artwork also guides your decision when choosing frame styles and materials. The right frame enhances the colors within the piece.
- Dark Artwork: A black or deep brown frame creates a cohesive look.
- Bright Artwork: A white or light wood frame lets vibrant colors pop.
- Warm-Toned Art: Natural wood or walnut frames enhance reds and golds.
- Cool-Toned Art: Black, white, or silver frames add sophistication to blues and greens.
Tip: When framing artwork on paper, you have many options. When choosing frame styles and materials for paper, consider if you want the frame to contrast or blend with the artwork.
Consider Your Room’s Aesthetic
Your room’s decor plays a big role in choosing a frame. You want the frame to feel like a natural part of the space. For an industrial room, a distressed wood frame adds character. For modern rooms, a simple black or white float frame is a perfect fit. If your decor is mixed, you can create a unified look. Choose a frame with a consistent color or material to tie everything together. This helps you choose the best frame for a cohesive feel.
Thin vs. Wide Frame Designs
The width of the frame changes how you see the artwork. A thin frame makes the artwork the main focus. It almost becomes invisible, letting the details of your art shine. This is an excellent strategy when choosing frame for minimalist pieces.
In contrast, a wide frame makes a strong statement. It adds substance and presence, especially for large art pieces over a sofa or mantel. Historically, ornate, wide frames were used to show status. Today, a wide frame can be a decorative element that complements traditional decor. Choosing the right frame depends on the visual impact you want to create. A float frame can come in both thin and wide profiles, giving you flexibility. Floater frames offer a versatile solution. You can choose a frame that is either subtle or bold. The design of floater frames makes them adaptable. Many floater frames work well in any setting.
Sizing Your Frame and Float Gap
Proper sizing is the technical heart of framing. You need exact measurements to create a professional look. This step ensures your frame fits perfectly and supports your artwork safely. Getting the size right prevents costly mistakes and protects your art.
Measure Your Artwork’s Dimensions
Accurate measurements are your foundation. Before you choose a frame, you must know the precise size of your artwork. This process is called measuring artwork for framing. You will need a few tools to get started.
- Essential Tools:
- Metal measuring tape
- Pencil and notepad
- Calculator
To get the most accurate numbers, follow these steps. Lay your artwork on a clean, flat surface.
- Measure Height and Width: Use your measuring tape to find the height (top to bottom) and width (left to right). Measure the actual edges of the artwork.
- Measure Multiple Times: Canvases and paper can be slightly uneven. You should measure the width and height in at least two different spots. Use the largest measurement for your final size.
- Be Precise: Record your measurements to the nearest 1/16 inch. This precision ensures your frame will be a perfect fit.
- Measure Depth and Weight: The depth of your canvas is crucial for a float frame. It determines how the artwork sits inside the frame. You also need to weigh your artwork. The weight dictates the type of hardware you will need to hang the frame securely.
Safety First! ⚖️ The weight of your artwork is a critical safety factor. A heavy piece requires a strong frame and robust hardware. Always choose hardware rated for at least twice your artwork’s weight.
- Under 5 lbs: Simple wall anchors work well.
- 5-20 lbs: You need stronger toggle anchors.
- Over 20 lbs: You must anchor the frame directly into wall studs.
Determine the ‘Float’ Gap
The “float” gap is the space between your artwork and the inside edge of the frame. This gap creates a shadow, making your artwork appear to hover. This three-dimensional effect draws the viewer’s eye to your art. A consistent gap is key for a sophisticated, deliberate look.
The ideal gap size depends on the size of your artwork. A small gap on a large piece can get lost, while a large gap can overwhelm a small piece.
- Small Artwork (under 12 inches): A narrow gap of 1/8 to 1/4 inch keeps the frame from overpowering the art.
- Medium Artwork (12 to 36 inches): A standard gap of 1/4 to 3/8 inch creates a classic, balanced look.
- Large Artwork (over 36 inches): A wider gap of 1/2 inch or more maintains the floating illusion at a distance.
Choosing the right gap for your frame is an important artistic decision. This detail elevates the entire presentation of the artwork.
Calculate the Final Frame Size
You can calculate your final frame dimensions yourself. This knowledge empowers you for custom projects. Many online services calculate this for you, but understanding the formula helps you verify the numbers. The formula is simple. You add the float gap (twice) to your artwork’s dimensions.
Artwork Width + (Float Gap × 2) = Final Inner Frame Width
Artwork Height + (Float Gap × 2) = Final Inner Frame Height
For example, let’s say you have a canvas that is 24 inches wide. You decide on a 1/4 inch float gap.
24" + (0.25" × 2) = 24.5"
Your final inner frame dimension would be 24.5 inches. You would do the same calculation for the height. This ensures the frame is built with the perfect space around your artwork. While this section focuses on canvas, the principles of careful measurement are also vital when framing artwork on paper.
Choosing the Right Acrylic for Your Frame
The acrylic glazing is the shield for your artwork. It protects the piece from dust, moisture, and physical damage. You have several choices when selecting acrylic for your frame. Your decision impacts the artwork’s appearance and long-term preservation. Choosing the right acrylic is a key step in finding the right frame.
Standard vs. Premium Thickness
Acrylic thickness affects the durability and stability of your frame. Standard acrylic is suitable for smaller pieces. For a larger frame, you should consider a premium, thicker acrylic. A thicker sheet resists bowing and provides more structural integrity. This ensures your artwork remains flat and secure over time. The size of your artwork guides this choice.
UV-Protective vs. Standard Acrylic
Sunlight and even indoor lighting emit harmful ultraviolet (UV) rays. These rays cause colors to fade and paper to yellow and become brittle. This damage is irreversible. For true preservation, you need archival materials. UV-protective acrylic is one of the most important archival framing materials you can choose. It acts like sunscreen for your art.
Did you know? 🤔 Certain types of artwork are extremely vulnerable to light damage. Your choice of acrylic directly impacts their lifespan and preservation.
| Artwork Type | Susceptibility to UV Light Damage |
|---|---|
| Watercolors & Gouache | Highly susceptible. Colors can fade or change hue significantly. |
| Photographs | Can suffer from severe fading, discoloration, and embrittlement. |
| Paper-based Art | Paper can yellow and become brittle. Inks and pigments can fade. |
| Textiles & Fabrics | Colors can fade and fibers can weaken. |
| Oil & Acrylic Paintings | More resilient, but pigments can still fade or yellow over time. |
Standard acrylic offers minimal uv protection. An archival acrylic, however, blocks most harmful rays. This is a critical element for the preservation of your piece.
| アクリルタイプ | UV Protection Level |
|---|---|
| Standard Clear Acrylic | ~66% |
| Standard Non-Glare Acrylic | ~66% |
| Conservation/Archival Clear | 99% |
Investing in archival, 99% UV-filtering acrylic is the best decision for long-term preservation. It is a non-negotiable feature for any valuable or sentimental artwork.
Anti-Glare and Non-Glare Options
Glare from windows or lights can create reflections on your acrylic. These reflections can be distracting and obscure the details of your artwork. Anti-glare acrylic has a matte finish that diffuses light. This minimizes reflections and allows you to view the art from almost any angle.
- クラリティ: Anti-glare options reduce distracting reflections.
- Color: The matte finish can cause a very slight softening of colors compared to glossy acrylic.
- Appearance: It provides a softer, more diffused look.
The choice depends on your room. If the artwork will hang in a brightly lit area, an anti-glare option is a great investment. You might be surprised to learn that the cost difference is often small. For just a few dollars more, you can significantly improve the viewing experience. Using the right archival framing materials ensures both protection and visibility. This helps you create the right frame for both your artwork and your space. This is an archival choice that balances viewing pleasure with excellent preservation.
Selecting Your Hardware
Hardware is the final touch that secures and completes your display. The right hardware ensures your artwork hangs safely and looks professional. You need to consider both the mounting style and the wall type.
Understanding Standoff Bolts
Standoff bolts are a modern way to mount acrylic frames. They create a three-dimensional effect, making your artwork appear to float off the wall. You screw the standoff barrels into the wall, place the acrylic over them, and secure it with caps. Several types are available.
- Stainless Steel: These are very durable and resist rust.
- Aluminum: A lightweight and sturdy choice for indoor use.
- Brass: This type offers a classic, elegant finish.
- アクリル: Clear standoffs enhance the floating look by keeping the focus on the art.
Installation Tip 🔩 To install standoffs, you must mark your spots, drill holes, and insert wall anchors first. This process provides stability, especially on drywall. Then, you can screw in the standoff barrels.
How to Choose a Frame Hardware Finish
Your hardware finish should complement your room’s decor. Popular options create different moods. Matte black offers a sleek, modern feel. Polished chrome is bright and reflective, perfect for minimalist spaces. Brass adds a touch of warmth and luxury.
You can mix metals in a room for a curated look. A good rule is to limit yourself to two or three finishes.
- Choose a dominant metal for the main elements.
- Select a secondary metal for smaller accents like light fixtures.
- Distribute the finishes evenly throughout the space for a cohesive flow.
For example, you can pair matte black light fixtures with satin brass hardware on your frame. This creates an elegant contrast.
Use the Correct Wall Anchors
You must use the correct wall anchors for your wall type and the weight of your artwork. Using the wrong anchor is a common and dangerous mistake.
- Drywall: For heavy pieces, you should use toggle bolts or molly bolts. These anchors expand behind the wall for a secure grip and can hold up to 50 pounds.
- Plaster or Brick: These walls require specific anchors. You may need to use a masonry drill bit to create a pilot hole for a plastic or lead anchor.
Always check the weight rating on the anchor packaging. Choose an anchor rated for at least double your artwork’s weight to ensure it hangs safely for years.
You now have the expert knowledge for choosing frame styles with confidence. A systematic approach ensures your artwork gets the presentation it deserves. Use this simple action plan to guide your decisions.
Your Framing Checklist ✅
- Match Style: Complement the artwork’s mood and your room’s decor.
- Measure Artwork: Note the height, width, depth, and weight.
- Determine Float Gap: Choose the right gap size for your artwork.
- Select Acrylic Type: Pick the right glazing for protection and clarity.
- Choose Hardware: Select the correct hardware for a secure display.
Following these steps makes choosing frame options simple and effective.
よくあるご質問
What is a float frame?
A float frame is designed for canvases. It creates a gap between the artwork and the frame’s edge. This space makes your canvas appear to “float” inside the frame. This style gives your art a modern, gallery-like presentation.
How do I clean the acrylic on my frame?
You should clean acrylic carefully to avoid scratches. Use a soft, microfiber cloth. You can dampen it with water or a special acrylic cleaner. Never use paper towels or glass cleaners like Windex, as they can damage the surface.
Can I put art on paper in a float frame?
Float frames are best for canvases or thick panels. Art on paper needs different support. You should use a traditional frame with a mat board. The mat separates the paper from the acrylic and provides a classic, finished look.
Why is my artwork’s weight so important?
Your artwork’s weight determines the hardware you need. A heavy piece requires strong anchors to prevent it from falling and getting damaged. Always choose hardware rated for at least double your art’s weight for maximum safety. ⚖️
See Also
Effortless Styling: Elevate Your Space with an Acrylic Coffee Table
Modern Home Decor: Chic Styling Ideas for Clear Acrylic Trays
Transform Your Home: 10 Creative Styling Ideas for Small Acrylic Trays
Unlock Style Potential: 10 Ways Acrylic Trays Redefine Your Space
DIY Decor: Busting Acrylic Tray Myths with Simple Creative Ideas

