
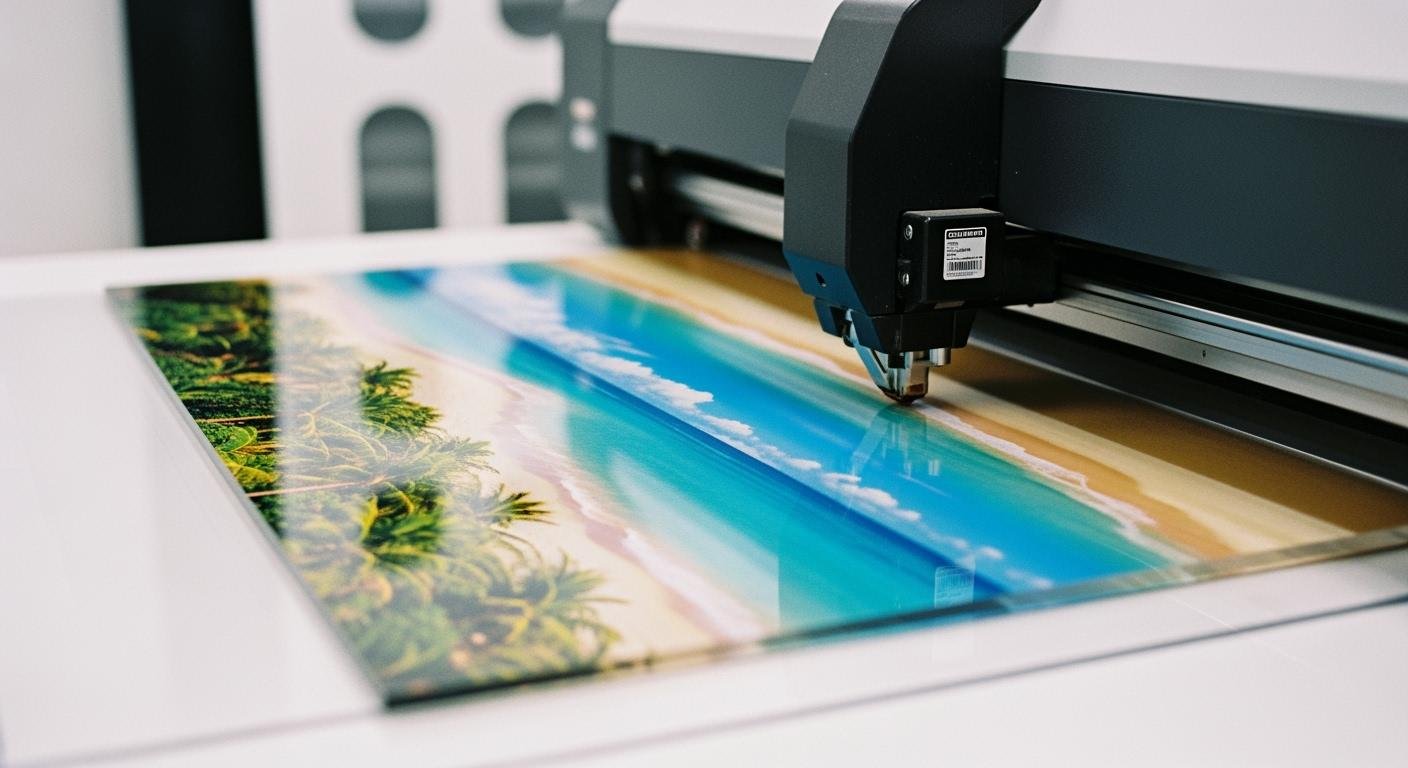
Yes, you can print on acrylic paper. The results produce stunning quality. The secret is a method called direct-to-acrylic printing. You can only print on acrylic using specialized UV printing.
Note: 📝 Common household printers cannot perform this type of
printing. Their inks will not stick to the smoothacrylicsurface, makingdirect-to-acrylic printingonacrylicimpossible with that equipment.
The demand for this beautiful printing on acrylic is growing fast. The UV curable acrylic market for printing shows this trend, making UV printing a key printing skill. This printing technique for acrylic is a popular printing choice for acrylic projects. This printing on acrylic is very effective.
Why you can’t print on acrylic paper with normal printers
You might wonder why your home printer cannot handle a sheet of acrylic. The answer lies in the material itself. Acrylic is a non-porous plastic. Standard printers are designed for porous materials like paper, which absorb ink. Successful direct-to-acrylic printing requires a completely different technology. This is a key difference from methods like screen printing on acrylic. Let’s explore why your inkjet and laser printers are not up to the task of direct-to-acrylic printing.
The role of UV printers and cured ink
UV printing is the secret to a perfect finish on acrylic. A UV printer does not dry ink with air. Instead, it uses ultraviolet (UV) light. The printer lays down a special UV ink on the acrylic surface. A UV lamp, often using wavelengths between 367nm and 400nm, follows the print head. This light instantly cures, or hardens, the ink. This process creates a durable layer bonded directly to the acrylic. This method of uv printing ensures excellent adhesion and prevents smudges. The success of this printing technique depends on good ink wettability on the acrylic. This is why professional direct-to-acrylic printing relies on uv printing.
Key Takeaway: UV printing is not about drying ink; it is about curing it with light. This chemical reaction permanently bonds the ink to the non-porous acrylic, a process that is also distinct from screen printing on acrylic.
Why inkjet printers fail on acrylic
Your inkjet printer uses water-based ink. This ink is mostly water with colorants. It works by soaking into paper fibers. Acrylic has a smooth, non-absorbent surface with low surface energy. The water-based ink has a higher surface tension. This mismatch prevents the ink from spreading out. Instead, the ink beads up into tiny droplets on the acrylic. The ink will never dry properly and will smudge with the slightest touch. This makes direct-to-acrylic printing impossible with this type of printing equipment.
| Caraterística | UV-Cured Ink | Standard Inkjet Ink |
|---|---|---|
| Adhesion | Excellent on non-porous acrylic | Poor; beads up and smudges |
| Curing | Cured instantly by UV light | Dries slowly by evaporation |
| Durability | Highly durable and scratch-resistant | Not durable; easily rubs off |
Why laser printers are not suitable
A laser printer uses a different process for printing. It uses a fine powder called toner. The printer’s fuser unit heats up to melt the toner onto the paper, with temperatures reaching 200°C (392°F). This heat-fusion process is designed specifically for paper. When you try to print on acrylic paper, the toner powder will not fuse correctly to the smooth plastic surface. The heat may also damage the acrylic sheet itself. This makes laser printing unsuitable for direct-to-acrylic printing, unlike uv printing or screen printing on acrylic. For quality results, you must use a method designed for the unique properties of acrylic, such as uv printing or screen printing on acrylic.
How to print on acrylic: a step-by-step guide
You are ready to move beyond theory. This guide shows you the exact process for successful direct-to-acrylic printing. Following these steps carefully will help you achieve a professional-grade photo or image with stunning quality. The process requires precision at every stage, from preparation to the final cure. These acrylic printing techniques are the key to a flawless result.
Step 1: Prepare the acrylic surface
A perfect print starts with a perfectly clean surface. Dust, grease, and static are the enemies of good ink adhesion. Your first job is to prepare the acrylic sheet. This step ensures the UV ink bonds correctly for a lasting, high-quality photo.
First, you must clean the acrylic. Use a gentle cleaning solution to avoid damaging the material.
- Mild soap and lukewarm water work well with a soft cloth.
- For grease or oil, you can use hexane or kerosene.
- Some commercial cleaners like Fantastik® or Formula 409® are also safe.
- You can also wipe the surface with 91% Isopropyl alcohol until it is dry to prevent streaks.
Warning: ⚠️ Never use abrasive cleaners or harsh chemicals on acrylic. Avoid window sprays, acetone, gasoline, benzene, and lacquer thinner. These products will damage the surface and ruin your printing project.
Next, you need to address static electricity. Acrylic sheets build up a static charge that attracts dust. Removing this charge is critical for direct-to-acrylic printing.
- An ionized airgun is a fast and effective tool for neutralizing static.
- Wiping the acrylic with a damp rag is a simple method for single sheets.
- Specialized anti-static brushes can also remove the charge right on the printer bed.
- Maintaining proper humidity in your workspace helps control static buildup naturally.
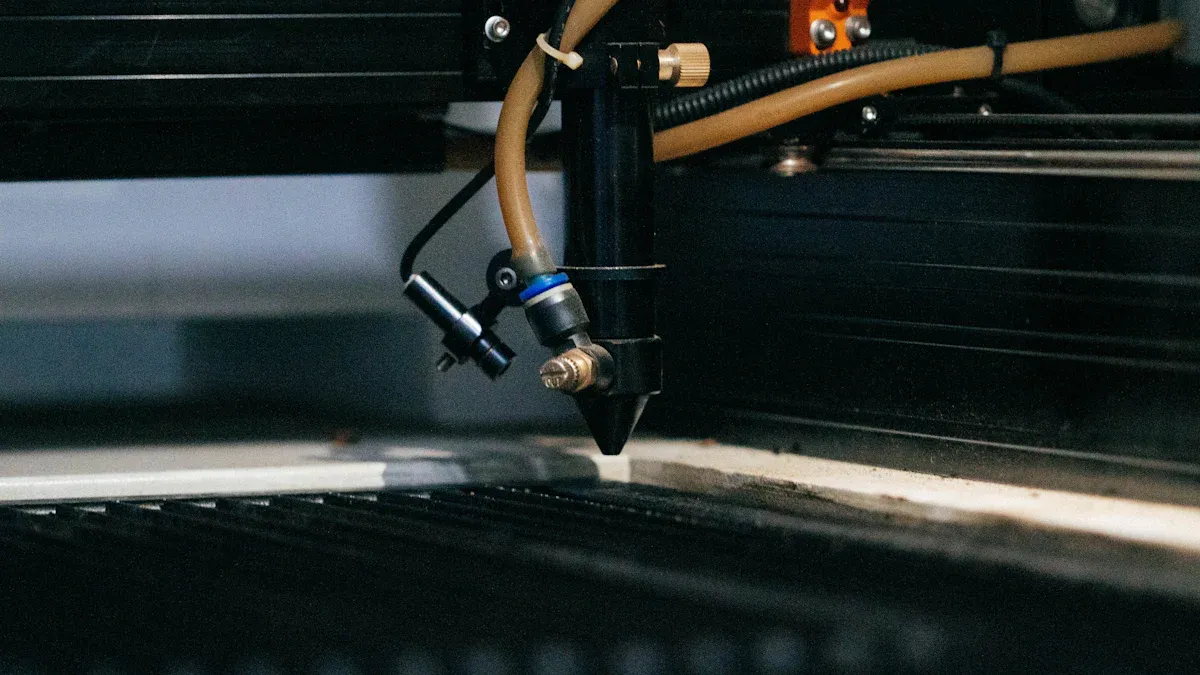
Step 2: Set up your UV printer
Your UV printer needs specific calibration for direct-to-acrylic printing. Different materials absorb ink and react to UV light differently. You must adjust your printer settings for the unique properties of acrylic. This calibration is essential for good adhesion and a long-lasting image.
Follow these calibration steps for the best results:
- Calibrate Print Heads. You must align the print heads according to the manufacturer’s guide. This ensures the printer places ink precisely for a sharp photo.
- Adjust the UV Lamp Height. You should fine-tune the distance between the UV lamp and the acrylic. The correct height ensures the ink cures evenly across the entire image.
- Optimize UV Ink Curing. You need to set the right UV lamp intensity. This guarantees each layer of ink hardens properly, creating a durable finish.
- Perform a Test Print. Always run a small test on a scrap piece of acrylic. This allows you to check your settings and make adjustments before the final printing.
Step 3: Configure print settings
The magic of direct-to-acrylic printing also happens in the software. Correctly configuring your print file is just as important as preparing the printer. This is where you control the color, clarity, and layering of your image. These acrylic printing techniques will make your photo pop.
First, manage your colors with an ICC Profile. An ICC profile ensures the colors you see on your screen match the final printed photo. For printing, the CMYK color profile is standard. Using a custom ICC profile tailored to your specific printer and acrylic sheet will give you the best quality. A white ink base is also crucial for accurate color, as it counters the natural tint of the acrylic.
Next, set the right resolution. For a high-quality photographic image on acrylic, a resolution of 150 DPI (dots per inch) is the optimal standard. This resolution ensures your photo looks sharp and detailed, even when viewed up close.
Finally, set up your print layers. UV printers can print multiple layers of ink in one pass. This is one of the most powerful acrylic printing techniques. A common configuration for printing on clear acrylic is:
- Layer 1: Color (CMYK): The printer lays down your main image.
- Layer 2: White Ink: The printer adds a white layer behind the color. This makes the image opaque and vibrant.
Your RIP software (Raster Image Processor) helps you manage these layers. You can set the printer to print color first, then white, or even a ‘CMYK + White + CMYK’ setup for double-sided signs. Proper layering is a cornerstone of professional direct-to-acrylic printing.
Step 4: Execute the print and cure
You have prepared the acrylic, calibrated the printer, and configured the software. Now you are ready for the final step. Place your clean acrylic sheet on the flatbed. Execute the print job from your computer. The printer will begin laying down the ink, and the UV lamps will follow, instantly curing it to the surface. This process transforms a simple sheet of plastic into a beautiful piece of art. The final print on acrylic paper will have excellent print quality.
Safety First! Operating a UV Printer 👷 UV printers use powerful ultraviolet light and chemicals. You must always protect yourself during the printing process.
- Protect Your Eyes and Skin: Never look directly at the UV light. Always wear certified UV-blocking safety glasses. Wear a lab coat, nitrile gloves, and closed-toe shoes to cover all exposed skin.
- Ensure Good Ventilation: The UV curing process can produce ozone and other fumes. Make sure your workspace has a proper ventilation system to remove any toxic gases.
- Handle Breakage Carefully: If a UV lamp breaks, it may release mercury vapor. Leave the room immediately and let it ventilate for at least 30 minutes before cleaning up with protective gear.
Following these safety rules ensures your experience with uv printing is both successful and safe. This is the final step to print on acrylic and achieve a durable, high-quality photo.
Pro tips for a perfect finish
You now understand the core process of direct-to-acrylic printing. These professional tips will elevate your work from good to flawless. Following this advice ensures the best quality and longevity for your projects. Direct-to-acrylic printing is often the most cost-effective method for achieving a premium photo image. This printing technique creates beautiful and durable projects, from unique wedding invitations to dynamic art for exhibitions.
Use a white ink base for vibrancy
A white ink underbase is the secret to making your colors pop. When you are printing on clear or colored acrylic, the material itself can affect the image. A layer of white ink acts as an opaque foundation. It blocks the acrylic’s color and reflects light back through your CMYK inks. This simple step dramatically boosts color vibrancy and saturation. Your final photo will have a much higher print quality. The difference in vibrancy is stunning.
Tip: 💡 A white ink base is essential for achieving true color vibrancy and a professional-quality image. This is a key step in direct-to-acrylic printing.
| Caraterística | Without White Ink | With White Ink |
|---|---|---|
| Color Appearance | Muted and translucent | Vibrant with full saturation |
| Substrate Interference | The acrylic color shows through | Blocks the acrylic color |
| Light Interaction | Light is absorbed by the acrylic | Reflects light for maximum vibrancy |
Choose the right acrylic sheet
The type of acrylic you choose matters. For projects that need to last outdoors, like professional business signage, you should use a special Sign Acrylic Sheet. Manufacturers engineer these acrylic sheets with UV stabilizers and impact modifiers. This provides superior weather resistance and excellent ink adhesion for long-term longevity. For fine art or high-end acrylic printing for home decor, you can choose optical-grade acrylic. This material offers stunning clarity for a museum-quality photo. The right acrylic ensures the best foundation for your printing.
Protect your finished print
Your beautiful image deserves protection to ensure its longevity. The longevity of photo prints on acrylic depends on proper care. For maximum acrylic print durability, you can apply a protective coating.
- Special UV-curable clear coats, like Kolorcure Lustercure, create a scratch-resistant, glass-like surface.
- You can also use a laminate film, such as General Formulations GF 247, for high-clarity protection.
Proper cleaning also preserves the image and its vibrancy.
- Always use a soft microfiber cloth to remove dust.
- Spray the surface with a gentle, ammonia-free plastic cleaner.
- Wipe the acrylic dry to prevent streaks. Never use paper towels.
With proper care, your direct-to-acrylic printing projects can last for years. An indoor photo has a longevity of over 5 years, while an outdoor image can last 2-3 years. This care ensures the longevity of your direct-to-acrylic printing work. The acrylic print durability and longevity of photo prints on acrylic are excellent with these steps. This direct-to-acrylic printing process offers great longevity. This printing method gives your photo impressive longevity.
You can definitely print on acrylic paper. Success with this printing process depends entirely on using the right equipment. Your journey to print on acrylic starts with UV printing technology. This printing method is essential for quality results on acrylic.
AndresJet continues to innovate in UV printing on acrylic, offering solutions that blend durability, speed, and customization for industrial manufacturers.
Remember these three keys for perfect printing on your acrylic:
- Use the right printer for your acrylic printing.
- Prepare the acrylic surface meticulously.
- Configure your printing software settings correctly.
You now have the knowledge to print on acrylic. Go create your stunning acrylic printing projects with confidence. This printing technique will elevate your work.
FAQ
Can I use a Cricut for printing on acrylic?
A Cricut machine cannot perform direct-to-acrylic printing. It is designed for cutting materials. For a true printing job on acrylic, you need a UV printer. This special printing equipment is necessary for the ink to stick to the acrylic.
What is the cost of UV printing on acrylic?
The cost of UV printing on acrylic varies. Factors include the size of the acrylic sheet and the complexity of the printing design. Professional printing services offer quotes based on your specific project. This printing method provides a premium finish for your acrylic.
How long does printing on acrylic last?
The longevity of your acrylic printing is excellent. An indoor acrylic print can last over five years. An outdoor printing project can last 2-3 years. Proper care protects your acrylic printing investment and ensures the image remains vibrant.
Is there an alternative to direct printing on acrylic?
Yes, you can mount a photo printed on high-quality paper to an acrylic sheet. However, direct UV printing offers superior durability and a more seamless look. This printing technique bonds the ink directly to the acrylic for a professional finish.
See Also
Unveiling Acrylic Tray Truths: Simple DIY Projects to Inspire Creativity
Acrylic Brochure Holders: Understanding Their Design, Function, and Uses
Anti-static Acrylic Explained: Its Core Principles and Practical Applications
Exploring Acrylic (PMMA): Defining Its Nature, Traits, and Versatile Uses
Extruded Acrylic Sheets: Understanding Their Creation, Features, and Utility

