
You want to create a sleek, modern acrylic frame. You can achieve a professional look with your own hands. The DIY home decor market was worth $8.91 billion in 2025 and continues to grow, showing how many people love DIY projects. However, working with plexi and acrylic glass can seem scary. Many people fear scratching or cracking the plexiglass during cutting.
Tip: Patience is your best tool. With the right techniques for cutting and assembling acrylic, you can master these projects and avoid common mistakes.
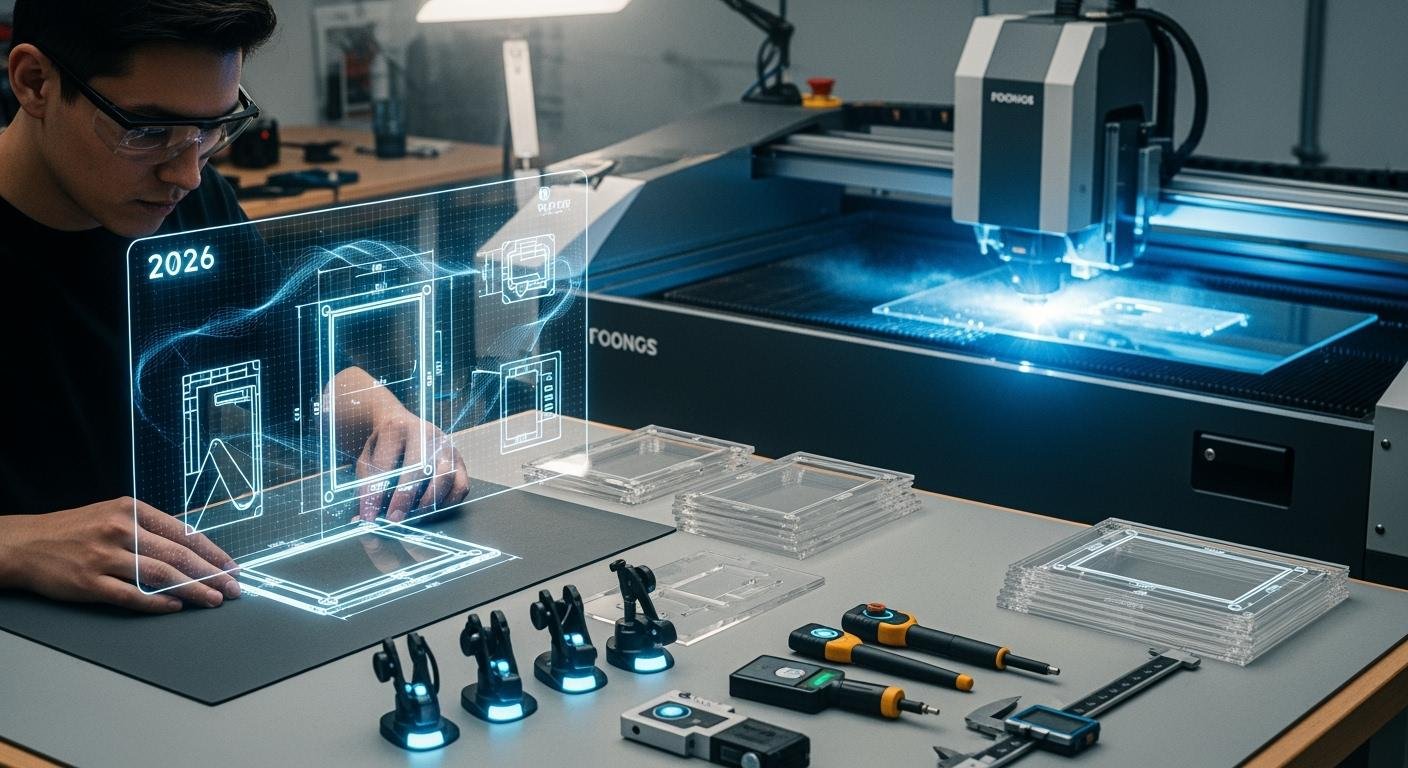
Working with Plexi and Acrylic Glass
Successful cutting and assembling acrylic begins with the right foundation. You must choose the correct materials and set up your space properly. This preparation prevents mistakes and makes your DIY projects much easier.
Choosing the Right Acrylic Sheet
You will find two main types of acrylic: cast and extruded. Your choice affects the final look and your working process.
- Cast Acrylic: This type offers superior optical clarity. It is more scratch-resistant and easier to machine, giving you a cleaner edge after cutting. It is the best choice for high-end projects.
- Extruded Acrylic: This plexiglass is more cost-effective and has better impact resistance. It is a practical option for many DIY picture framing jobs where budget is a consideration.
For most beginners, extruded plexiglass provides a great balance of cost and durability for a new frame.
Essential Tools and Safety Gear
Safety is the most important part of any project. You must protect yourself from plastic dust and chemical fumes. Before you start, gather your essential safety gear.
- Safety glasses to protect your eyes
- Gloves to handle materials and adhesives
- A NIOSH-approved respirator, especially when using solvent cements in areas without good airflow
You will also need basic tools like a utility knife, a measuring tape, and a sturdy straightedge.
Preparing Your Workspace
A clean and organized workspace is critical when working with plexi and acrylic glass. Find a large, flat, and stable surface. This prevents the sheet from wobbling and reduces the risk of scratches.
Note: Good ventilation is non-negotiable. Acrylic adhesives release strong fumes. Always work in a well-ventilated area. Open windows or use an exhaust fan to ensure fresh air is circulating. Keep your adhesive containers closed when you are not using them.
Mastering the Cut for Flawless Edges

The quality of your frame depends heavily on the quality of your cut. Clean, smooth edges are the hallmark of a professional-looking project. This section covers the essential cutting techniques you need for perfect results every time. Proper cutting and shaping is a skill you can learn with practice.
Scoring and Snapping Thin Acrylic
For thin acrylic sheets (typically 3/16 inch or 4.5mm and under), the score-and-snap method is simple and effective. It requires no power tools, making it a great starting point for any DIY project.
- Measure and Mark: Place your acrylic sheet on a flat surface. Measure your cut line carefully and mark it.
- Score the Line: Use a sturdy straightedge to guide your utility knife or a special plastic-scoring tool. You must apply firm, even pressure. Drag the blade across the cut line repeatedly, aiming for 5 to 10 passes. Your goal is to create a deep, consistent groove.
- Snap the Acrylic: Position the sheet so the scored line is aligned with the edge of your worktable. Hold the main part of the sheet firmly against the table. Apply quick, downward pressure on the overhanging section. The acrylic should snap cleanly along your scored line.
Pro Tip: A deeper score makes for a cleaner snap. Don’t rush this step. Patience here prevents jagged edges and wasted material.
Using a Jigsaw for Custom Shapes
A jigsaw gives you the freedom to cut curves and custom designs. The key to success is using the right blade and technique to avoid melting or chipping the plexiglass. For this type of shaping, your blade choice is critical.
Choose a blade specifically designed for acrylic or plastic. Look for these features:
- Material: Bi-Metal or high-speed steel blades offer the strength and flexibility needed for cutting acrylic.
- TPI (Teeth Per Inch): A high TPI, between 10 and 20, ensures a smoother cut.
- Tooth Design: Blades with small, sharp, and closely packed teeth make a cleaner cut with less pressure.
When cutting, set your jigsaw to a medium speed and move steadily. Pushing too fast can cause the blade to heat up and melt the acrylic.
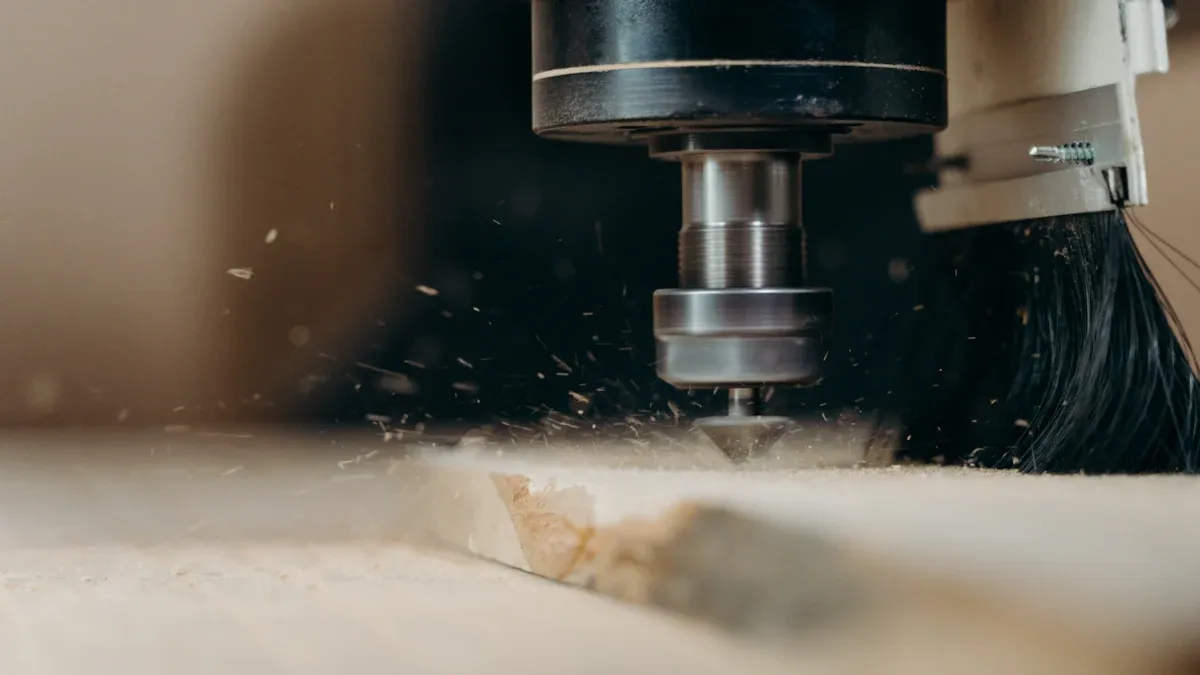
Using a Table Saw for Precision
For perfectly straight, long cuts, a table saw is your best tool. It provides unmatched precision for your DIY frame pieces. However, you must use a blade designed for plastics to prevent chipping. A standard wood-cutting blade will ruin your material.
Use a carbide-tipped blade with a high tooth count. The best blades feature a “triple-chip” tooth design, which creates a clean cut by clearing material from the center and edges separately.
Table Saw Blade Recommendations for Acrylic
| Acrylic Thickness | 10″ Blade Tooth Count | Blade Design |
|---|---|---|
| 1/16″ – 1/8″ | 80 | Carbide-Tipped, Triple-Chip |
| 1/8″ – 1/2″ | 80 | Carbide-Tipped, Triple-Chip |
| 1/2″ – 1″ | 60 | Carbide-Tipped, Triple-Chip |
Safety First! Set your blade height so the teeth extend just slightly—about 1/8 inch—above the thickness of the acrylic sheet. This minimizes chipping and produces the smoothest edge.
Cutting Miters with a Miter Saw
To create a classic picture frame with 45-degree corners, you will need a miter saw. As with other power tools, the blade is the most important factor. Use a fine-toothed blade made for cutting plastic or non-ferrous metals.
Vibration is your enemy when cutting acrylic. You must secure the sheet firmly to prevent it from moving, which can cause chipping or cracking.
- Secure the Sheet: Hold the acrylic firmly against the saw’s fence and table. If you are cutting multiple sheets at once, clamp or tape them together tightly.
- Use a Zero-Clearance Insert: Replace the standard throat plate on your saw with a zero-clearance insert. This supports the material right next to the blade, reducing vibration and preventing small pieces from falling into the saw.
- Check Blade Alignment: Ensure your saw blade is perfectly aligned. A misaligned blade can cause “back cutting,” which leads to melting and a rough finish.
By mastering these cutting techniques, you are well on your way to the successful cutting and assembling acrylic process.
Cutting and Assembling Acrylic
You have mastered the art of cutting and shaping your acrylic. Now, you are ready for the assembly phase. This stage transforms your precisely cut pieces into a finished product. Proper assembly is just as important as the cutting process. It ensures your frame is strong, square, and has that professional, seamless look you want. The process of cutting and assembling acrylic requires attention to detail at every step.
Drilling Clean Holes for Hardware
Many projects, especially gallery frames, require you to drill holes for mounting hardware. Using a standard drill bit on acrylic is a recipe for disaster. It will grab, chip, or crack the material. You need a drill bit specifically designed for plastic.
Look for bits labeled as “acrylic drill bits” or those with a “Chipfree™ Point.” For example, brands like Norseman and TAP PlasDrill engineer bits for this exact purpose. These bits have a special 60° point that enters the material gradually. They also feature a 0° rake angle on the cutting edge. This design prevents the bit from “grabbing” or pulling itself through the acrylic, which is a common cause of cracking.
Drilling Tip: 💡 Always place a piece of scrap wood under your acrylic sheet. Apply light, steady pressure and let the drill do the work. If you push too hard, you risk melting the plastic or causing cracks.
Solvent Cementing for Invisible Seams
For a truly professional look, you want your seams to be invisible. Solvent cement is the key. This is not a glue. It is a chemical that lightly melts the acrylic surfaces, allowing them to fuse together into a single, strong piece. The result is a crystal-clear, bubble-free bond.
Applying solvent cement requires a technique called capillary action. You will use a special applicator bottle with a fine needle tip.
- Prepare the Joint: Make sure your edges are perfectly smooth and clean.
- Position the Pieces: Fit the two pieces of acrylic together exactly as you want them. To create a tiny, even gap for the solvent, you can place small pins or thin guitar strings between the panels.
- Apply the Solvent: Lightly touch the needle tip to the joint. The solvent will be drawn into the seam by itself. Run the applicator smoothly along the entire length of the joint.
- Let It Wick: Watch the solvent flow and fill the gap. Move the applicator at a steady pace. If the joint is wide, move slower to ensure it fills completely.
- Secure and Cure: As the solvent fills the seam, you can slowly remove the pins. The acrylic will become soft. Hold the pieces firmly in place for a few minutes until the initial bond sets. The joint will reach full strength in 24-48 hours.
Using Epoxies and Adhesives
While solvent cement is ideal for edge-to-edge seams, other adhesives have their place. Two-part epoxies create very strong bonds and can fill small gaps, making them useful for less-than-perfect joints. However, they are not as optically clear as a solvent weld. For mounting photos inside a frame, you can use archival-quality double-sided tape or glue dots. These options hold your artwork securely without damaging it over time.
Squaring and Securing the Frame
A crooked frame will ruin the look of your project. You must ensure your corners are perfect 90-degree angles. After you loosely join the corners, you can confirm the frame is square with a simple trick.
The Diagonal Measurement Technique: Measure the distance from one corner to the opposite corner. Then, measure the other diagonal. If the two measurements are identical, your frame is perfectly square. If they are not, gently adjust the frame until they match.
Once you confirm your frame is square, you need to hold it securely while the adhesive cures. Your hands are not steady enough for this job. You need the right clamps.
Effective Clamps for Acrylic Frames
| Clamp Type | Best Use | Why It Works |
|---|---|---|
| Spring Miter Clamps | Mitered (45°) corners | These apply even pressure directly on the joint and are easy to apply and remove. |
| 90° Corner Clamps | Butt joints and T-joints | Brands like Bessey or Kreg offer clamps that act as a “third hand,” holding pieces at a perfect right angle. |
| Band Clamps | Securing the entire frame | A strap wraps around the whole frame, applying inward pressure on all four corners at once. |
Creating a DIY Custom Acrylic Gallery Frame
A floating diy custom acrylic gallery frame is a stunning way to display art. This popular DIY project sandwiches a photo between two sheets of acrylic, which are then mounted to the wall with standoff hardware. This creates a modern, frameless look.
Here is how you can create your own diy custom acrylic gallery frame:
- Prepare Your Acrylic: Start with two equally sized sheets of acrylic. Leave the protective film on. To prevent scratches, peel the film from only one side of each sheet—these will be the inner surfaces.
- Position Your Artwork: Carefully clean the exposed acrylic surfaces. Place your photo or artwork on the back sheet. You can use a few small pieces of double-sided tape to hold it in place.
- Sandwich the Layers: Place the top sheet of acrylic over the photo, with its exposed side facing down. Align the edges perfectly.
- Drill the Holes: Tape the sheets together at the edges to prevent shifting. Mark the locations for your standoff hardware, usually one in each corner. Drill through both sheets at once using an acrylic-safe drill bit.
- Mount the Hardware: Mark the hole locations on your wall. Install the standoff barrels (the part that screws into the wall).
- Final Installation: Remove the final outer layers of protective film from your gallery frame. Hold the acrylic sandwich up to the barrels on the wall and screw in the standoff caps to secure your new piece of art.
By following these steps, you can complete your DIY projects and achieve a beautiful, professional-quality result.
Professional Finishing and Polishing
Your cut pieces are ready. Now you can give them a professional finish. This final shaping and polishing stage turns a simple cut into a beautiful, glass-like edge. It is the secret to making your DIY project look store-bought.
Sanding Edges for a Smooth Finish
Sanding removes saw marks and prepares the edge for polishing. You must sand in stages, moving from coarse to fine sandpaper. For the best results, use wet sandpaper. It prevents heat buildup and gives you a smoother surface.
- Start with 180-grit sandpaper to remove deep scratches.
- Move to 320-grit sandpaper to refine the edge.
- Finish with 600-grit sandpaper for a smooth, frosty look.
Tip: Keep the sandpaper wet and your sanding block flat against the edge. This ensures an even finish and prepares the surface for a perfect polish.
Flame Polishing for a Glass Sheen
Flame polishing melts the surface of the acrylic, creating a crystal-clear, glossy edge. This technique requires care and practice. Always work in a well-ventilated area and keep flammable materials away.
Use a propane torch with a clean, blue flame. Hold the tip of the flame about 1-2 inches from the acrylic edge. Move the torch along the edge at a steady pace, about 2-3 inches per second. You will see the edge turn from frosty to glossy. Let the acrylic cool down naturally to prevent cracks.
Buffing for a High-Gloss Look
Buffing is another way to get a high-gloss finish. You will need a buffing wheel and polishing compounds. A loose-leaf muslin wheel works best because it runs cooler and is gentle on acrylic.
- First Stage: Use a coarse compound, often red, to remove any fine sanding marks.
- Second Stage: Switch to a fine, white compound. This step brings out the final high-gloss shine for your DIY gallery piece.
This two-step process gives your acrylic frame a brilliant, reflective edge.
Final Cleaning and Maintenance
Your beautiful gallery piece is almost complete. The final step is a thorough cleaning. Do not use regular glass cleaners, as they can damage the acrylic.
Use a cleaner made for plastics, like Novus No. 1 or Acrifix® Antistatic Cleaner. These products clean without scratching. They also leave a shine that resists fogging and repels dust. This keeps your new artwork looking its best for longer.
Troubleshooting Common Issues
Even with careful planning, you might run into a few problems. Do not worry. Most common issues are easy to fix. This guide will help you solve problems and keep your diy projects on track.
How to Fix Minor Scratches
You may find a small scratch on your acrylic. You can often polish it out. The method you use depends on how deep the scratch is.
- For light scratches: Use a plastic polish like Novus 2. Apply it with a clean microfiber cloth. Rub in a circular motion until the scratch disappears.
- For deeper scratches: You will need to wet sand the area. Start with 400-grit sandpaper and work your way up to a finer 1200-grit. Keep the surface wet. After sanding, use a polishing compound to restore the shine.
Dealing with Crazing and Cracks
Crazing looks like a web of tiny cracks inside the plexiglass. It is caused by stress or harsh chemicals. You can prevent it with proper care.
Important: Never use glass cleaners that contain ammonia or alcohol. These chemicals attack the acrylic and cause permanent damage. Always use mild soap and water or a cleaner made for plastics.
When you build your frame, allow a small gap for the material to expand with temperature changes. This prevents stress that can lead to cracks in your finished gallery piece.
Preventing Warping and Bowing
Acrylic sheets can sometimes warp or bow. This is often caused by stress left over from when the sheet was made. Heat from cutting can also cause warping. You can prevent this during assembly.
When you cut or drill, make sure you clamp the sheet evenly. Use a flat backing board, especially with thin sheets. This supports the material and helps spread out heat, which reduces the risk of the acrylic deforming.
Cleaning Up Adhesive Mistakes
Adhesive spills can happen. The key is to act quickly. If you spill solvent cement, let it evaporate completely. You can then carefully scrape off any residue with a sharp razor blade held at a low angle. For uncured epoxy, you can often clean it up with isopropyl alcohol. Always test your cleaning method on a scrap piece first to ensure it does not damage the surface.
You now have the knowledge for successful cutting and assembling acrylic. For great results on your diy projects, remember these tips. Always maintain a clean workspace to keep dust off your gallery piece. Use the right tools, like special drill bits, to prevent cracks when working with plexi and acrylic glass. You can now build a beautiful diy gallery frame. We invite you to share your finished projects or ask questions in the comments below.
FAQ
What is the best acrylic for a beginner?
You should start with extruded acrylic. It costs less than cast acrylic and is very durable. This material gives you a great balance of affordability and performance for your first DIY frame projects. It is a practical choice for learning.
Can I use a wood-cutting blade on acrylic?
No, you should never use a standard wood-cutting blade. It will chip or crack your acrylic sheet. You must use a blade made for plastic. Look for one with a high tooth count and a triple-chip tooth design for clean, smooth cuts.
How do I clean my finished acrylic frame?
You can clean your frame with mild soap and water. Use a soft microfiber cloth to avoid scratches. Never use glass cleaners with ammonia or alcohol. These chemicals will damage the acrylic surface and can cause crazing over time.
Why did my acrylic crack when I tried to snap it?
Your acrylic likely cracked because the score line was not deep enough. You need to make multiple passes with firm pressure. A shallow score creates a weak point, but a deep groove guides the snap for a clean break.
💡 Tip: Aim for a score that is about 25% of the acrylic’s thickness.
See Also
Laser Cutting and Engraving: Process, Applications, and Acrylic Product Integration
Edge Bonding Explained: Process, Applications, and Acrylic Manufacturing Techniques
Recycled Acrylic (r-PMMA): Understanding Its Process and Diverse Applications
Edge-Lit Acrylic Signs: Principles, Design, and Practical Applications
Acrylic Blocks: Exploring Their Definition, Key Features, and Uses

