
Let’s begin with the single most important rule for photocard safety.
Rule #1: Always place your photocard inside a soft, acid-free sleeve before it goes into a hard acrylic holder.
This one action is your number one defense against scratches and chemical damage. You might feel anxious about harming your valuable cards. Rest assured, you can protect your collection. These simple methods ensure your cards stay safe and look great. You will learn how to properly assemble and use your holders for maximum protection. ✨
How to assemble and use your holder

You are now ready to prepare your holder. Following these steps will help you correctly assemble and use the holder, guaranteeing a perfect fit and maximum safety for your photocard.
Preparing your workspace
Your first step is to create a safe environment for assembly. You should work on a soft, clean surface. A large microfiber cloth or a soft desk mat is an excellent choice. These surfaces prevent you from accidentally scratching the acrylic pieces.
Before you begin, make sure the acrylic itself is clean.
- For Dust: Use a dry microfiber or anti-static cloth to gently wipe the pieces.
- For Smudges: Lightly dampen a microfiber cloth with distilled water. Never spray liquid directly onto the acrylic.
⚠️ Important: You must avoid certain cleaning products. Never use glass cleaners like Windex, products containing ammonia, or abrasive paper towels. These items can permanently cloud or scratch your new holder.
Peeling the protective film
Most new acrylic holders arrive with a thin protective film on each side. This film prevents scratches during shipping. You need to remove it carefully.
- Place an acrylic piece flat on your soft workspace.
- Use your fingernail to gently lift one corner of the film. A plastic spudger or guitar pick also works well.
- Avoid using knives, tweezers, or any sharp metal objects. These tools can easily slip and gouge the acrylic underneath.
- Once you lift a corner, peel the film back slowly and evenly. Repeat this for all sides of each acrylic piece.
Assembling without the card
You should always perform a test assembly without the card inside. This practice run ensures all parts fit together correctly. It also helps you understand how to assemble and use your specific holder type without risking your photocard.
There are two common types of acrylic holders:
-
Magnetic Holders: These are the simplest to use. They have small, powerful magnets embedded in the corners. You just place one piece on top of the other, and they will snap together securely.
-
Screw-in Holders: These holders, like the ‘CardSaver II Screw-Down’, offer a more permanent seal. You align the pieces and insert the provided screws.
Pro Tip: Hand-Tighten Only! When using a screw-in holder, tighten the screws just until they feel snug. You should only use your hands. Do not use a power drill or screwdriver. Over-tightening the screws can create pressure points that damage the card or, even worse, crack the acrylic. Your goal is a firm seal, not maximum force.
Safe card insertion and security
With your holder assembled and your workspace ready, you can now focus on the most critical part: safely inserting your photocard. These steps protect your card from physical and chemical harm.
Choosing the right sleeve
You already know the golden rule is to sleeve your card first. Now, you must choose the right sleeve. The sleeve is the only material that will directly touch your photocard. Its size and material are extremely important.
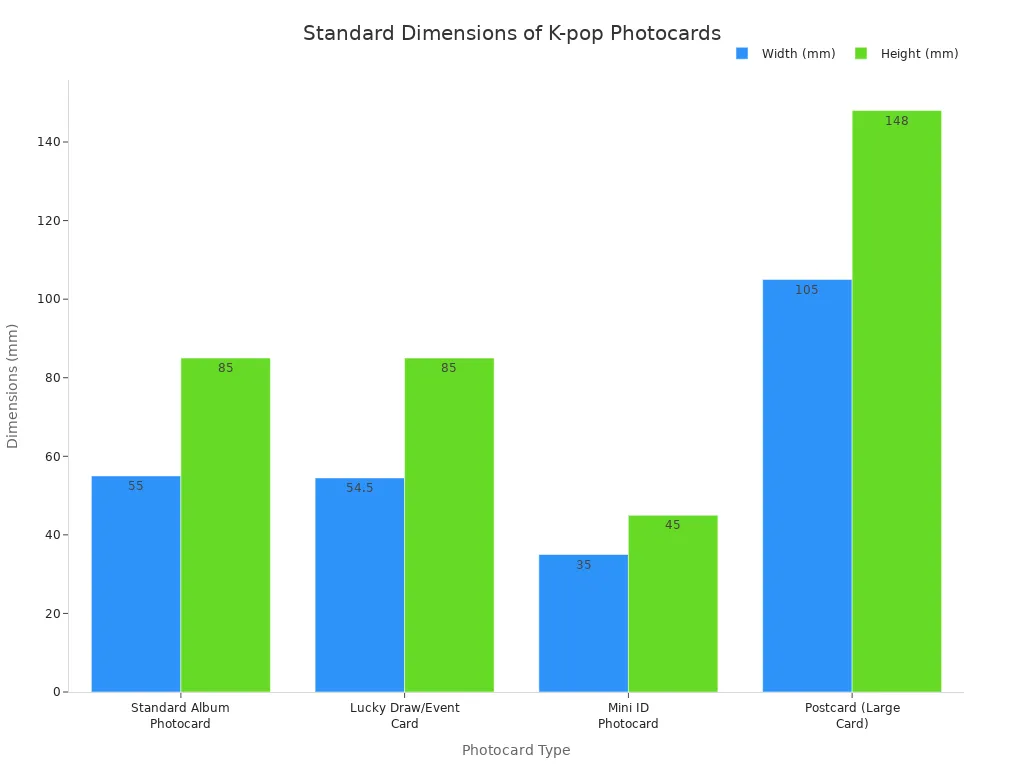
First, you need a sleeve that fits snugly. A sleeve that is too large allows the card to slide around, risking edge wear. A sleeve that is too tight can bend or warp the card. Most K-pop photocards have standard dimensions.
| Photocard Type | Approx. Dimensions (mm) | Dimensions (cm) |
|---|---|---|
| Standard Album Photocard | ~55 × 85 mm | ~5.5 × 8.5 cm |
| Lucky Draw/Event Card | ~54–55 × 85 mm | ~5.4–5.5 × 8.5 cm |
| Mini ID Photocard | ~35 × 45 mm (varies) | ~3.5 × 4.5 cm |
| Postcard (Large Card) | ~105 × 148 mm | ~10.5 × 14.8 cm |
Second, you must use sleeves that are acid-free and PVC-free.
⚠️ The Danger of PVC PVC (Polyvinyl Chloride) contains chemicals called plasticizers. Over time, these plasticizers release gases. The gases cause a chemical reaction that can ruin your cards. You might notice the sleeve becoming ‘oily’ to the touch, soft, and yellow. This process will permanently damage your photocard’s finish and color.
Always check the packaging of your sleeves for “PVC-Free” and “Acid-Free” labels. Polypropylene (PP) is a safe and widely used alternative.
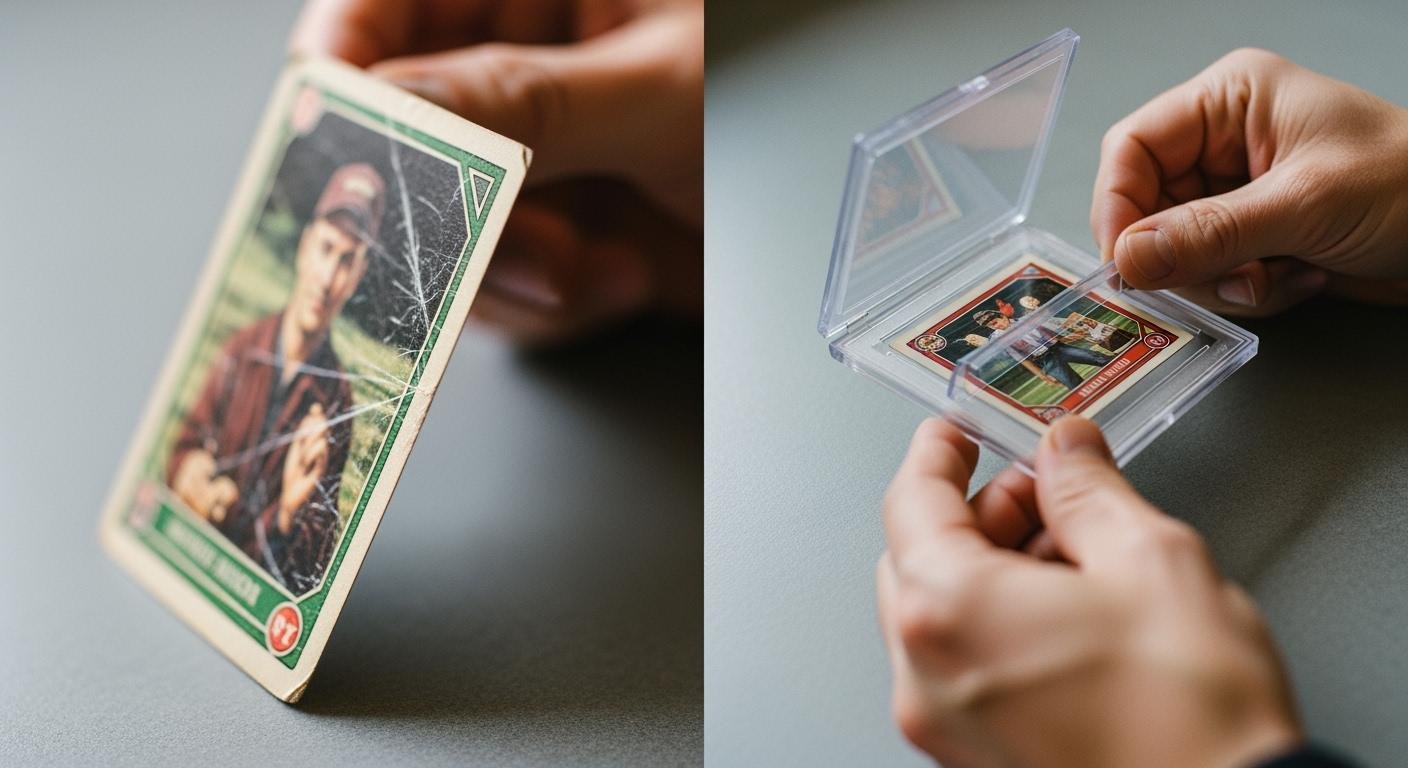
Placing the sleeved card
You are now ready to place your sleeved card into the holder.
- Take one half of your acrylic holder and lay it flat on your soft workspace.
- Carefully pick up your sleeved photocard by its edges.
- Gently place the card into the recessed area of the holder.
- Adjust the card so it sits perfectly in the center. This ensures even pressure when you close the holder.
Adding a retrieval tab
Getting a card out of a holder can be difficult. Prying it out risks damage. You can solve this problem with a simple trick. This makes removal effortless and safe.
💡 The Washi Tape Trick Before you place the card, attach a small piece of washi tape or a dedicated photocard pull tab to the back of the sleeve. Leave a small flap hanging off the top edge. This flap acts as a handle. You can gently pull on it later to lift the card out without ever touching the card itself.
Closing the holder securely
The final step is to seal the holder. How you assemble and use the holder at this stage is crucial for long-term safety.
- For Magnetic Holders: Place the second acrylic piece directly on top of the first. The magnets will snap together, creating a firm seal. Listen for the click to ensure it is closed correctly.
- For Screw-in Holders: Align the top piece and insert the screws. Remember to only hand-tighten them. Tighten each screw a little at a time in a crisscross pattern. This distributes the pressure evenly. Stop when they feel snug.
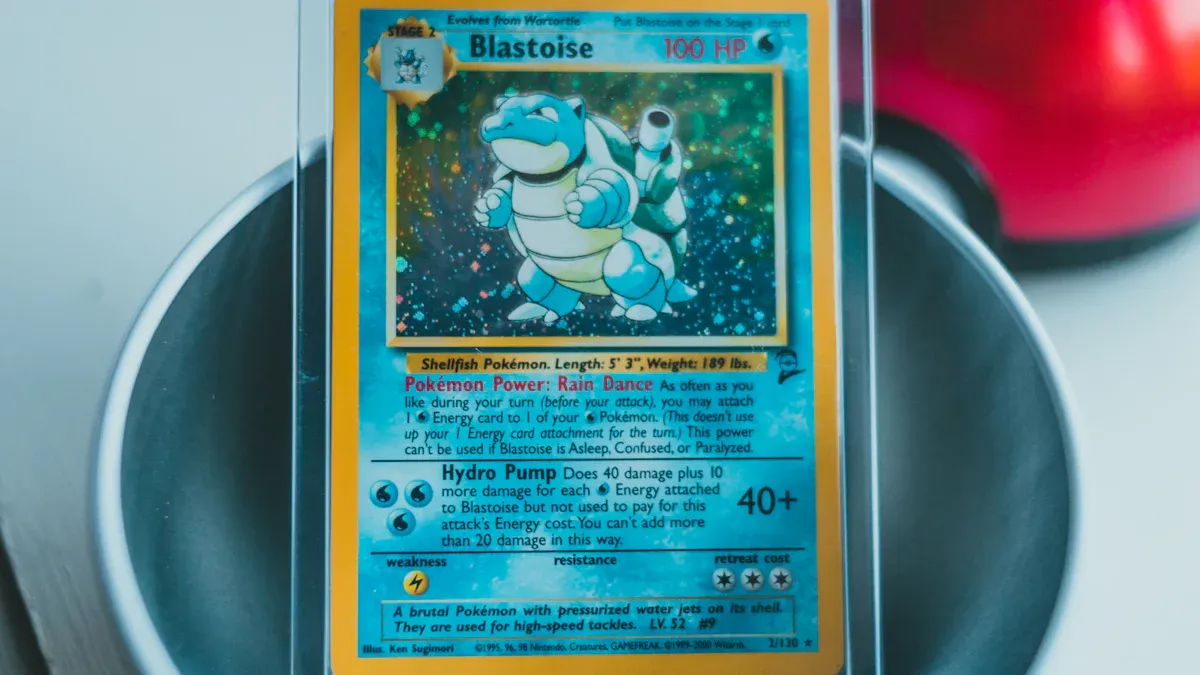
Your photocard is now securely displayed and protected from dust, scratches, and UV light.
Display, travel, and long-term care
You have successfully secured your photocard. Now you can focus on keeping your holder and card in perfect condition for years to come. Proper care ensures your collection always looks its best.
Cleaning and maintenance
Your acrylic holder will gather dust and fingerprints over time. You must clean it correctly to avoid damage. Always use a clean, soft microfiber cloth.
✨ Pro Cleaning Tip For the best results, you can use cleaners made specifically for acrylic. Products like NOVUS #1 or Brillianize® gently clean the surface and help repel dust. Never use glass cleaners like Windex or any products with ammonia. These chemicals will make the acrylic cloudy and can cause permanent damage.
Safe card removal
You may want to change the card in your holder. Your retrieval tab makes this process simple and safe.
- Open the holder on your soft workspace.
- Gently pull the washi tape or pull tab.
- Lift the sleeved card straight out of the holder.
This method prevents you from bending the card or scratching it while trying to pry it out.
Displaying your collection
You want to show off your beautiful cards. You should choose your display spot carefully. Direct sunlight is the biggest enemy of your collection.
Sunlight contains powerful UV rays. These rays can cause the colors on your photocard to fade over time. While acrylic holders block some UV light, they do not provide 100% protection. You should always display your holders away from windows and out of direct sunlight.
Taking your photocard on the go
You might want to take your photocard with you. You can protect the holder from scratches inside a bag or purse. Simply wrap the holder in a microfiber cloth or place it inside a small, soft pouch. This simple step prevents other items from scratching the acrylic. How you assemble and use the holder for travel ensures it remains clear and beautiful.
You now have the knowledge to protect your collection. Remember these golden rules for photocard safety:
- Always use an acid-free, PVC-free sleeve first.
- Add a retrieval tab for easy removal.
- Never overtighten screws on a holder.
- Only clean acrylic with a soft microfiber cloth.
An acrylic holder is a fantastic tool for both protection and display. Using it correctly ensures your cherished cards remain in pristine condition, preserving their value for years. Enjoy showing off your beautifully and safely displayed collection! ✨
FAQ
Should I double-sleeve my photocard?
You can double-sleeve for extra protection. You must ensure the inner sleeve is a perfect fit. The outer sleeve should then fit snugly inside the holder’s recessed area. This method prevents any movement and adds another layer of defense against dust and moisture.
Do acrylic holders offer 100% UV protection?
No, most standard acrylic holders do not block all UV rays. They provide good UV resistance, which helps prevent fading. You should still display your collection away from direct sunlight. This gives your photocards the best long-term protection from sun damage. ☀️
What if my holder gets scratched?
You can fix minor scratches on your holder. Use a special acrylic polish, like NOVUS #2, with a microfiber cloth.
Always test the polish on a small, hidden area first. Deeper scratches are often permanent, so prevention is key to keeping your holder clear.
See Also
Choosing and Caring for Your White Acrylic Trays: A Complete Guide
Innovative Uses for Acrylic Tabletop Stands in Your Retail Showcases
Debunking Acrylic Tray Myths: Simple Do-It-Yourself Ideas Revealed
Your Comprehensive Handbook to Mastering Acrylic Table Display Stands
Elevate Your Modern Home Decor with Clear Acrylic Tray Styling

