
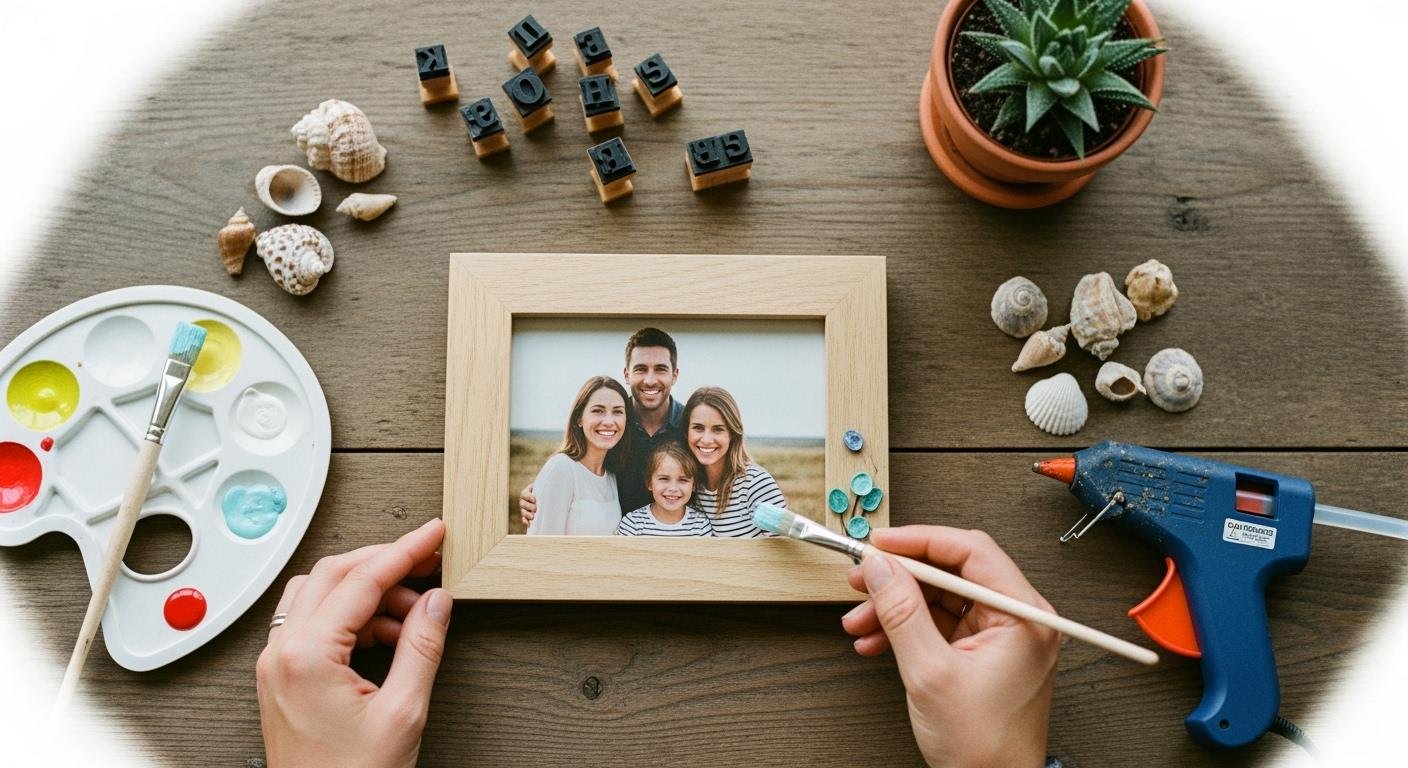
A truly personal gift captures a special memory. It creates a moment of pure joy for someone you love. The modern acrylic magnetic photo frame offers a perfect canvas for your creativity. You can easily personalize photo frames to make them unique.
Looking for simple, creative ways to make your gift unforgettable? 🎁
Understanding Your Acrylic Frame
Before you start customizing, you should get to know your acrylic frame. These modern frames are a fantastic choice for displaying your favorite photos. They offer several advantages over traditional frames.
- Lightweight Design: Acrylic is much lighter than glass. You can easily move or hang these frames anywhere.
- Exceptional Durability: The material is impact-resistant. It is less likely to shatter, making it a safe and long-lasting option.
- High Transparency: Acrylic provides a crystal-clear view of your photo. It also protects your pictures from fading with available UV protection.
The Basic Two-Panel Design
Most acrylic magnetic frames have a simple two-panel design. Two clear acrylic blocks hold your photo between them like a sandwich. Strong magnets in each corner snap the panels together, securing your picture firmly in place. This design makes swapping photos incredibly easy.
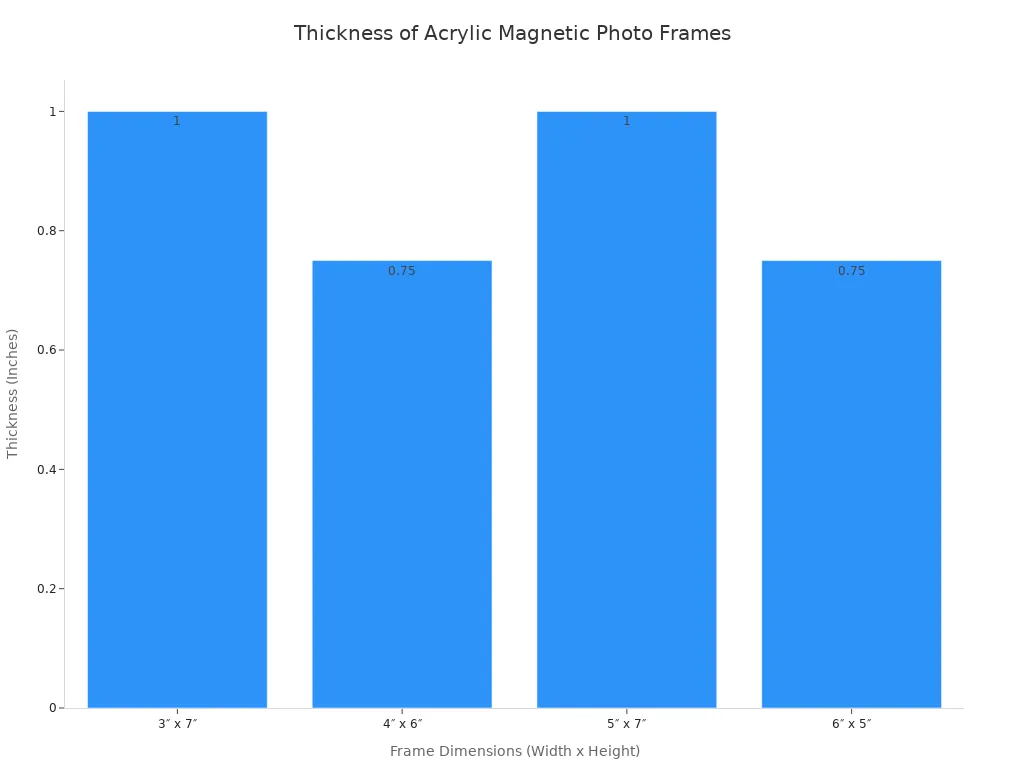
These frames come in many standard sizes to fit your photos, from small 2.5″×3.5″ prints to larger 8″×10″ portraits. The thickness of the frame also varies, which affects its stability and appearance.
| Product Description | Dimensions (W x H) | Thickness |
|---|---|---|
| Magnetic Certificate Holder | 3″ x 7″ | 1″ (two 1/2″ panels) |
| 4″ x 6″ Magnet Frame | 4″ x 6″ | 3/4″ |
| MagneticSandwich 2 pc. Frame – Heavy Weight | 5″ x 7″ | 1″ (two 1/2″ panels) |
Preparing the Surface for Customization
A clean surface is the key to a beautiful, long-lasting design. Dust, oils, and fingerprints can prevent paint or vinyl from sticking properly. You must prepare the acrylic panel before you add any personal touches.
Follow these steps for a perfectly clean surface:
- Remove Dust: First, gently blow any loose dust off the panel with an air blower. Never wipe a dry, dusty surface, as this will cause scratches.
- Prepare a Solution: Use a mild dish soap mixed with water or a dedicated plastic cleaner.
- Wipe Gently: Dampen a soft microfiber cloth with your cleaning solution. Wipe the acrylic in straight lines. Do not spray the cleaner directly onto the frame.
- Rinse and Dry: If you used soap, wipe away the residue with a second cloth dampened with plain water. Let the panel air dry completely.
Important Tip: Avoid using harsh chemicals on your acrylic frame. Cleaners containing ammonia, acetone, or other solvents can permanently damage the surface. Stick to simple soap and water for the best results.
Text and Hand-Drawn Designs
Adding words and drawings is a popular way to personalize your frame. You can transform a simple acrylic block into a meaningful keepsake with a special date, a name, or a unique design. This section will show you two great methods: using vinyl for a clean look and paint pens for an artistic touch.
Before you begin either method, you must have a perfectly clean surface. Wipe the acrylic panel with a soft cloth and some rubbing alcohol. This removes any oils or residue. A clean start ensures your design will stick properly and last a long time.
Applying Vinyl Lettering
Vinyl lettering gives your frame a crisp, professional finish. It is perfect for names, dates, or short quotes. You can create your own vinyl decals with a cutting machine or buy pre-made ones online.
Supplies You Will Need ✍️
- Pre-cut vinyl lettering
- Masking tape
- A tape measure or ruler
- A squeegee (a credit card also works)
- A precision craft knife for detailed work
Follow these steps to apply your vinyl perfectly:
- Position Your Design: Your vinyl lettering sits between a top mask layer and a bottom backing paper. Place the entire graphic on your frame. Use a ruler to make sure it is straight.
- Create a Hinge: Apply a strip of masking tape across the top edge of your design. This tape acts as a hinge and holds your design in place.
- Remove the Backing: Lift the design using the hinge. Carefully peel the backing paper away. The vinyl letters should stick to the top mask layer.
- Apply the Vinyl: Slowly lower the mask layer onto the acrylic. Use a squeegee to press the vinyl onto the surface. Start from the center and push outwards at a 45-degree angle to remove air bubbles.
- Remove the Mask: Gently peel the mask layer and hinge tape off. Pull it back at a sharp angle. If a letter lifts, press it back down before continuing.
- Let It Cure: Allow the vinyl to set for 12-24 hours. This helps it bond securely to the acrylic.
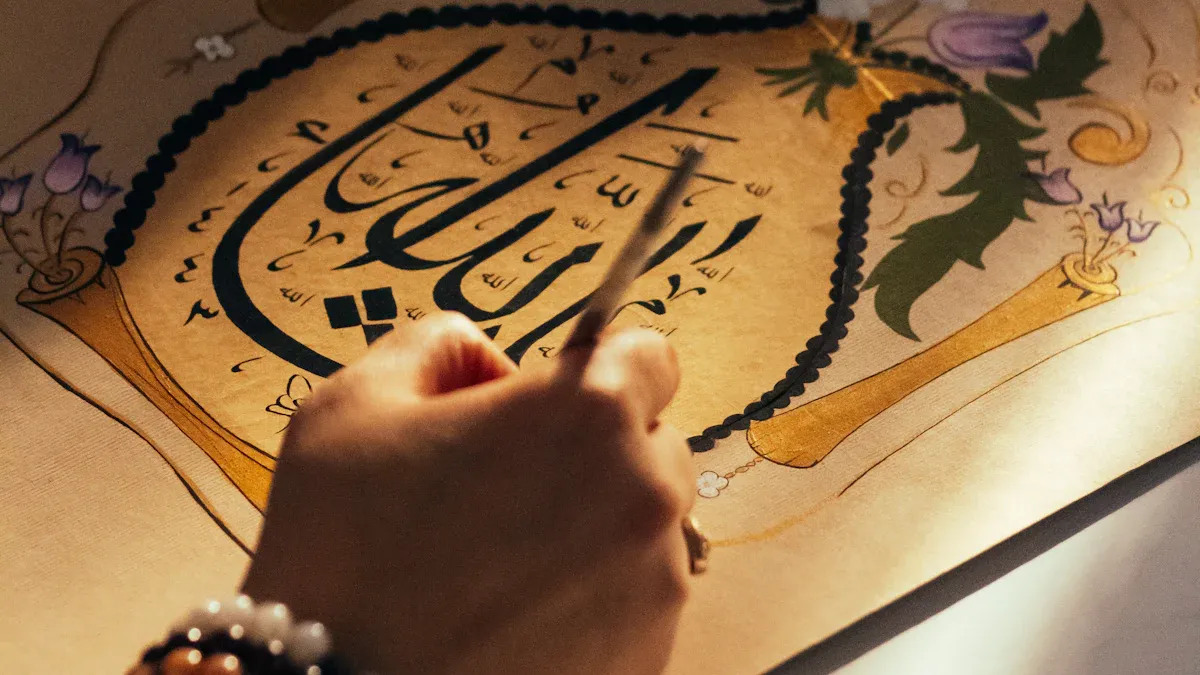
Drawing with Paint Pens
Paint pens offer you a chance to add a truly personal, hand-drawn touch. You can write a message in your own handwriting or draw a simple picture that has special meaning. This method makes your gift one-of-a-kind.
For the best results on acrylic, you should use the right kind of pen. Oil-based or acrylic paint pens work best because they are permanent and vibrant.
Recommended Paint Pens:
- Posca Paint Pens
- Sharpie Oil-Based Paint Pens
- Molotow One4All Acrylic Paint Pens
Quick Tip: Be careful when using metallic colors. Some pens, like the Sharpie oil-based gold metallic marker, have been known to bleed slightly on acrylic surfaces. You should always test your pen on a hidden corner or a scrap piece of acrylic first.
Ready to draw? Here is how you can do it:
- Plan Your Design: Lightly sketch your idea on a piece of paper first. This helps you plan the spacing and layout.
- Shake the Pen: Follow the instructions on your paint pen. You usually need to shake it well to mix the paint inside.
- Start Drawing: Press the pen tip down on a piece of scrap paper to get the paint flowing. Then, draw your design directly onto the clean acrylic frame.
- Let It Dry: Let the paint dry completely. Drying time can vary, so check the pen’s instructions. Add a second coat if you want a more opaque look.
Personalize Photo Frames with Embellishments
You can add three-dimensional elements to your frame for a unique, textured look. Embellishments like flowers, glitter, and decorative tape add color and personality. These additions make your gift even more special and visually interesting. This is a wonderful way to personalize photo frames with a creative flair.
Adding Pressed Flowers or Glitter
Pressed flowers and glitter offer two distinct ways to decorate your acrylic frame. Flowers provide a delicate, natural beauty. Glitter adds a fun, sparkling effect. You can even combine them for a truly unique design.
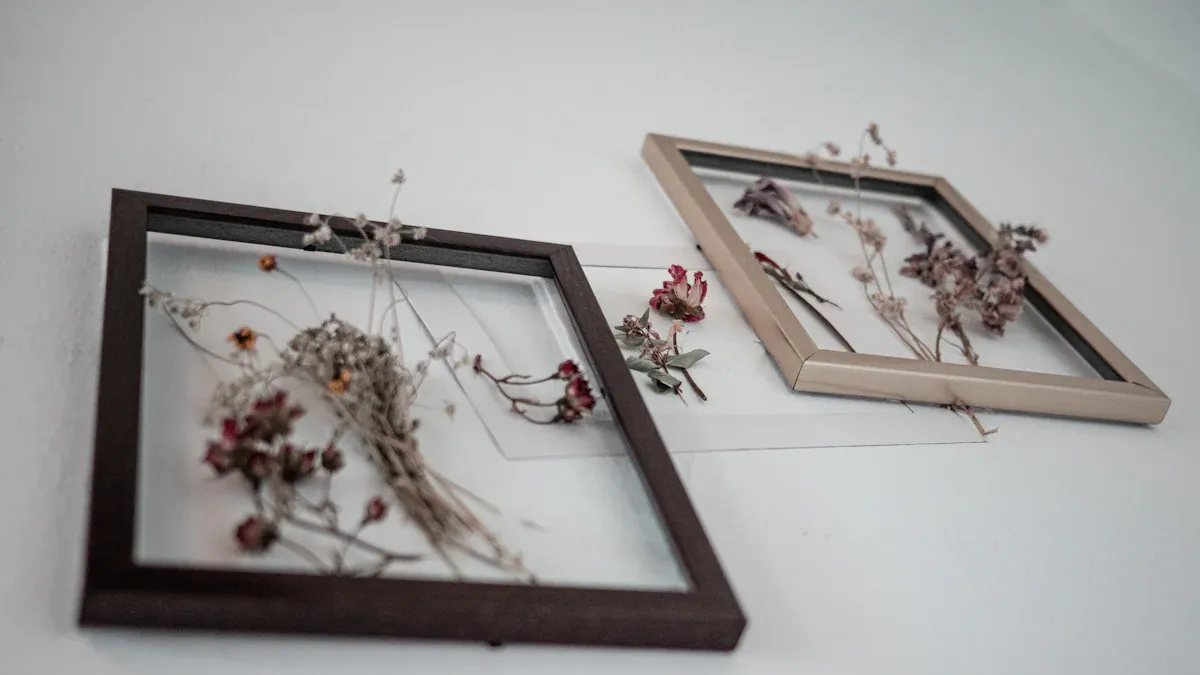
Using Pressed Flowers 🌸
You can press your own flowers to capture a piece of nature. This method preserves their color and shape beautifully.
- Prepare Your Flowers: Make sure your flowers are clean and completely dry. Place them on a sheet of absorbent paper. Leave some space between each flower.
- Press Them Down: Cover the flowers with another sheet of absorbent paper. Slowly close a heavy book over them. You can stack more heavy objects on top for extra pressure.
- Wait Patiently: Let the flowers dry for 2-4 weeks. The drying time depends on the flower’s thickness.
- Arrange and Display: Once dry, carefully arrange the flowers on your photo inside the frame. The two acrylic panels will hold them securely in place.
Adding a Touch of Sparkle ✨
Glitter can create a magical floating effect around your photo. You can apply it to the inside surface of one of the acrylic panels.
- Apply Adhesive: Brush a thin, even layer of clear craft glue where you want the glitter.
- Sprinkle the Glitter: Sprinkle your glitter over the glue. Gently tap the panel to remove any excess.
- Let It Dry: Allow the glue to dry completely according to the product’s instructions.
- Seal Your Design: Apply a coat of clear varnish or a sealant spray over the glitter. This locks the particles in place and prevents them from flaking off. Let the varnish dry fully before assembling the frame.
Creating a Washi Tape Border
Washi tape is a decorative paper tape that comes in endless colors and patterns. You can use it to create a simple, stylish border. This technique is a quick and easy way to personalize photo frames. Popular patterns include stripes and polka dots. You can also cut solid color tape into fun shapes.
Pro Tip: Choose a washi tape pattern that complements the colors in your photograph. This creates a cohesive and professional look.
Here is how you can create a perfect washi tape border:
- Choose Your Tape: Select one or more washi tapes for your design.
- Apply the First Strip: Start with one edge of the acrylic panel. Lay a strip of washi tape along the edge. Let a little bit of tape hang over the corners.
- Continue Around the Frame: Repeat this process for all four sides. Overlap the tape at each corner.
- Create Clean Corners: For a neat finish, you need to miter the corners. Use a sharp craft knife and a ruler. Carefully cut through the overlapping tape layers at a 45-degree angle from the inner corner to the outer corner.
- Remove Excess Tape: Peel away the extra cut pieces of tape from the top and bottom layers. You will be left with a perfect corner.
- Press to Secure: Press down firmly on all the tape to ensure it is securely attached to the acrylic.
Etching for a Frosted Look
Etching creates a beautiful, frosted design on your acrylic frame. This technique permanently alters the surface, giving it a soft, matte finish. You can add elegant patterns, monograms, or dates that will never fade or peel. Etching provides a sophisticated and timeless way to personalize your gift.
How to Etch Acrylic Safely
You can etch acrylic in two main ways: with chemicals or with a laser. Each method works differently and has unique safety considerations. Laser etching is the modern, safer choice for detailed custom projects. It uses a focused beam of light to vaporize the acrylic surface with incredible precision. Chemical etching uses strong acids to eat away at the material, a process that requires handling hazardous substances.
For personal projects, you should seek out a professional service that uses a laser etcher. This ensures a perfect result without the risks of working with dangerous chemicals.
The table below compares the two methods.
| Caraterística | Chemical Etching | Laser Etching |
|---|---|---|
| Process | Uses corrosive chemicals to remove material. | Uses a focused laser beam to vaporize material. |
| Safety | Involves harsh, toxic chemicals. | Eliminates the need for chemicals. |
| Precision | Can be difficult to control for fine details. | Offers unparalleled accuracy for intricate designs. |
| Turnaround | Is a time-consuming, multi-step process. | Is efficient and streamlined by computer control. |
Simple Design Ideas for Etching
Etching opens up many creative possibilities. You can create a uniform frosted look across the entire frame for privacy or a soft-focus effect. You can also add custom patterns for a unique decorative touch. A patterned frosting is perfect for adding names, important dates, or branding.
Here are some simple design ideas that are perfect for beginners:
- A delicate border of simple geometric shapes like circles or triangles.
- Basic floral designs, such as a single large flower in a corner or a vine of leaves along an edge.
- Abstract swirls or wavy lines that flow across the frame.
- Repetitive patterns like classic stripes or playful polka dots.
You can easily personalize photo frames to create a gift with a huge emotional impact. A mother named Anita created a gallery wall that let her family relive cherished memories every day. With techniques from paint pens to etching, you can also create a beautiful, custom piece. You have the tools to personalize photo frames and turn them into treasured keepsakes.
Now, it’s your turn! Pick a favorite photo and start crafting a meaningful gift for your loved one today. 💝
FAQ
How do I clean a personalized frame?
You can clean your personalized frame gently. Use a soft microfiber cloth with mild soap and water. Avoid scrubbing the decorated areas directly. This simple care routine protects your custom design from damage.
Can I remove my design later?
Etching and oil-based paint pens create permanent designs. You cannot remove them. You can carefully peel off vinyl lettering and washi tape if you want to change your design in the future.
Will the decorations damage my photo?
Your photo stays completely safe inside the frame. You apply all decorations to the outer surface of the acrylic panels. This process keeps your picture protected and untouched by any paint, glue, or tape.
What happens if I make a mistake with a paint pen? ✍️
You must act quickly to fix a paint pen mistake.
Immediately wipe wet paint with a cloth dampened with rubbing alcohol. Once the paint dries, it becomes permanent and is very difficult to remove from the acrylic surface.
See Also
Clever Home Decor: 10 Ways to Style Small Acrylic Trays
Personalize Your Space: Elegant Touches with Acrylic Trays
Elevate Your Decor: 10 Stylish Transformations Using Acrylic Trays
Innovative Decor: Acrylic Trays with Inserts for Unique Styling
Effortless Styling: Decorating Your Acrylic Square Coffee Table

