
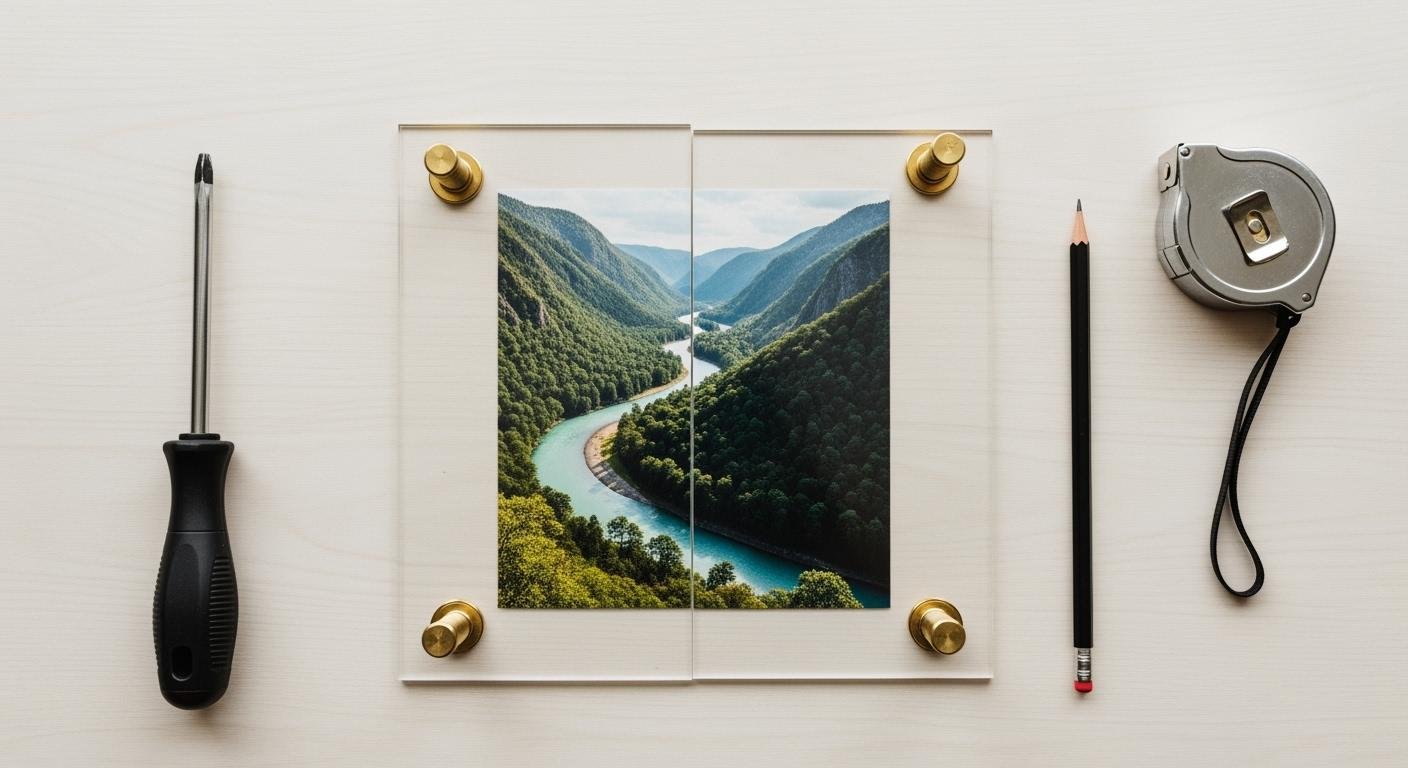
Ready to create your own stunning diy acrylic frames? Let’s gather your materials. This complete list includes all the supplies you might need for your diy project. You can build beautiful frames with these items.
- Acrylic or Polycarbonate Sheets
- Standoff Hardware or Chicago Screws
- Screws and Wall Anchors
- Power Drill with Plastic-Specific Bit
- Tape Measure & Pencil
- Safety Glasses & Microfiber Cloth
- Optional: Table Saw, Sandpaper, Adhesives
Примечание: We will explore these options, including no-drill methods, in the sections below.
Core Materials for DIY Acrylic Frames
Choosing the right components is the most important step in your diy project. The materials you select will define the look, durability, and style of your finished frames. Let’s break down the core items you’ll need.
1. Acrylic vs. Polycarbonate Sheets
Your main material is the clear sheet that protects your art. You have two primary choices: acrylic and polycarbonate. Both are strong plastics, but they have key differences. Polycarbonate is incredibly impact-resistant, making it a great choice for high-traffic areas. Acrylic, however, is often preferred for diy acrylic frames because it is clearer and more scratch-resistant.
Within acrylic, you can find two types: cast and extruded. This choice affects how your piece of acrylic holds up over time.
| Характеристика | Литой акрил | Экструдированный акрил |
|---|---|---|
| Scratch Resistance | More scratch resistant | Less scratch resistant |
| Impact Resistance | Better impact resistance | Very strong and durable |
For most diy frames, cast acrylic offers a perfect balance of clarity and durability.
2. Choosing Your Hardware
Hardware is the jewelry of your frame. It holds everything together and adds a major design element. You can choose between two main styles.
- Standoffs: These create a gap between the wall and the frame. This gives your artwork a modern, “floating” appearance.
- Chicago Screws: These act like a bolt and post. They clamp the two acrylic sheets together for a clean “sandwich” look without mounting to a wall.
The finish you select also impacts the final style. Brass offers a warm, classic feel. Polished chrome provides a cool, reflective surface for minimalist rooms. Matte black is a popular modern choice that hides fingerprints and creates a bold contrast.
3. Hardware for a Floating Acrylic Frame
To create a beautiful floating acrylic frame, you will need specific hardware. This system pushes your art away from the wall for a dramatic effect. You will need to gather your materials before you begin.
- Standoffs: These are the metal cylinders that create the “float.” A common size includes a 5/8″ diameter barrel that is about 1″ long.
- Screws: You need screws to connect the standoffs to the wall.
- Wall Anchors: These are essential for a secure installation, especially in drywall or plaster. You must use the right anchor for your wall type to properly attach your frame.
- For Drywall: Plastic ribbed anchors or self-drilling anchors work well for lighter frames.
- For Plaster: You should use stronger options like molly bolts or toggle bolts.
An alternative to standard standoffs is using simple brass screws with small spacers. This can give your diy acrylic frames a more delicate and customized look.
4. Backing and Finishing Options
The final touches can protect your art and complete your diy project. A backing board helps secure your pictures and adds rigidity. For photos or valuable art, you should use an acid-free material. Options like Heritage Corrugated Board or other archival foam boards prevent yellowing over time. A simple piece of cardboard works for posters or prints.
If your design includes any wood elements, like dowel hangers, a good finish is crucial. Danish oil is an excellent choice. It protects the wood and gives it a beautiful, natural sheen.
- Work in a well-ventilated area.
- Apply a liberal coat of oil to the wood with a clean, lint-free cloth.
- Let it soak in for about 20 minutes.
- Wipe away all excess oil completely. The surface should not feel sticky.
- Let the piece of acrylic and wood dry for 48 hours before assembly.
- Safety Tip: Always lay oily rags flat to dry outdoors before throwing them away to prevent spontaneous combustion.
Essential DIY Tools
Having the right tools makes any diy project easier and safer. You will need a few key items to measure, cut, and assemble your acrylic frames. Let’s review the essential tools for the job.
1. Measuring and Marking
Precision is key to a professional-looking frame. You must measure your acrylic sheets and mark your drill points accurately.
-
Measuring Tape: A quality tape measure ensures your cuts and hole placements are perfect. Brands like Tajima are known for their excellent readability and accuracy, making them a great investment for any diy enthusiast.
-
Marking Tool: You need a marker to draw cut lines and pinpoint where to drill your holes. The best choice depends on your acrylic sheet.
- Chalk Markers: These are often the best option. They write clearly on any color of acrylic and wipe away easily with a dry cloth.
- Wet Erase Markers: These create dark, fine lines. You will need a damp cloth to remove the marks. They work best on light or clear acrylic.
- Dry Erase Markers: These are easy to remove. However, their ink can be transparent and difficult to see on clear acrylic.
Pro Tip: Always keep the protective film on your acrylic sheet while you measure and mark. This simple step prevents accidental scratches on the surface.
2. Cutting and Drilling
This step transforms your acrylic sheets into the pieces for your frame. You must work carefully to avoid cracks.
A table saw with a fine-toothed blade can cut acrylic sheets quickly. For most diy projects, a simple scoring knife is all you need.
How to Score and Snap Acrylic:
- Place the acrylic sheet on a flat, stable surface.
- Use a straight edge as a guide for your scoring tool or utility knife.
- Make five to ten firm passes along your cut line. You want to create a deep, even groove.
- Move the sheet so the score line is perfectly aligned with the edge of your work table.
- Hold the main part of the sheet down firmly. Apply quick, even pressure to the overhanging section to snap it cleanly.
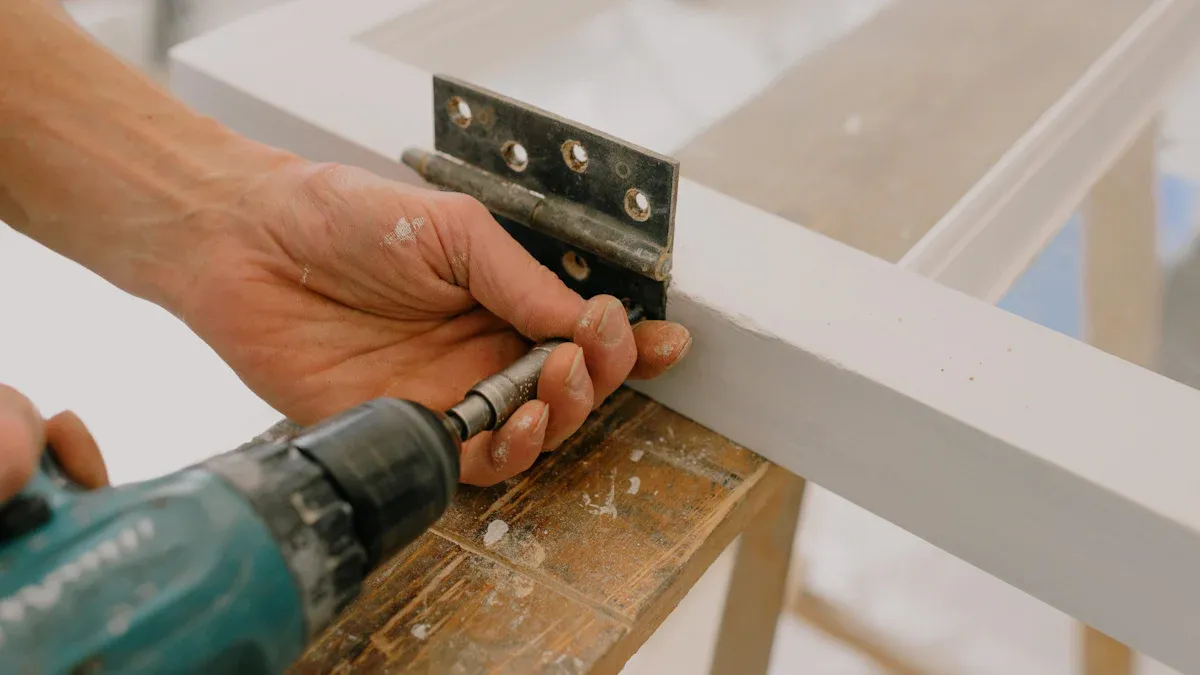
Drilling requires a special touch. Using the wrong bit or speed will crack the acrylic.
- The Right Drill Bit: You must use a bit designed for plastic. Standard wood or metal bits can grab and shatter the material. Look for spur-point bits or special plastic-cutting twist bits. These create clean holes without adding stress.
- The Right Speed: A slow, steady speed is crucial. Set your power drill to a low RPM, around 500-1000 RPM. This prevents heat buildup and reduces the risk of cracking as you drill your holes.
- The Right Technique: Apply light, consistent pressure. Do not force the drill. It is a good idea to back the bit out a few times as you drill your holes. This clears away plastic shavings and keeps the bit cool. Practice on a scrap piece first to get a feel for the process before you drill your holes in the final piece. Remember to drill your holes slowly and carefully. When you drill your holes, patience is your best tool. Always support the acrylic from behind with a piece of scrap wood to prevent the bit from cracking the exit side as you drill your holes.
3. Assembly and Safety Gear
With your pieces cut and drilled, you are ready for the final assembly. You will also need the right safety gear to protect yourself throughout the project.
Essential Assembly Tools:
- Power Drill: You need a reliable power drill to attach your frame to the wall. Models from brands like DeWalt or Milwaukee offer great performance for home projects.
- Microfiber Cloth: Acrylic scratches easily. Use a soft, lint-free microfiber cloth, like one from MagicFiber, for all cleaning. It will not leave scratches or lint behind as you prepare to secure your pictures.
- Fine-Grit Sandpaper (Optional): If the edges of your drilled holes are a little rough, you can smooth them. Start with a 180 or 400-grit paper and move to a finer 600-grit paper for a polished finish.
Essential Safety Gear:
Safety First! The American Academy of Ophthalmology recommends every home has ANSI-approved protective eyewear.
- Safety Glasses: This is the most important piece of safety gear. Drilling and cutting can send small plastic shards flying. Your glasses should meet the ANSI Z87.1 standard, which ensures they are tested for high-impact resistance. Look for the “Z87+” mark on the frame.
No-Drill DIY Frame Alternatives
You can create beautiful displays without drilling a single hole in your wall. No-drill alternatives are perfect for renters, dorm rooms, or anyone who prefers a damage-free approach. Let’s explore two easy methods.
1. Using Adhesives
Adhesives offer a powerful and versatile way to hang your art. You have several options depending on your frame’s weight and your needs.
- Adhesive Strips or Hooks: These provide a secure hold for lightweight items.
- Velcro Strips: You can use these for frames you want to reposition easily.
- Wall Putty: This works well for hanging unframed posters or paper art.
For a heavier diy acrylic frame, you need a stronger bond. Heavy-duty double-sided tape creates a tight hold on both smooth and rough surfaces.
| Tape Type | Weight Capacity |
|---|---|
| Scotch-Mount™ Extreme Double-Sided Mounting Tape | Up to 30 lb |
Pro Tip: How to Remove Adhesive Strips To prevent wall damage, never pull the strip out and away from the wall. Instead, grab the bottom tab and pull it straight down, keeping your hand against the wall. Continue pulling slowly until the strip releases completely.
You can also use clear adhesives like a 2-part epoxy or Gorilla Glue Clear Gel to bond two acrylic sheets together, creating a “sandwich” frame without any hardware.
2. Simple Cardboard and Plastic Frames
You can make your own simple frames using household materials. This creative diy project is perfect for displaying children’s art or lightweight prints. You only need cardboard, clear plastic, and glue.
First, cut a piece of cardboard to your desired size. Then, cut a window in the center that is slightly smaller than your artwork. You can decorate the cardboard border with paint or decorative paper. Next, cut a sheet of clear plastic, perhaps from old packaging, to cover the window. Glue the plastic to the back of the cardboard border. Finally, place your art behind the plastic and glue another piece of cardboard to the back to hold everything in place. This easy diy method lets you create custom, lightweight frames for any space. This is a fun diy project for the whole family.
You have the complete guide for your diy acrylic frames. Keep your supplies dry and organized. This checklist will help you shop for your frames.
Your Complete Shopping Checklist 🛒
-
For a Drilled DIY Frame:
- Acrylic Sheets
- Standoffs or Chicago Screws
- Drill with Plastic-Specific Bit
- Screws & Wall Anchors
- Safety Glasses
-
For a No-Drill DIY Frame:
- Acrylic Sheets
- Heavy-Duty Adhesive Tape or Strips
- Cardboard (Optional)
- Microfiber Cloth
You are ready to start your diy project. Find inspiration on sites like Pinterest and create beautiful diy acrylic frames for your home.
ЧАСТО ЗАДАВАЕМЫЕ ВОПРОСЫ
What is the best way to clean my acrylic frame?
You should use a soft microfiber cloth for cleaning. Apply gentle pressure to wipe away dust and fingerprints. Avoid paper towels and harsh chemical cleaners like Windex. These items can easily scratch the acrylic surface or make it cloudy.
Can I use a regular drill bit on acrylic?
No, you should not use a standard drill bit. You need a bit made specifically for plastic. A regular bit will grab the material and cause it to crack or shatter. Always use a plastic-cutting bit for clean, safe holes.
How thick should my acrylic sheets be?
For most DIY frames, a 1/8 inch (or 3mm) thickness works perfectly. This thickness provides good rigidity without being too heavy or difficult to work with. You can choose a thicker sheet for very large or heavy-duty applications.
How do I prevent scratches while making the frame?
You can easily prevent scratches on your project. Keep the protective film on the acrylic sheets for as long as possible. You should only remove the film right before your final assembly. This simple step protects the surface during measuring, cutting, and drilling.
See Also
Your Comprehensive Handbook to Acrylic Table Stands and Their Uses
Debunking Acrylic Tray Misconceptions: Simple DIY Projects for Your Home
Exploring Premium Acrylic Stand Tables: Design, Materials, and Craftsmanship Explained
Choosing and Maintaining White Acrylic Trays: A Complete Care Guide
Innovative Applications for Acrylic Table Top Stands in Product Displays

